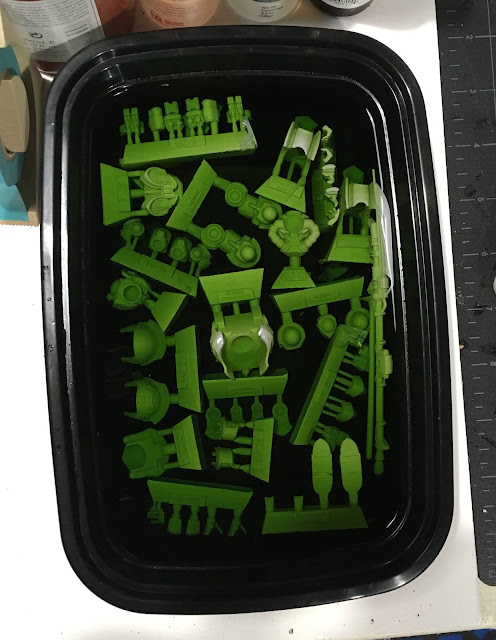
Welcome to week one of the DreadTober 2018 blog project. I'be participated in two prior years, completing a Deathwatch Dreadnought, and a Grey Knights Grand Master in Nemesis Dreadknight Armor. This year, I will build and paint a Legio Custodes Contemptor-Achillus Dreadnought for my Adeptus Custodes force. This is a resin model, so of course I had to start by cleaning off any remaining mold release agent on the model. Skipping this step will most often lead to paint not sticking, and then literal sloughing off when the model is handled. So into a Simple Green bath the parts went...
I let the parts soak over the weekend so I'd be ready to clean and assembled them on the October 1st. A quick scrub with a tooth brush, then a repeat wash and scrub with some Dawn dish washing liquid. I'm taking no chances here. Then things were laid out to dry.
 |
| The parts clean and ready for assembly |
Here is how the build turned out.
I used my heat gun to carefully warm up and reshape the halberd which had a slight curve to it. Otherwise, there as no warping to the parts at all. The forearms and arm-mounted weapons were designed to be magnetized, which is a really cool feature. I chose to glue the arms, but I did magnetize the weapons for this build. The preview 40K datasheet only allows for the twin storm bolters, however Infernus incinerators and Adrathic destructors are also provided with the kit so it seemed a shame not to magnetize them. Perhaps I'll get in a 30K game, or maybe they'll see their way to the 41st millennium some day.
The weapons sit well with the magnets installed, and no drilling required! In addition to the magnets, I pinned the top of the carapace so it could be easily removed when it comes time to paint the head. This allowed me to glue the head into position. There isn't a lot of detail in this area so it will be easy to paint even while attached and then the upper portion of armor can be permanently glued down.
Now assembled, it was time for a coat of Vallejo Surface Primer Black sprayed over all using the airbrush. I am currently using an Iwata Eclipse, and enjoying it very much. I let the surface primer dry over night to insure a good dry coat and plenty of adhesion before I got on with the gold.
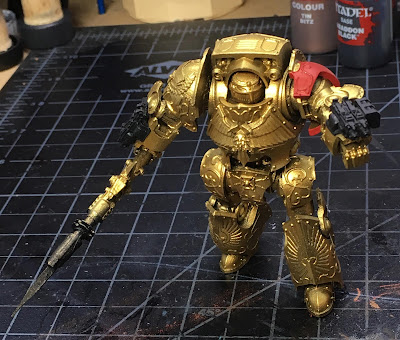
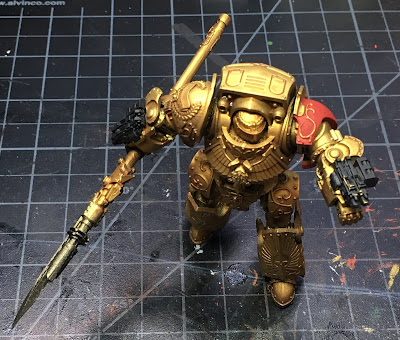
Next I used the airbrush again to lay down some Vallejo Brass, followed by some Vallejo Old Gold sprayed only over the top of the model. Then I decided a splash of red would tie the model in with my existing Custodes so I painted some GW Mephiston Red over the left shoulder pad.
Then it was time for a coat of GW Reikland Fleshshade over all the gold and red to establish the shadows and some detail while also lending a richer hue to the model over all. While this dried, I took a look at the base.
I'm staring simple so the contemptor stands out best on it. I don't want this project to get too busy. So A simple slab of cork was glued down and topped with Vallejo Black Lava and some model railroad ballast, for interest. Once this dried, along with the contemptor, it was time for a test fit pose...
Yep, that'll do! While working on things this far, it became clear that I was going to ruin the paint or break something if I keep handling the model directly. So I pulled out the pin-vise and some brass rod and pined the model to one of my signature Bourbon cork stoppers. I used this same cork for my prior Custodes dreadnought so it has a good vibe about it for this project.
Next up, I began blocking in more of the details and adding some highlights here and there. I chose GW Abbadon Black for the skeletal structure and the hands of the Dreadnought, matching the Forge World paint job. I will use the same power weapon effect from the Duncan YouTube video that I have used on my other Custodes.
Then, for fun, I finished magnetizing the optional arm weapons. It's pretty cool how the model comes socketed for magnets. They fit amazingly well on the arm with the magnets installed.
 |
| Armed with Infernus Incinerators |
 |
| Armed with Twin-linked Adrathic Destructors |
That's where I'm at so far. It's going well, and quickly, making me think I should have chosen something more challenging. My recent work on Imperial Knights have schooled me towards a quicker, more efficient style I think. Moving into week two I'll be focusing on completing the highlights.
How is your DreadTober project coming along? Let me know in the comments.
Cheers and Happy Gaming!


You do know you have until the end of the month...
ReplyDeleteFair point, and I might have got a bit carried away in my excitement to kick of the project...
DeleteVery nice.. you are rocking and rolling!
ReplyDeleteThanks Todd, definitely off to a good start.
DeleteWhat size magnets did you use for the arm mounted weapons?
ReplyDeleteThey are 3mm diameter magnets...probably 2mm thick, or perhaps 1mm. i have both and forget exactly what I used there. In general, I tend to add as big a magnet as I have available to make as strong a bond as I can.
Delete