Greetings,
In this post, I describe how I modeled bases for my Armiger Warglaives. And yes, I have two now! Since there are no real options when building the Warglaive, I'm not going to post about the second build. Instead, I took more pictures of the second build so I can post a detailed how-to on magnetizing the waist. I forgot to take pics with the first build, and so only mentioned the magnetizing in passing. With the second Warglaive, I did mix things up by reversing the legs to change the pose, something the kit allows for. So between that and varying the final position of the arms, I hope they will appear unique enough with some paint.
But enough of that now. This is a post about BASES. :) If you follow my work here, you know by now that I enjoy customizing my own bases using cork and model railroad scenic materials. This process becomes much more creative when you have a large base to work with. You can fit more cool stuff!
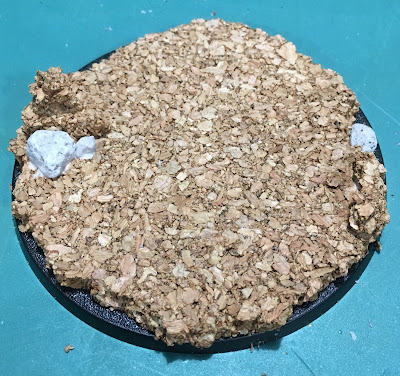
In my April workbench post I showed off the build of my first Warglaive including a rather plain initial base of cork as seen here.
Yuck. Not very inspirational for such a cool Knight model. Time to dress it up a bit. I started by using left over pieces form breaking down the cork circle to build up some features. Then, I spread a little wood clue around and sprinkled on some of my custom railroad ballast mix. This is just two bags of small sizes I mixed years ago. One bag of fine, and another of the next size up; a bit coarser.
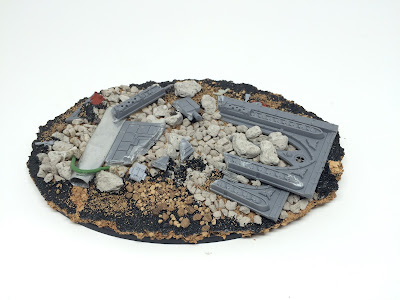
Next, I fiddles about in the bitz box for a bit until i came away with a few pieces of a Chaos terminator. Seems like something fun for a Warglaive to smash about! So I glued it down to the base as well. Here's where things stood at that point.
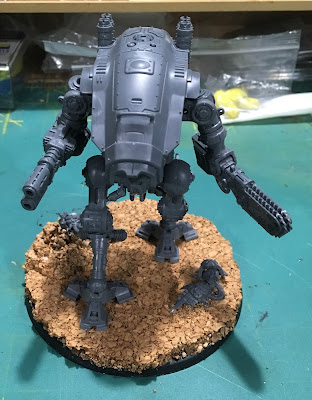
Lets test fit everything to see how it looks...
Yep, that will do! One Warglaive striding through the remains of a blasted Chaos terminator.
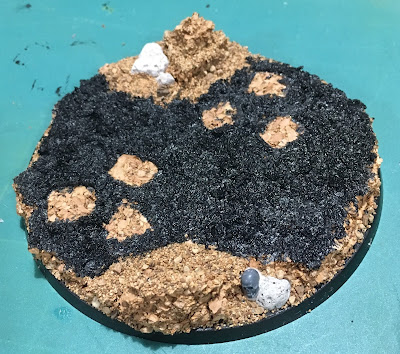
Next, I like to lay down a finer grit so the model doesn't appear to be standing in a gravel pit. Also, I don't like a model to be floating on top of its terrain. I prefer to settle its feet into the grit a bit so it sinks in and appears to have some weight. For the knight bases, I'm using Vallejo Black Lava which is a gritty black paste that dries hard. I held the Knight legs in place while spreading the Black Lava which left behind clear foot prints which will be used to mount the knight after painting.
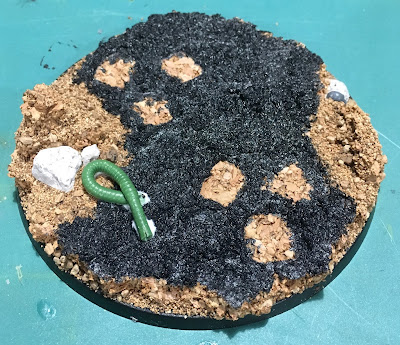
So that's one base. Clicking through to the full size image may allow you to get close enough to see better detail of the rock pile on the left of the picture. It is built up with three layers of cork bits to form a jagged spire of rock, against which the fallen termie shell rests. Here is how I modeled the second base.
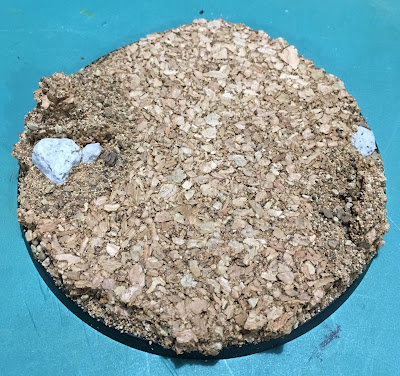
For this base, I also added some larger scenic model railroad rocks, just to vary things a bit. Next, the good ol' wood glue and gravel treatment. I make sure any portion of the black base that is visible gets glue and gravel. Otherwise, for these bases I am only putting gravel around the rocky features so things appear to be crumbling/eroding.
Then of course the Black Lava around the feet...and a skull because its Warhammer 40k.
Here is Warglaive #2 on its new base.
Later, I added a bit of hose I made back-a-long from left over Green Stuff and a Green Stuff Industries tentacle maker tool. You can see the hose in the title image at the top of this post. After putting a cool blasted chaos terminator on the first base, I felt the second base needed something...
S0 that's how I spent an hour or so whacking together some cool custom bases for my Warglaives. I hope it's clear that the sky is the limit here to creativity. With the cork to emphasize a section of land, its pretty trivial to drop on whatever fits your army theme and personal interests.
Here's a quick example of something more elaborate from my Freeblade Knight Paladin which will soon be back on the painting table and blog.
Cheers and Happy Gaming!




You actually make it seem so easy with your presentation but I find this matter to
ReplyDeletebe really something which I think I would never understand.
It seems too complicated and extremely broad for me.
I am looking forward for your next post, I will try to get the hang of it!
Another thing I like to do for bases this large is add some thin patches of spackle or something, just so that whole big space isn't quite so flat. Not enough to create a noticeable hill or anything, but just enough to make the ground slightly varied in places.
ReplyDeleteOh, sure. Great idea! That will get filed away for the remaining House Taranis Knights I'm working (slowly) on.
DeleteThanks!