Friday, March 26, 2021

#MonsterMarch5 Week 4 Progress


Warlord-Sinister for Adeptus Titanicus WIP

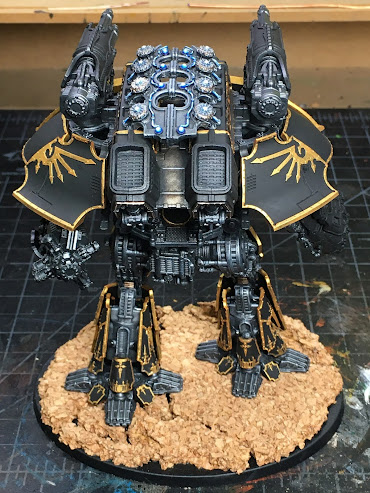
Welcome to week four of #MonsterMarch5 where I try to make a final push for the finish.  We have a fabulous amount of detail molded into these tiny titans and each piece can be a project unto itself. This post is a bit heavy on the pictures, but it is time to reveal the work in more detail as I race for the line.

Friday, March 19, 2021

#MonsterMarch5 Week 3 Progress


Warlord-Sinister Psi-Titan for Adeptus Titanicus WIP

Welcome to #MonasterMarch5 week three.  It find I'm very pleased that March has almost five weeks this year.  I have not had the time I might have wanted for this project so far.  Never fear, though, the painting goes on!  This week, I tackled the weapons.  All pieces have had their gold trim painted and the armor panels cleaned up.  As a bonus, I even got some red paint on the power fist (copying the Forge World studio paint job to avoid...well...decisions).

Warlord-Sinister Psi-Titan for Adeptus Titanicus WIP

So I'm not going to win any awards for speed painting, but it IS a lot of trim, after all. Oh, and let's not forget the missiles got a coat of white too! Still lots to go to get these weapons finished, but this is a big step.  I'm going to have to kick it in to high gear to finish it all by the 31st.  Will I make it? What drama!

Warlord-Sinister Psi-Titan for Adeptus Titanicus WIP

Don't count me out yet.  Lots of weapon details will be on display next week, including some plasma glow and all the creativity I can muster for the very cool looking Sinistramanus Tenebrae. Also, I will get to highlighting the titan - lots of armor and "skeleton" to get some highlights on there.Then hopefully the base comes together in the short 5th week - with some time for a little weathering powders to finish things off.

Check back to see how I do.  Best of luck to all me fellow challengers out there.  Some really great projects coming together!

Stay safe out there.

Cheers and Happy Gaming!


Tuesday, March 16, 2021

On the Workbench [March]


Dark Angels Heavy Intercessors WIP

Greetings and welcome back to another article about whats on my workbench.  I skipped a couple months due to focus on my painting projects, but here's a project I thought would be worth sharing.  I was able to pick up a copy of Kill Team: Pariah Nexus and immediately set to building the marines.  These models will join the Indomitus Dark Angels force I recently painted up.  I chose to build the Heavy Intercessors with the "executor" option for increased damage potential at range.  The only problem was, all the sergeant arms used the default Heavy Bolt Rifle, with no option to swap the clips.  This was a bummer, as I love to keep things WYSIWYG. So there was nothing to do but get out the tools and start hacking...

Dark Angels Heavy Intercessors WIP

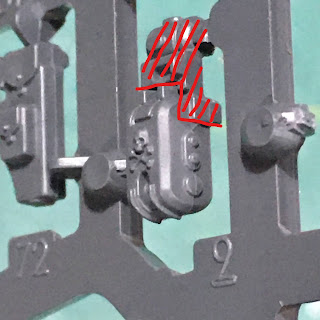
In order to to make a clip that could attach to the sergeant's bolt gun, I needed to cut away the plastic that would be part of the gun.  There is no need, in my opinion, to try and get the whole part in there as the differences are mainly to the size and shape of the clip itself, not the receiver/port ejector, etc. And as you'll see below, the arm I chose hides most of this anyway from all but very close inspection.

Dark Angels Heavy Intercessors WIP

The pic above illustrates the plastic I removed from the clip,  I made special effort to save the two prongs just below the removed plastic...I bent them a bit, but was mostly successful.

Dark Angels Heavy Intercessors WIP

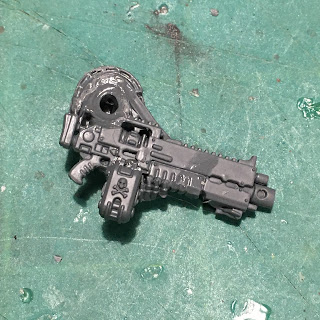
I didn't take detailed pictures of the modifications to the sergeant's arm, but you can see the results above.  Using the blade of the forearm as a plane, I cut the existing clip off with flush cutters (sharp sprue cutters).  A small saw would have worked if I was careful too.  I then clipped off the front of the clip being VERY careful to preserve the fingers that were up against it. The new clip is shown above so you can see the notch I cut out of it to fit over the modified bolt gun.

Dark Angels Heavy Intercessors WIP

Here it is again with the clip oriented as it will be glued down. The two prong bits at the top are easy to see to now, with some white discoloration from accidentally bending them...but I didn't snap or cut them off fortunately!

Dark Angels Heavy Intercessors WIP

With the clip glued on, you are hard pressed to tell that this is not an Executor Bolt Rifle without careful comparison to and original.  And this view is hard against the model's body once attached so you can't even see it without careful inspection.

Dark Angels Heavy Intercessors WIP

From the other side, it looks totally normal. Let's see how things look fully assembled.

Dark Angels Heavy Intercessors WIP

The clip visible from the underside of the arm.  Once painted up, I doubt it will be obvious at all that this isn't and original part.

Dark Angels Heavy Intercessors WIP

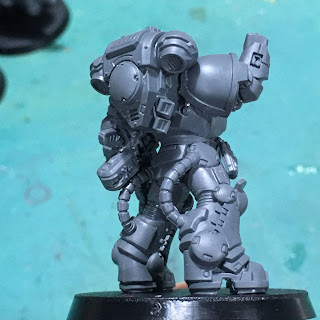
From the left side of the model, the obvious view now looks like the profile of an Executor bolt rifle. It's a pretty simple conversion that will keep the squad looking coherent since they must be armed with the same weapons.  I'm a stickler for details. 😂 If you don't fancy cutting up the models like this, don't worry.  There is currently no point difference between the three different options for this squad, so WYSIWYG is more of an aesthetic thing anyway here, though it can certainly avoid confusion for those who know what to look for.

Fun Fact: There is no indication in the instructions or the Space marine codex of what each pattern of bolt rifle look like. However, if you poke through the Pariah Nexus rule book, there are color photos of the models.  And if you read the captions carefully you can find examples of the models called out with the various options - though I think there are mistakes/inconsistencies to watch out for in the examples.

So that's all that I have on the workbench in March.  I really need to get back to the Warlord-Sinister Psi-titan I'm painting for #MonsterMarch5.

Stay safe out there.

Cheers and Happy Gaming!

Friday, March 12, 2021

#MonsterMarch5 Week 2 Progress


Warlord-Sinister Psi-Titan WIP

Greetings and welcome to week 2 of #MonsterMarch5.  I had some family vacation time this week, so progress was slow on the Titan.  I finished the armor trim, shaded and dry brushed the skeleton and painted in some details (various pipes, etc.) that would later be hard to reach.

Warlord-Sinister Psi-Titan WIP

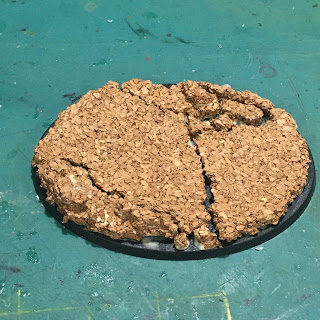
The cork was glued down to the base finally.  I ended up inadvertently choosing a new layout for the various pieces.  Next time, I will glue things down right away, rather than waiting.  Anyway, this looks fine. :)

Warlord-Sinister Psi-Titan WIP

At one point, I got into a painting groove with the "Ciricrux Anima, and basically completed it.

Warlord-Sinister Psi-Titan WIP

Just a bit of a blue glowing look to dress things up a bit.  I carried this effect into a few of the pipes/hoses going into the titan's head to tie things together.

Warlord-Sinister Psi-Titan WIP

At this point, I decided to start gluing the armor on. There's nothing left I need to paint behind the panels and now I need to start focusing on what the final model will look like.  I used 2-part 5 minute epoxy so it's slow going with the armor being added in stages with some drying time in between.  It takes longer, but the bond is solid without the brittleness of superglue, meaning bits don't pop off capriciously when handled.

Warlord-Sinister Psi-Titan WIP

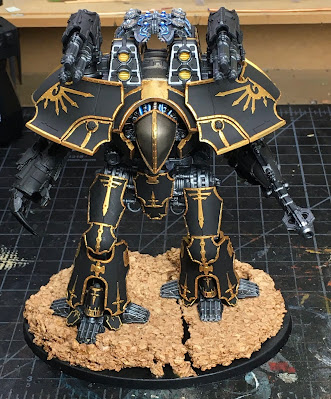
I'll end with this rear facing companion pic to the title shot above.  All the weapons are magnetized and added here just for the photo.  Once I have the main body basically complete, I'll start painting all the weapon options. The armor is now all attached.  Heading into week three, I'll move on to final details and highlights.  The rear door to the Titan's body is currently black, and I think I'd like to paint it in hazard strips as Forge World did on the studio model. It's a nice burst of color on the otherwise drab metal back.

Check back next week to see how things progress.  I have the base, and lots of weapons to complete so there's plenty to keep me busy for the remainder of the month.

Best wishes to my fellow MonsterMarchers.

Stay safe out there.

Cheers and Happy Gaming!


Friday, March 5, 2021

#MonsertMarch5 Week 1 Progress


And so it began.  I dove into my Monster March project by first priming all parts with Vallejo Surface Primer Black.  Then I used Scale Color Black Metal (SC-63) to base coat the titan's skeleton and all the metal bits on the weapons.  I then used Pro Acryl Coal Black from Monument Hobbies on the armor panels.  I like this black a lot!  Very flat and muted.  I'm hoping it works well for this Warlord-Sinister.

Warlord-Sinsister Psi-Ttan for Adeptus Titanicus WIPWarlord-Sinsister Psi-Ttan for Adeptus Titanicus WIP

For the head, I sprayed Pro Acryl Bronze over the "face", followed by a coat of Pro Acryl Light Bronze in the center.  I played with Army Painter Strong Tone and GW Nuln Oil to develop deep shadows around the edges of the bronze while keeping the center/high point of the bulge shinier. 

Warlord-Sinsister Psi-Ttan for Adeptus Titanicus WIP

 Then I broke out the Pro Acryl Rich Gold and and set to work on the trim...oh...so...much...trim. This is really a labor of love, but the results pop.  My Warlord-Sinister will lean more to towards brass tones and away from the more copper tones of the Forge World studio model.  What we see here will be shaded and highlighted so this is just a beginning.

Warlord-Sinsister Psi-Ttan for Adeptus Titanicus WIP

The Ciricrux Anima has been shaded with Nuln Oil and just rests in place here for the photo.  I'll pick out the void shield generators in bronze and there will be the usual highlights and what-not.

Warlord-Sinsister Psi-Ttan for Adeptus Titanicus WIP

These feet took some time...so much little trim. You have to respect the great detail that goes into these models though.  It's work, but still a real pleasure to paint up.

Warlord-Sinsister Psi-Ttan for Adeptus Titanicus WIP

I had time to get trim on a few additional armor panels too.  So as week one draws to a close, here's what I have to show for it.  Not a bad start. 

I have a short week two coming up, due to a family excursion, so no early post next week.  Check back next Friday to see if I got anything done with the short week.  I hope to get a couple sessions in after clearing away the cobwebs of home confinement.

Best wishes to all the other Monster Marchers out there.  I look forward to checking out your results too.

Stay safe out there.

Cheers and Happy Gaming!


Tuesday, March 2, 2021

#MonsterMarch5 Kick-Off - The Pledge


#MonsterMarch5
Image Courtesy of Path of an Outcast

Greetings and welcome to my #MonsterMarch5 kick-off.  This year, I'm pledging to complete a Warlord-Sinister Psi-Titan for Adeptus Titanicus.  If completed, it will bring me to three completed Warlord class Titans in three consecutive challenges.

Warlord-Sinister Psi-Titan for Adeptus Mechanicus WIP

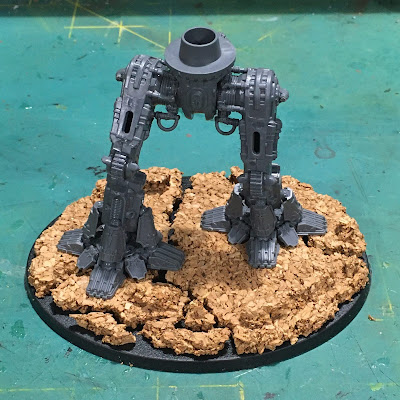
I like to build these titans literally from the ground up.  I'm standing this new Psi-Titan on a custom cork base which I'll paint up in my Mars theme to match the Legio Tempestus and Legio Ignatum titans I've already completed.  Just some simple broken ground here using pieces of cork sheet broken into interesting shapes and stacked up here and there to add some variety to the terrain.

Warlord-Sinister Psi-Titan for Adeptus Mechanicus WIP

The build is pretty much a straight up Warlord kit with a new weapon arm, head, and sinister psi-tech bolted to the carapace.  I magnetized the left arm weapon (Sinistramanus Tenebrae), even though it is a non-optional arm for a Warlord-Sinister.  I want to be able to substitute the model as a standard warlord when needed.  This is an expensive kit so one wants to get as much use out of it as feasible - and some games may just call for a warlord or two and not a sinister psi-titan!

And what a fun little piece of work THAT is.  A nasty "beam" weapon that is able to damage more than one model if it can catch things in a straight line and destroy what it hits. One can even hit a titan behind a building, given the weapon automatically punches through a building unit even if it doesn't do enough actual damage to destroy it.

Warlord-Sinister Psi-Titan for Adeptus Mechanicus WIP

 The featureless head of this titan is marvelously creepy. 

Warlord-Sinister Psi-Titan for Adeptus Mechanicus WIP

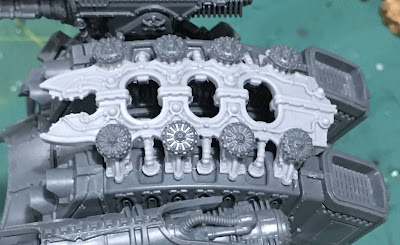
Here, the void shield projectors are installed onto a new carapace addition whose arcane origins are likely known only to the Emperor himself.  I expect this device merges void shield technology with warp energy, but that may be just a bunch of tech-heresey.

Warlord-Sinister Psi-Titan for Adeptus Mechanicus WIP

My pledge is to paint everything in the pic above. I've added some weapon options for versatility in games of Adeptus Titanicus.  While this model could borrow from extra Legio Ignatum weapon arms in my collection, I felt it only proper that it have its own weapons painted accordingly. And let's not forget the armor...

Warlord-Sinister Psi-Titan for Adeptus Mechanicus WIP

And there we have it, one #MonsterMarch5 pledge with the build complete.  I cheat a little here since I *love* building and it's neigh impossible for me to possess a fun kit like this without ripping the shrink wrap off an diving in at the first available moment.  Much of my painting backlog is built and not in original packaging as a result.

So kudos to those challengers who will build AND paint within the month.  I respect your efforts and I up my own ante with extra weapons, not part of the original kit I am painting. 😁 

Best wishes to my fellow MonsterMarchers!

Stay safe out there.

 Cheers and Happy Gaming!