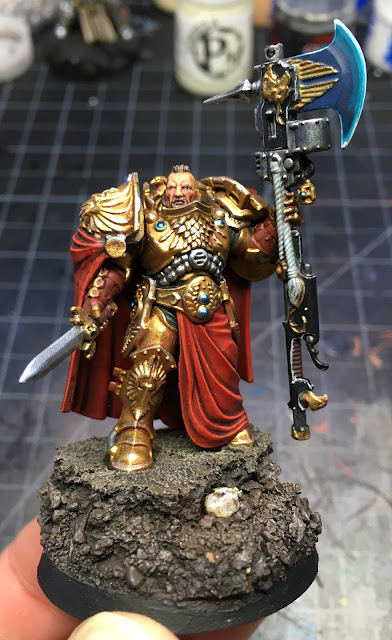
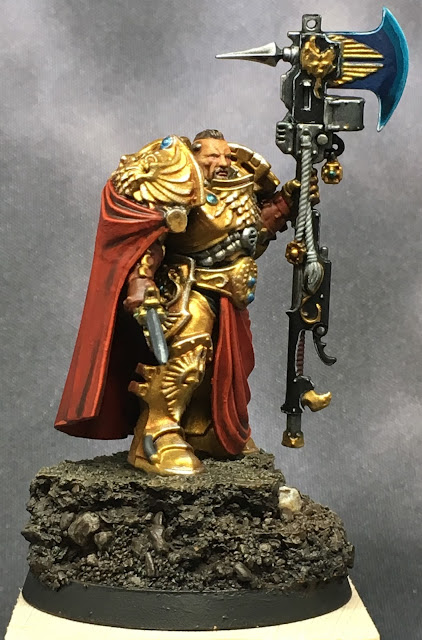
Monday, April 30, 2018

WIP: Armiger Warglaives from House Taranis - Part 1


In this post, I'll describe the airbrush work I put in priming the models and base coating the armor plates.  I use Vallejo Surface Primer Black (74.602) straight out of the bottle in my airbrush for inside priming these days.  I have a spray booth to help collect over-spray and any fumes,but there are few fumes with this acrylic primer.

To hold the small parts in place, I use double-sided tape on a spare paint stick I had kicking around.  Any odd length of scrap should work though. One of my own personal foibles is to use poster-tac to cover areas where I want to glue things later using plastic model cement.  You might forgo this extra work and just use superglue, however there is the possibility of the glue coming away with the primer if it chips off the model.

The small parts all ready for priming on the backsides
Here are the main parts all primed and ready for the next step.


Once the primer was dry, I set about using the airbrush to lay down the base colors on the weapon arms and armor plates. I'll brush paint the rest.  I wanted good smooth coats on the armor that I felt I wouldn't achieve with a brush, given my current abilities. For now, I'm using the primer coat for the black paint on the armor.  I expect to go over this with a thin coat of Abaddon black, either through the airbrush, or with a regular brush later.

I used more poster-tac to mask off the black so red and white could be sprayed on without fear.  I varied the color scheme for the two warglaives to give them some individuality. Here is what the whole lot looked like after the airbrushing.


Pretty straight forward so far, nothing exciting. I like the poster-tac for masking because it's easier to get a good confident seal so no spray leaks under or around it.  I've had issue with tape over uneven details and using the tac reduces the amount of cleanup painting I have to do.  The work is up front, stick the tac down carefully to insure good straight lines where needed.

In the end, I have two pairs of armor ready for brush painting.  The panels are colored and should look great when the trim is painted and the whole armor shaded.


I'm new to the House Taranis paint scheme, but I am hopeful these two will fit right in once complete. For lesser nobles or house retainers, I guess these two might have a bit more latitude for personalized paint schemes than might truelove have been fitting. Regardless, I wanted the two knights to have some individuality and character so here we are.

The two bases also got primed while the brush was out.


In the next part, the skeletons will get some dry brushing and details, then it'll be onward to the armor. I'd like to have these guys done as inspiration for more when the new Imperial Knights codex lands. I have three plastic knights and one Forge World resin knight waiting in the wings to enter service in House Taranis.


Cheers and Happy Gaming!

Thursday, April 26, 2018

HowTo: Magnetizing the Warglaive at the Waist

Magnetizing the Armiger Warglaive

While building my second Armiger Warglaive, I thought I'd share details on magnetizing the waist joint.  When I built the first Warglaive, I neglected to take any pics of the process, only the final result.  The design of the Warglaive makes magnetizing this joint quite simple.  Here is how I went about it.


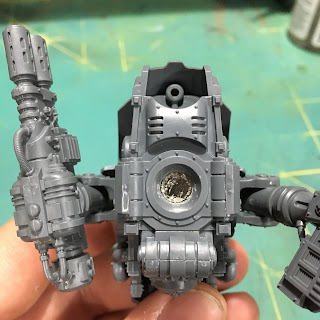
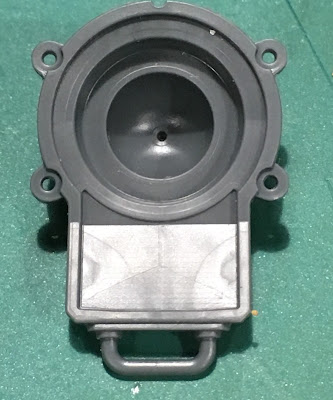
1) dry fit the base of the joint (the part with the dome) with the bottom plate of the body. The dome will poke up though the bottom plate by a good amount. This gets in the way of seating a magnet in the bottom plate.  So, make a mark on the dome where it sticks up inside the bottom plate. Then cut off the top of the dome at the mark you made.  I used a razor saw...any fine tooth hobby saw could work.  I wouldn't use a knife for this.  It's a lot of plastic to cut through and only disaster will come from it.  When you are done sawing and smoothing out the cut with knife and file it should look like this:

Magnetizing the Armiger Warglaive

You may uncover the small hole in the dome, but the cut should NOT go so deep as to remove the whole top of the dome. The underside of the dome for the waist joint still looks like this.  Lots of room for magnets in there!

Magnetizing the Armiger Warglaive

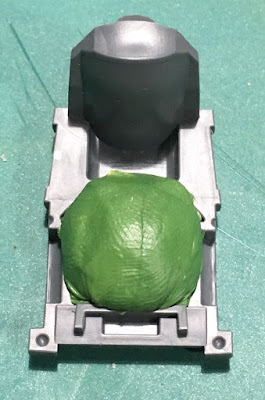
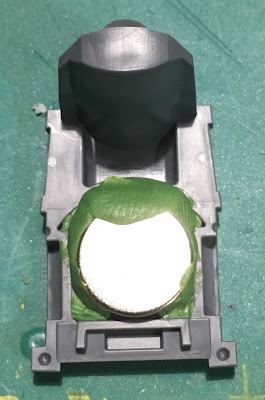
2) add the magnets.  Because the dome tapers, I chose to make a pyramid of three small magnets to more or less fill the dome.  There's too much room around the magnets to effectively use super glue here.  In my first Warglaive, I used Vallejo plastic putty.  It worked, but the drying time is loooong. And since I wasn't willing to wait, things slopped around and it was generally a pain to work with.

This time, I decided to use some go ol' green stuff. I just mixed it according to the package and packed it in around the magnets like this:

Magnetizing the Armiger Warglaive

I folded the extra green stuff over the magnets and made sure it would not interfere with where the rest of the waste get attached to this piece. The end result is a little dome as show here:

Magnetizing the Armiger Warglaive

3) While that cures a bit, time to put a magnet in the bottom plate of the torso.  I wanted a strong pull so I used the largest thick magnet I had that would fit - 1/8" x 1/2" or 3mm x 13mm. I used left over green stuff from step two to seal it into the bottom plate.

Magnetizing the Armiger Warglaive

I always make sure to cover the magnet to reduce the chance of it loosening and popping out over time, then rattling around in the body of the knight. Here, superglue should work just as well.  At least I hope so, because that's what I used for the first knight! The end result should look something like this:

Magnetizing the Armiger Warglaive

Word to the wise, be sure to clean out any glue or green stuff that squirts into the cup where the dome of the waist is going to connect, otherwise you won't get the best seat of the magnets when you connect the two pieces. You can see where I scraped away extra super glue in the title pic above.

4) Allow for some curing time before connecting the two halves and keep them separated so they don't try to come together and unseat things before it cures. It won't take all that long.  What works well is the tackiness of green stuff, which allows everything to stick together well and not come loose even before it sets if you treat things well. I took this time to continue assembly.

After curing enough that things won't come apart, fit the two pieces together and enjoy the satisfying 'click' as the magnets take hold. Hopefully you ended up with something like this:

Magnetizing the Armiger Warglaive

That's all there is to it!  I didn't magnetize any weapons.  At the moment there aren't options for the arms anyway. The carapace weapons have a long enough post to attach securely on their own so I didn't bother there either. Magnetizing the waist will give me storage options down the road when a full height Warglaive may prove a nuisance.

I hope you find this short tutorial useful. If it could have been more useful, please share your thoughts in the comments.

Cheers and Happy Gaming!
Monday, April 23, 2018

HowTo: Custom Bases for Armiger Warglaives

WIP Custom base for an Armiger Warglaive

Greetings,

In this post, I describe how I modeled bases for my Armiger Warglaives.  And yes, I have two now!  Since there are no real options when building the Warglaive, I'm not going to post about the second build. Instead, I took more pictures of the second build so I can post a detailed how-to on magnetizing the waist. I forgot to take pics with the first build, and so only mentioned the magnetizing in passing. With the second Warglaive, I did mix things up by reversing the legs to change the pose, something the kit allows for. So between that and varying the final position of the arms, I hope they will appear  unique enough with some paint.

But enough of that now.  This is a post about BASES. :)  If you follow my work here, you know by now that I enjoy customizing my own bases using cork and model railroad scenic materials.  This process becomes much more creative when you have a large base to work with.  You can fit more cool stuff!

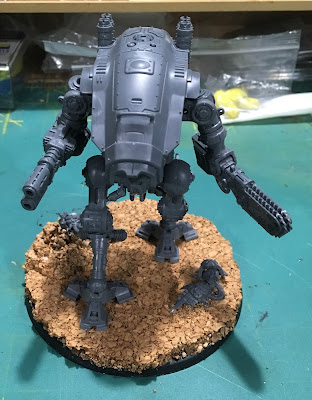
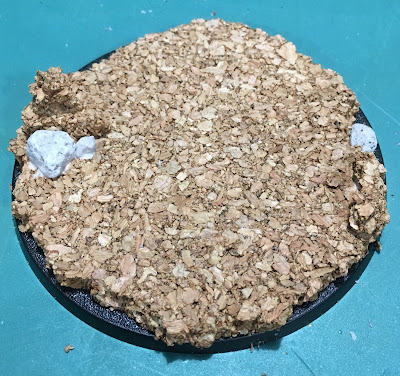
In my April workbench post I showed off the build of my first Warglaive including a rather plain initial base of cork as seen here.

WIP Custom base for an Armiger Warglaive

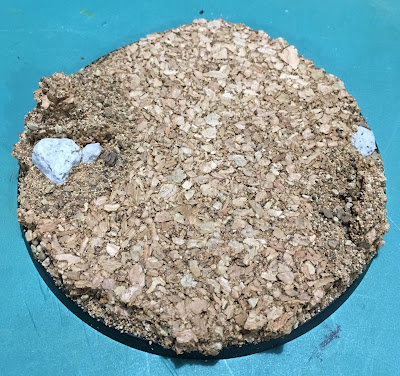
Yuck.  Not very inspirational for such a cool Knight model.  Time to dress it up a bit.  I started by using left over pieces form breaking down the cork circle to build up some features. Then, I spread a little wood clue around and sprinkled on some of my custom railroad ballast mix.  This is just two bags of small sizes I mixed years ago.  One bag of fine, and another of the next size up; a bit coarser.

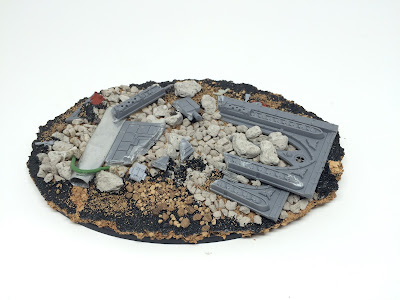
Next, I fiddles about in the bitz box for a bit until i came away with a few pieces of a Chaos terminator.  Seems like something fun for a Warglaive to smash about! So I glued it down to the base as well.  Here's where things stood at that point.

WIP Custom base for an Armiger Warglaive

Lets test fit everything to see how it looks...

WIP Armiger Warglaive

Yep, that will do! One Warglaive striding through the remains of a blasted Chaos terminator.

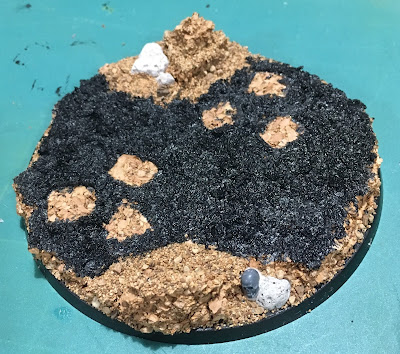
Next, I like to lay down a finer grit so the model doesn't appear to be standing in a gravel pit.  Also, I don't like a model to be floating on top of its terrain.  I prefer to settle its feet into the grit a bit so it sinks in and appears to have some weight.  For the knight bases, I'm using Vallejo Black Lava which is a gritty black paste that dries hard.  I held the Knight legs in place while spreading the Black Lava which left behind clear foot prints which will be used to mount the knight after painting.

WIP Custom base for an Armiger Warglaive

So that's one base.  Clicking through to the full size image may allow you to get close enough to see better detail of the rock pile on the left of the picture.  It is built up with three layers of cork bits to form a jagged spire of rock, against which the fallen termie shell rests. Here is how I modeled the second base.

`WIP Custom base for an Armiger Warglaive

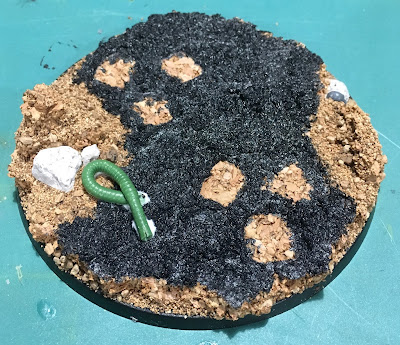
For this base, I also added some larger scenic model railroad rocks, just to vary things a bit. Next, the good ol' wood glue and gravel treatment. I make sure any portion of the black base that is visible gets glue and gravel.  Otherwise, for these bases I am only putting gravel around the rocky features so things appear to be crumbling/eroding.

WIP Custom base for an Armiger Warglaive

Then of course the Black Lava around the feet...and a skull because its Warhammer 40k.

WIP Custom base for an Armiger Warglaive

Here is Warglaive #2 on its new base.

WIP Armiger Warglaive

Later, I added a bit of hose I made back-a-long from left over Green Stuff and a Green Stuff Industries tentacle maker tool. You can see the hose in the title image at the top of this post. After putting a cool blasted chaos terminator on the first base, I felt the second base needed something...

S0 that's how I spent an hour or so whacking together some cool custom bases for my Warglaives.  I hope it's clear that the sky is the limit here to creativity.  With the cork to emphasize a section of land, its pretty trivial to drop on whatever fits your army theme and personal interests.

Here's a quick example of something more elaborate from my Freeblade Knight Paladin which will soon be back on the painting table and blog.

WIP Custom base for a Freeblade Knight Paladin

Cheers and Happy Gaming!

Thursday, April 19, 2018

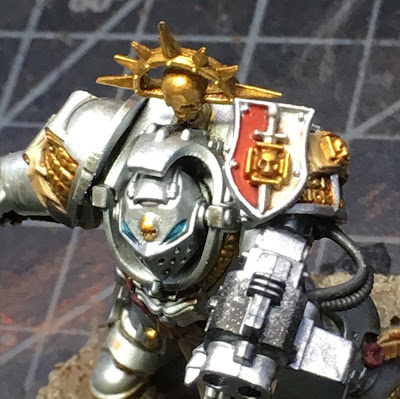
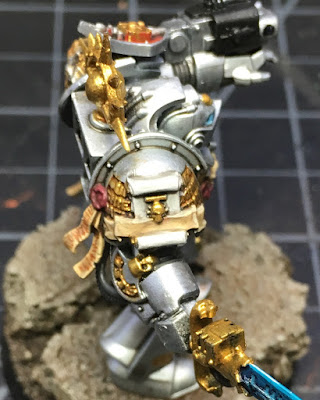
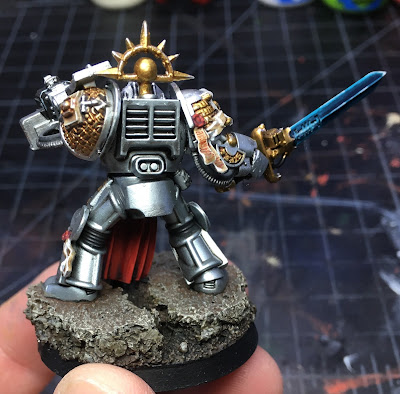
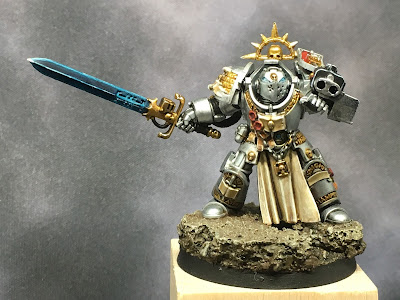
Grey Knights Brotherhood Champion to DONE

Grey Knights Brotherhood Champion Title

Its time to call it quits on the Grey Knight Brotherhood Champion. This post is a bit more picture heavy than normal, but I thought it would be fun to bring together some gallery pics at the end of recently completed projects.  If for no other reason than boosting my own morale!  It feels good to pick up the pace recently and turn out some fun results.

For the final painting session, I started with the tilting shield, arbitrarily going with a split red/white color scheme.

Grey Knights Brotherhood Champion WIP

The storm bolter got some paint, and the various icons got attention.  And boy, this fella has A LOT of icons on his armor. Here is a good shot of the left shoulder pad. I'll probably scrawl a name or something on the banner before calling it quits.


Grey Knights Brotherhood Champion WIP

The base got some paint to at last.  Looking at the shot below, he's really coming together now.

Grey Knights Brotherhood Champion WIP

And the back...

Grey Knights Brotherhood Champion WIP

Then the final highlights were put on.  All the parchment got some love from the P3 Menoth White Highlight; the golds got some Vallejo Gold added here and there, followed by some Vallejo Silver.

Grey Knights Brotherhood Champion WIP front

And the back...

Grey Knights Brotherhood Champion WIP back

I am really enjoying painting the Grey Knights, almost as much as Custodes.  For me, the limited skills I know and the little tips and tricks just seem to work on these guys.  I struggle much more with Deathwatch and Dark Angels. It's fun to be able to move between the various factions...working harder on some, and laying back to take it easy with others while still getting solid results across the board.

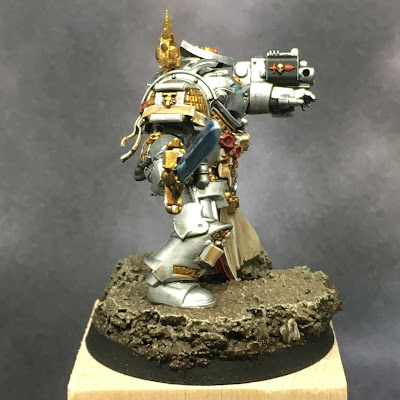
I'll close with some gallery shots from the light box.  Scroll down to see a family shot of my recently completed Grey Knights, and a pic of the Deathwatch Watch Captain and Custodes Shield-Captain with this completed project. as well.  I know it is all just piece meal work, but it feels good to have completed three characters to good standard in a couple weeks time.

This guy gets the big DONE seal!


I hope you are enjoying good results with your own projects.

Grey Knight Brotherhood Champion front

Grey Knight Brotherhood Champion left side

Grey Knight Brotherhood Champion back

Grey Knight Brotherhood Champion right side

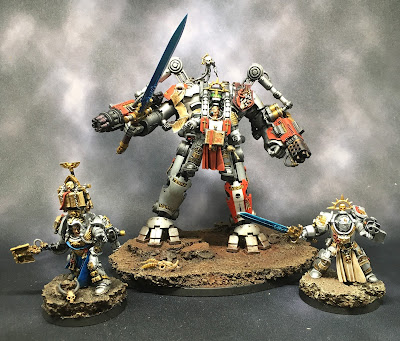
Grey Knight Grand Master, Librarian, and Brotherhood Champion
Taken at the Grey Knights HQ offsite...
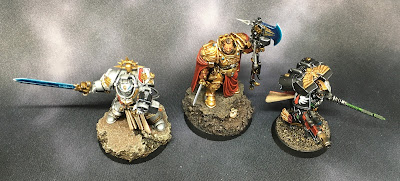
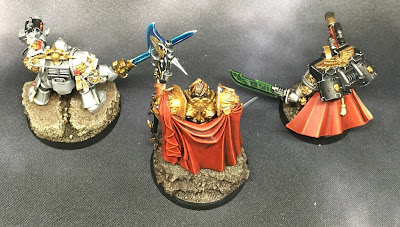
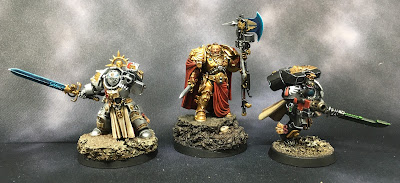
And the most recent three characters from my WIP posts all DONE and together in the light box.

Completed Characters from Grey Knights, Custodes, and Deathwatch
Heroes of the Imperium

Completed Characters from Grey Knights, Custodes, and Deathwatch

Completed Characters from Grey Knights, Custodes, and Deathwatch

Completed Characters from Grey Knights, Custodes, and Deathwatch

Cheers and Happy Gaming!
Monday, April 16, 2018

Custodes Shield-Captain w/Ax to DONE

Adeptus Custodes Shield Captain Title

He is DONE! After completing some details on the Ax, I spent most of my final session working on the face.  I really wanted to complete the eyes this time, and not simply leave grey orbs with no pupil.
Adeptus Custodes Shield Captain

The face took me well over an hour get to a point I would live with.  I still don't love the eyes, but for now, I hit my limit.  Anything I did to improve the situation just F'd it up more. A man has got to know his limitations...

Adeptus Custodes Shield Captain WIP

In short, I used GW Kislev Flesh to touch up the highlights. Then I used GW Reikland Fleshshade to work the shadows.  GW Carroburg Crimson was used to color the lips and shade under the eyes and on the cheeks.  The hair and beard were highlighted and then shaded with GW Reikland Fleshshade to tone things down a bit and put some auburn in there, maybe. I'm no hair scientist...

The eyes were simply Vallejo Game Color Ghost Grey with a black pupil.  Rather than dot the eye, I attempted a short vertical line.  On the left eye, the touch up of the line may not be complete as seen in the close ups. It doesn't seem to show much on the model...and again, fixing it was just making things worse.  At one point, I just got up and walked a way for a bit.  Then came back to have a look with what I hoped was fresh perspective.  That is when I chose to call this guy done.  The face is believable, at least to me, and ended up looking better than his possessed (or perhaps wildly fanatical?) brother Shield-Captain...

YOU want some of this?!

'Nuff said?  Let's move on and give this guy a big seal of DONE!


And then close out with a handful of gallery shots.

Adeptus Custodes Shield Captain

Adeptus Custodes Shield Captain

Adeptus Custodes Shield Captain

Adeptus Custodes Shield Captain

Adeptus Custodes Shield Captain

Adeptus Custodes Shield Captain

That's it for now. I really love this guy.  So much presence in the pose and sculpt.  Definitely the senior Shield-Captain in my growing force so far. Next up we'll have some Imperial Knight Armiger Warglaive WIP progress and hopefully I'll bring the Grey Knight Brotherhood Champion to DONE.

Cheers and Happy Gaming!!