A journal of my efforts towards completing various and sundry Warhammer 40K projects involving the many Armies of the Imperium of Mankind.
Enjoy and feel free to comment...
- Home
- Adeptus Custodes Paint Recipe
- Adeptus Mechanicus Paint Recipe
- Aeronautica Imperialis Paint Recipes
- Blades of Vengeance Paint Recipe
- Dark Angels (Pre-Heresy) Paint Recipe
- Dark Angels Paint Recipe
- Death Korps of Krieg Paint Recipe
- Deathwatch Paint Recipe
- Grey Knight Paint Recipe
- House Taranis Paint Recipe
- Legio Ignatum Paint Recipe
- Legio Tempestus Paint Recipe
- About
Thursday, September 27, 2018
WIP: Questoris Mechanicus Knight Paladin of House Taranis - Part 5
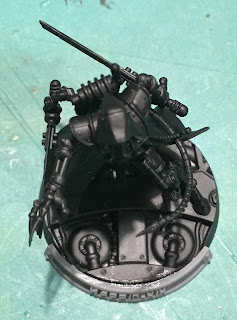
The finish line is in sight for Custos Martis and its pilot Sir Theobald. Much work has gone into the arms to bring them up to spec with the rest of the model so far.
I started by cleaning up the blade and completing the details. I'm going to change my washing/shading strategy for the red moving forward. At present, I ruin the base coat with Nuln Oil then spend an inordinate amount of time building up the red again so it isn't all murky. I like the result, but it's costing me way too much time and effort, and seriously degrades the whole purpose of using the air brush for smooth base coats in the first place.
Next, I blocked n the remaining colors, cleaning up red over spray on the weapon itself and what-not.
Then it was on to the highlighting. I used GW Evil Sunz Scarlet, followed by a thinner highlight of GW Wildrider Red. The Black was highlighted by Vallejo Game Color Wolf Grey (72.047). The rest of the red over spray was cleaned up on the arms and pistons. Next, I painted the purity seals and touched up anything that might be hard to get to when the arm was attached to the torso. Because, next up, that is exactly what I did.
Things are looking sharp now. It felt good to finally attach the arm and the shoulder armor. They have been rattling around separately in the beats lab for so long, it seems. Next, the battle cannon got the same treatment. and was likewise attached to the upper torso, along with the right should armor.
At this point, the pose is complete and the model is fully assembled and painted to a good standard. Next up I'll go over the shoulders and arms again to look at final highlights and touch ups. I think I'll use the kill marking decals on the battle cannon and add some heat effects to the barrel as well.
Last up will be the base. Let's not forget the base. It has gone largely ignored to this point. I have another night or two that I can put in this week, then this guy has to be done as I move into DreadTober. So I need to make them count! Stay tuned for the what I hope will be the final post for this Project and my first large seal of DONE for the 2018/19 Hobby Season.
Cheers and Happy Gaming!
Wednesday, September 26, 2018
DreadTober 2018 - Declaring my challenge!
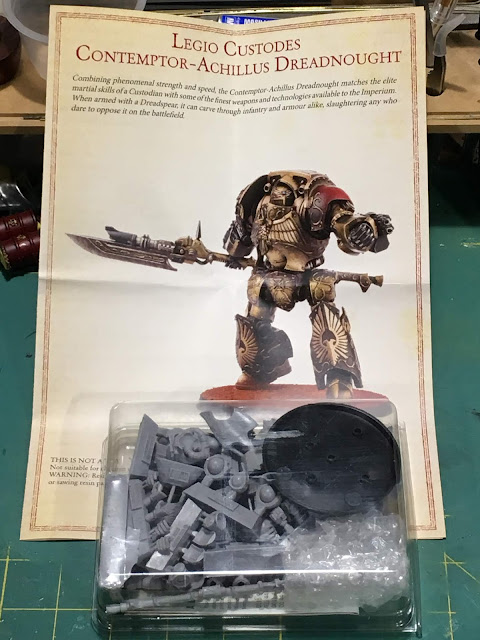
It's that time of year again! With the onset of the 2018/19 hobby season comes a great blog-o-sphere hobby effort, DreadTober. I started participating in 2016 with a Deathwatch Dreadnought. Then last year I joined the fun with a Grey Knight Grand Master in Nemesis Dreadknight Armor. This year I have something special in mind - a Legio Custodes Contemptor-Achillus Dreadnought. I love the look and style of this model, particularly within the style of the Custodes. While the 40K rules are a "Preview" currently, I assume they'll become real at some point. This dread is going to look awesome along side my currently growing Adeptus Custodes force.
I purchased this model back in June 2018, thankfully before the "Great Forge World Cost Increase of 2018" hit the US. Since then, it has sat quietly waiting for DreadTober to make its presence felt. I will build, prime and paint this model as my DreadTober 2018 challenge.
See there, it's in writing! So let the challenges begin.
Cheers and Happy Gaming!
Tuesday, September 25, 2018
Review: Versatile Terrain Custom Name Plates
 |
| Image Credit: www.versatileterrain.co.uk |
Today I'm posting something new on the blog: a review! I came across Versatile Terrain's custom name plate service through a recent Spikey Bits article. It struck me that while impractical for large armies, this was a fantastic idea from small skirmish games like Necromunda or Kill Team. Having just completed building and priming a handful of teams I decided to try the product out on one of them.
When I put together my Adeptus Mechanicus team, I used all the table sin the rule book to name the members and give them personalities. So this was the perfect team for this exercise. I jumped on the Versatile Terrain web site and placed my order. It was an easy process to select a base size and plate design, then the font and quantity of plates/names to order. Once added to the cart, it's time to enter the list of names. I was very careful here to put in the correct names!
For my ad-mech force, I needed three 40mm and five 30mm bases. By mistake, I ordered two 40mm and six 30mm bases, but it all worked out in the end. The order was placed and shipped six days later. I was even emailed the day before the order shipped to let me know all was well. I have had good communications throughout the process. When the order arrived, here's how they looked:
Brilliant! The print and details are sharp and clear and the arcs line up well with the sector mechanicus bases I had chosen for the kill team. I felt this was a risk since it might be that the sector mechanicus bases might not be identical in shape to a standard black plastic base. The bases are cast in resin which allows for some shaping if you apply a little heat. This helps me make sure my mistaken 30mm plate fit around a 40mm base.
I lined up a base with a model to be sure I had everything right. Then I set to work removing the sprue, cleaning things up and then gluing them down. The sprue comes off very easily. I used standard flush cutters as I would with any sprue, but I could have carefully snapped them off with my fingers too. Super glue (Cyanoacrylate) in small amount was used to glue the plates onto the bases. Some care was needed to keep things lined up well while the glue set. You don't want a slow drying epoxy or other glue here, in my opinion.
Here's how things look on a 30mm base.
From the bottom, you can see the plate lines up well with the curve of the base.
And the same from the top. With these sector mechanicus bases, I made sure to line things up so the rivets on the plate appear to go into the base instead of thin air since there are voids/low spots on the edges of the bases.
Here here is Amu-8869 with his new name plate attached. As you might imagine, things went as well for a 40mm base.
Everything continues to line up well.
Lookin' good...
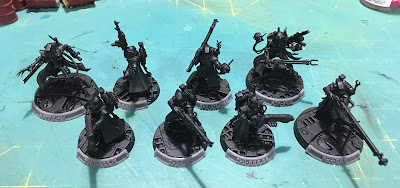
And here is Kappic-XIX with his new nameplate. I specifically chose what I thought passed for a Gothic look with a digital font for the Ad-Mech. There were plenty of good choices for plate and font styles. Here is a shot of the team with their name plates applied.
Click through to see this close up. On the front right you can see the 30mm name plate attached to the 40mm base I chose for the Skitarii with the Transuranic Arquebus. when ordering, I simply forgot that I had used a large base size on that one Skitarii. It fit just fine with a minor amount of heat applied to prevent it from looking two warped. The results stand for them selves.
I really liked the product and will likely order plates for my other teams as well. I'm particularly interested in plates for my House Taranis Knights as this is a great way to display the creative names and add some personality to the models.
I give the Versatile Terrain custom name plate service two enthusiastic thumbs up!!
Next up, I'll get back to the Questoris Knight Paladin. I've done work on the weapons and will have more to show on that soon.
Cheers and Happy Gaming!
Tuesday, September 18, 2018
WIP: Questoris Mechanicus Knight Paladin of House Taranis - Part 4
Custos Martis ("Guardian of Mars") edges closer to completion. The upper carapace has been highlighted and decals initially applied. I'm looking at a couple smaller decals to add for details, but the major iconography is applied. I also got the shoulder armor heraldry completed. I will come back in with a brush to complete and touch up the black crenelations.
These shots were taken right after I finished with the decals. I'll come back with some matte varnish to seal the decals and blend them in with the rest of the paintwork. I like to make a couple passes with Micro Sol to remove as much of the decal film as possible and soften the decals over any imperfections. This prevents the decal from looking like a thin sticker on top of the paint work when viewed at various angles. If you do ANY decal work, you must get a hold of Micros Set and Micro Sol from Microscale Industries, inc.. I have been using the same two bottles since the mid 90's, no joke.
The house heraldry was applied to the shield as well after it was highlighted, along with the armor over the head. With these steps complete, the final details and remaining highlights will be painted in and all touch ups completed. Then its on to the arms as I head for the home stretch on this project. I very much need to get this fella completed before DreadTober, which is right around the corner.
Thanks for following along. I hope your own projects are meeting with success.
Cheers and Happy Painting!
Friday, September 14, 2018
WIP: Questoris Mechanicus Knight Paladin of House Taranis - Part 3
Putting more work in on the Knight Paladin, Custos Martis. The white and red armor panels on the legs were cleaned up from the shading process. I need to get better at applying gloss coats before shading to control how much damage I d while applying the Nuln Oil. I did try that approach while working on the Warglaives, but found I still got the same or similar staining. I think it's down to me not thinning the Nuln Oil prior to application.
The red armor and on the legs and the banner then got a bold highlight of GW Wildrider Red, followed by a second thin highlight of GW Evil Sunz Scarlet. I brought in some Vallejo Dark Rubber (70.306) for the flexible joints on the toes, then shaded it with GW Nuln Oil. The smooth wires/hoses were painted GW Abbadon Black and the metal skeleton of the legs got some cleanup and simple highlighting. I'll come in with a second pass later.
The legs are coming along great. They have fully recovered from being repainted in House Taranis colors. I'll look at decals next so I can blend them with any final shading/weathering. As mentioned earlier, I'm working ground up now. So once I have the legs where I want them, I'll move up to the torso and arms. Here's a close up of the legs.
A quick assembly of the parts to see where we're at...Looking good!
Next up, I added Vallejo Chrome highlights to the silver trim on the leg armor as well as other metal highlights, including brightening up some of the gold details where prior shade passes had dulled it too much. Then I got down to some decals. I *love* decal work. It's probably because my freehand is so awful. Some solid decal work really helps finish one of these models off.
Next up, I got on with the upper half of the Knight Paladin, starting by cleaning up the red armor from its initial pass of shading. I will get more patient with thinning the Nuln Oil and putting down a sealer before shading to avoid all the rework on the armor of future knights for this project.
Despite the extra work, the red is coming our well. Next up will be highlights for the torso armor. Before that, I got to work on the carapace armor. This required trim and details, then a shade of Nuln Oil, and then more cleanup of the red armor. I haven't done the last part, but already the carapace is looking good.
The mechanicum seal needs work, but the rest of the details are blocked in and shaded.
Most everything got cleaned up form the shading process except the red. I ran outta time for this session but I'll get to it first up when I sit down next to paint. The it'll be time to highlight everything and lay down decals. Here's how Custos Martis stood by then end of the evening.
 |
| Now with more dakka,,, |
That's it for now. I hope the have the torso complete in one more session. Then the arms need work before I can call this one done. Getting there though. I really like how the Taranis color scheme is coming out on this Knight. I have lots of inspiration now to carry me into the remaining four knights (and two helverins...yikes).
Cheers and Happy Gaming!
Wednesday, September 12, 2018
On the Workbench [September] - Inquisitor Eisenhorn and Cherubael
As a bonus workbench project for September, I secured a Cherubael model to from Artel "W" Miniatures to go with my Eisenhorn model. When I saw that Eisenhorn's rules allowed for him to summon a demonhost, I knew I needed to paint one up to go along side. After trawling eBay, I managed to get ahold of an old daemonhost to use. But I wanted Cherubael...after all Eisenhorn isn't summoning just any old daemonhost. He commands a very specific deamonhost: Cherubael!
The model from Artel "W" is the right beast, no doubt. Right away, I was impressed with the packaging. I really hoped this wasn't a smoke screen to shift focus from a sub-par model. I was not disappointed. The Cherubael sculpt is well cast and VERY detailed. It was a bit fiddly to assemble, to be fair, but quite satisfying for any extra care required.
First up, here is Inquisitor Eisenhorn after being assembled and mounted for painting.
The chains didn't seem to hang quite right so I took a heat gun to them...
There, that's much better. More motion, more natural shape as the beast thrashes about in his bindings. More custom ground cover completed the base to tie it all together. With more patience, I would have worked on some sort of stone/metal cell floor so the chains made more sense being anchored down. But let's face it...we're painting models of daemons, it shouldn't be so odd that he appears shackled to bare ground.
I'm looking forward to painting these two. I suspect I won't get to them for a while though. I'm dedicating most of September to finishing my House Taranis Questoris Knight Paladin and then we'll be into DreadTober. So look for these guys hitting the painting table in November at the earliest.
Are you working on anything purely for the hobby love? If so, let me know in the comments.
Cheers and Happy Gaming!
Monday, September 10, 2018
Kill Team - Heretic Astartes (The Fallen)
So an interesting thing in my hobby universe happened the other day. I was poking about on various forums for what folks were doing in terms of Heretic Astartes kill teams. I have various cultists lying about from past boxed sets and since I don't run non-Imperium forces generally, I've had no use for them. So I thought, why not cook up a new Kill Team on a lark? My investigations led me to a few posts from folks looking at the opportunity to run the Fallen in kill team using the Heretic Astartes team.
And it hit me.
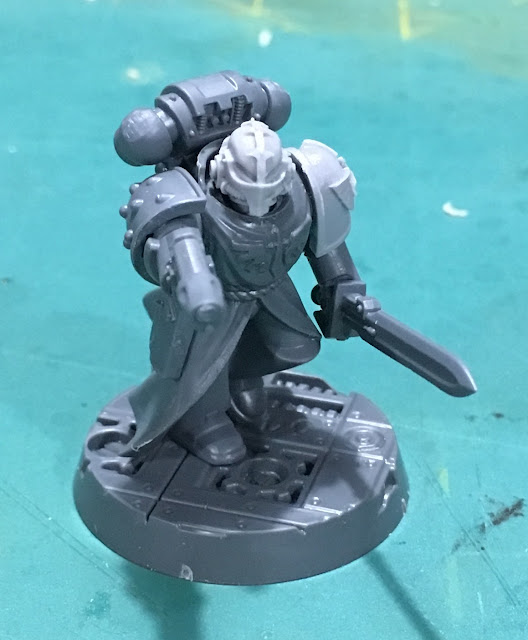
I have boxes and bins of Dark Angles and 30K marine kits and bits lying about. What not combine them an make my own Fallen Kill team to compliment my Dark Angels. The Fallen are known to stir up cults and instigate rebellion to achieve their own ends. So this would be a great opportunity. Assemble a fluffy kill team of Cultists being "assisted" by a team of Fallen Angels. The leader would be a cult champion accompanied by a force of his brothers. But all the specialists would be Fallen marines. After going over a few options, I decided to run a full squad of five marines along side the cultists. A longer term goal will be to use the opportunity to paint up Cypher as the grand architect of the team's machinations. He won't play in the game, but He'll stand proudly along side his brother marines in the display case. :) Maybe he'll even hit the table in a 40K game down the road now that the Fallen have official rules in the game.
Building the marines was a thing of beauty. I have Mark II and Mark IV armor and weapons from two prior boxed sets plus all the forge work Dark Angels bits. They are waiting for the day they get turned into a proper 30K 1st Legion force. Certainly I wouldn't miss a handful of bits. I also had the robed DA bodies lying in the bits box. Why not marry the two??
So I set about gathering up what I needed to built the team as I had mapped it out on BattleScribe. The only 40K bits are the robbed bodies and the Sector Mechanicus bases. The rest all come from the Mark III and Mark IV Heresy armor sprues. I was originally going all mark IV to use the Forge World heads. But I though it would be more interesting to mix the old armor marks, and I had the Mark III "Iron Armor" shoulder pads already. After all, the Fallen have been around a while...that whole warp thing and what not.
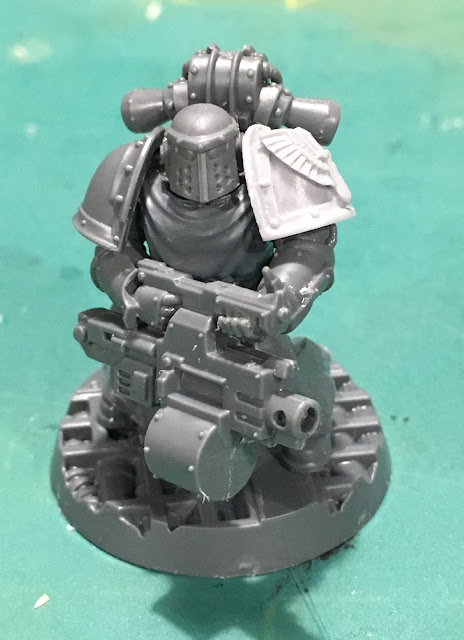
The Zealot with a mark of Khorn (he might have been a bit too zealous) was born. He is the "sergeant" of the Fallen squad sent to stir up and direct the team's cult elements.
The Sniper with his ancient plasma gun. I'll play with an angry red or purple plasma effect to represent the angry, heretic machine spirit caged within. As a personal point of humor, I was sure choose a mark III helm that did not have any vents or holes on the right cheek. One doesn't want to get scorched by their finicky plasma gun!
The Heavy with an equally ancient heavy bolter. What a great use for the cool looking 30K underslung weapon in 40K. Clearly reads as a heavy bolter but should len and "out-of-time" air to the Fallen brother. I hope the mark III armor helps these veteran gunner specialists stand out on the team.
A brother with a gun. I chose to use the Phobos pattern bolters from the mark III armor kit with the mark IV armor here. They have an old, iconic look and further indicate the out-of-time, out-of-place nature of these heretics.
The final brother of the five, also with an old Phobos pattern bolter. To keep momentum, I also banged together a few of the cultists I already had on hand, a cult champion to lead the band and three of his thugs.
Now I just need to acquire two cultists with heavy stubbers and I'll be set. I might even go with one heavy stubber and one flamer. I'm also going to name the Fallen, at the very least. I'll post follow up pics once the team is complete. Six cultists and five Astartes make up the team. Hopefully a reasonable mix of capabilities to make for good, if not seriously competitive, games of Kill Team. This brings me to six teams on hand for any pick up games I manage with my friends. I don't expect they will make the time to form teams of their own. We're all grey beards with careers and families now.
I don't run chaos. So I look forward to painting something new here, even if they aren't really all that chaotic (I'm looking at you here, Nurgle). I especially look forward to painting up some Fallen to display alongside (ok, not RIGHT along side) my Dark Angels for the fluff's sake. The plastic Cypher model is very cool and I look forward to painting him up as a bonus.
I hope to post up regular Kill Team articles as I work through the hobby season along with the normal work bench and other project articles. Heck, I might even play some games, too!
Cheers and Happy Gaming!
Friday, September 7, 2018
WIP: Questoris Mechanicus Knight Paladin of House Taranis - Part 2
As I enter the 2018/19 Hobby Season, I'm kicking things off big by getting back to work on the Knights of House Taranis. The Questoris Knight Paladin, Custos Martis, returned to the painting table as I continue to transform the knight from a Freeblade to a House Taranis knight. In part one of this WIP series, I describes using the air brush to repaint the armor in the House Taranis livery. Now it was time to clean up that work by touching up the panels and laying down the silver trim. Here's the before shot from part one.
And here is what things looked like with cleanup and new trim work complete. I decided to go ahead and glue down the face plate at this stage. Tough to cover up all the face detail, but I know its there. And anyone peering into the eye slits will see the soft glow of the optics.
Next up, I started cleaning up the over spray on the knight's skeleton, as well as additional tidying up up around the edges of the red panels where masking got in the way of the spray. Then I applied shading with GW Nuln Oil. This really darkens things and I'll go back in with the base colors to brighten the major smooth surfaces of the armor later. The results can be seen below on the shoulders (though it is a bit washed out) where the white portions have already been tidied up.
The red over spray is all gone and the armor is starting to take shape. The banner was also cleaned up and shaded. Not sure what I'm going to do there yet, so it's literally painted up to be a clean canvas at this point. Taking a break from the legs and torso, I then put some base colors on the weapons. They are far form done, but some progress is still progress!
Knights can be large and daunting to paint so it really helps to break them down smaller sub-projects. The trick there, of course, is to stay consistent over the project so the different components come together to form a cohesive whole in the end, and not some rag-tag patch work.
Anyway, welcome to the 2018/19 Hobby Season and my first project.
Cheers and Happy Gaming!
Subscribe to:
Posts (Atom)


