 |
| Image Credit: IKEA |
I have two of these cabinets. The work great, especially when paired with LED light strip kits, also offered by Ikea. I don't find the lights I used on the site anymore, but there are other strip lights there and elsewhere that I'm sure would work. The main issue with using a Detolf display cabinet for displaying models is that it only has three shelves providing four surfaces for models (including the floor of the cabinet. Unless you are housing titans, you won't need all the space between shelves. Adding additional shelves, however allows you to store more models per cabinet.
Thus I embarked first on an Internet search, then a project to add three additional shelves to my cabinets. This would double my storage space without increasing its foot print in my hobby room. Adding two more cabinets was out of the question since I'm out of floor space at this point!
The Detolf cabinet uses welded metal round stock to hold the shelves. You may find articles on welding in new stock to hold additional shelves (I don't have the necessary equipment), and you will find many articles on using cable/wire clamps as shelf supports. However, I found this solution on Ebay, from user 2005helliwell, that has worked really well. I thought I'd pass it along.
 |
| Image Credit: EBay user 2005helliwell |
At the time I wrote this article, this auction link was valid. You will want to search EBay using the text "Shelf brackets for IKEA DETOLF" to find any current offers of this product. The seller offers one pack, or two or more packs as a bundle. The brackets clamp on to the inside metal stock at the corners of the cabinet and provide a secure ledge for a shelf to sit on.
 |
| Image Credit: EBay user 2005helliwell |
After acquiring a couple sets of these brackets, I then ordered six .25" plate glass shelves from a local glass store. I originally set out to get tempered glass shelves (for safety), but the tempered glass option was WAY more expensive than plate glass. After discussing the merits of tempered glass with the seller, I decided that 24" plate glass would be perfectly safe for this project. As it was, the six shelves cost me $60 total...which while not bad, was almost as much a s a whole new cabinet. So this isn't a cheap add on to be sure. In my case, I had the money for the shelves, but not the space for a new cabinet. I brought along an original shelf form the cabinet when I placed the order to be sure I got a solid replacement. at .25", the new shelves are thicker than the original ones, but it isn't something that stands out.
The brackets came with all the hardware needed in a Ziploc bag. One set will hold up three shelves (12 brackets); I picked up three sets so I'd have spare parts (should something get lost or broken) and could possibly add another shelf or two if necessary in the future.
 |
| Enough Parts for Three Shelves in One Set |
Each bracket uses a nut and bolt combination to tighten it to the shelves.
 |
| A Bracket and its Hardware |
Below is a shot of the parts assembled. When the bolt is tightened into the nut, the bracket clamp is squeezed together holding it onto the bar stock of the cabinet. I would suggest tightening the bolt as securely as possible without over tightening and snapping the plastic of the bracket. I can say I torqued down solidly on all 24 that I installed without breaking one of them. So they'll take to a good tightening. You won't want one to slip down the bar stock and tilt or drop a shelf! That said, I cannot see how it is in any way likely that more than one of these for a given shelf might ever slip at one time. We're holding up plastic after all...the glass shelf itself is probably heavier than all the plastic I'm storing on top of it. We'll see what happens if I get a good amount of Forge World resin on one. :)
 |
| The Parts Assembled for Illustration |
With glass and brackets in hand, I set about installing them in my cabinets. In order to stay sane while attempting to level 24 brackets so the shelves don't wobble, I made a simple jig with a piece of stiff cardboard. Wood, thick plastic card stock and many other things would likely work as well. After measuring the distance between existing shelves in my cabinets, I found that mounting the brackets 7" from the top of existing shelves worked just fine for my purposes. This roughly centered the new shelves between existing ones. I saw no need to be precise here; and visually, I don't see an issue after completing the installation.
So I cut a length of cardboard 7" long. I would stand the cardboard like a ruler on a shelf at the corner of the cabinet and then attach a bracket so it rested on the top edge of the "ruler". Doing this carefully and consistently insured that each bracket was the same distance for the shelf below. As I laid in each new shelf, I was very pleased to see that only a single bracket out of the 24 installed needed a slight tweak in height so the shelf it supported didn't wobble. All the other shelves sat perfectly flat.
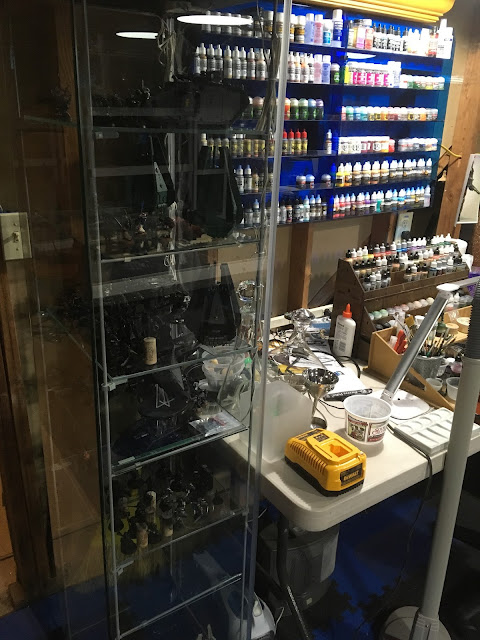
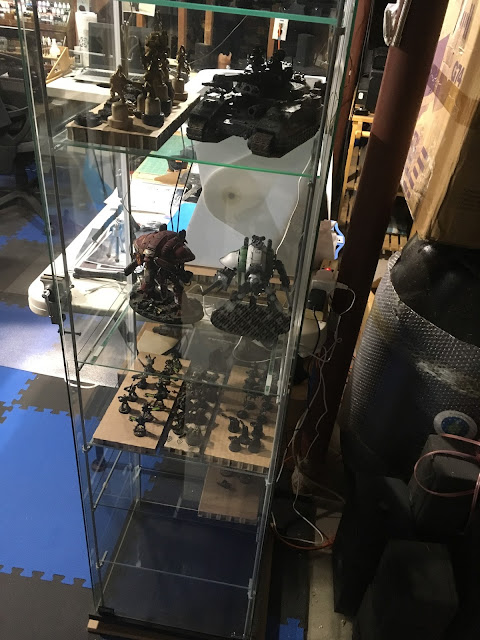
Here are a couple shots of the finished cabinets. Not great pics, to be honest, but I think you can get the idea, especially if you click through to the full image, or zoom in on a mobile device. The brackets are visible, but barely distinguishable from the original cabinet. I installed mine to be parallel with the size walls, bit one could rotate them to point diagonally into the cabinet to provide less chance for a shelf to slide off. I feel I have plenty of shelf overhang to prevent this in my case.
 |
| Cabinet #1 with ~7" spacing for all shelves, and an area for tall models on the bottom |
I'm able to get things as tall as drop pods in here with plenty of room. There is even a Deathwatch corvus blackstar in there. The Forge World dreadnought drop pods didn't fit, so they go on the bottom. But landraiders, baneblades, etc. are all set. I imagine that other taller fliers on their stands won't fit either. But the beauty is that I can raise the new shelves a bit if I need another inch or so for such models in the future. For infantry models, the 7" height is still very generous. I can get my hands in to move stuff about easily enough, as well.
 |
| Cabinet #2 with a tall space in the middle to store my Imperial Knights |
Cabinet #2 illustrates some flexibility in how extra shelves can be configured. Instead of having the knights on the bottom (as would have to happen in cabinet #1 above), I chose to leave a full height section in the middle of cabinet #2 for the taller knights. It's just a matter of taste. I could have had them at the top too. The only restriction is the original three shelves that sit on brackets welded to the the cabinet frame. They are clearly unmovable without breaking the welds.
Each cabinet has two light sets installed, one at the top and one at the middle, that helps light up the models when I choose. I have additional sets that I will probably add now to increase illumination.The extra shelves and models cast shadows down through the cabinet. My issue with the light sets is all the wires that have to be manged inside the otherwise see-thru cabinet. At some point I'll tackle this and see if I can do something better to manage all the wires. You can see bundles of wires in the pictures above which I currently twist-tie to the frame of the cabinet. It's going to get a bit unwieldy with more light sets.
That is a minor issue, however. I have doubled the space for storing and displaying models in the cabinets which is very cool! I really like these custom brackets. Using metal clamps will likely require additional felt or rubber pads to rest the glass on. These plastic brackets work fine on their own with no issues scratching the glass. Also, the shelves don't rattle noisily or slide on them at all if the cabinet is bumped lightly (which happens, I'll admit!).
If you are interested in this project, definitely take a moment to scan about on the Internet. Others have put together very nice step-by-step instructions for using clamps and other methods. I don't have the free time at this point to produce a solid step-by-step guide myself. If you have specific questions, put them in the comments and I'll be happy to answer all I can. This is a great cabinet and fairly inexpensive for what it is, in my opinion. I like the fact that it is all glass and allows models to be seen easily from all sides. It really needs some lighting work to show off your hard work, but in a well lit room you could probably still get away without it.
I look forward to filling mine with painted work. Currently, they store far more work in progress. Still, the cabinets keep the work out and in my mind which helps inspire me to truck on and get things done.
Next up will be a follow on article with progress on the 29th Zetic Tigers from my prior post. I have been making slow, but steady progress on the team and they are shaping up well. Not sure why I chose ANOTHER black armored paint scheme requiring edge highlighting...if I ever get to my 1st Legion 30K project, I'll be well drilled in painting black armor...
Cheers and Happy Gaming!
A nice solution. I had one of these cabinets and had the same issue of it's nice, but needs more shelves.
ReplyDeleteTo hide the wiring, I've seen others add a back drop or mirror to the back and hide the wires behind it
Hmmm...hadn't thought about a back drop. That would work. I did add another set of lights to one of the cabinets. I think some patience and good careful wire positioning and discipline will make things work out. I'm thinking about some small zip ties and some wrapping.
DeleteA dream post! Thanks, I've been using perspex display plinths, but this is exactly what I need!
ReplyDeleteGlad to hear it. Also happy to see the eBay link is still relevant. :)
DeleteBought a similar kit, its excellent, yes the eBay link is great and still relevant, but beside that the post is a great signposting for a problem all Detolf owners have!
Delete