Tuesday, May 31, 2022

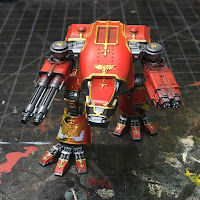
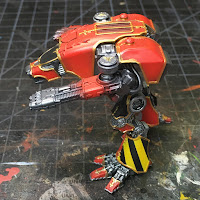
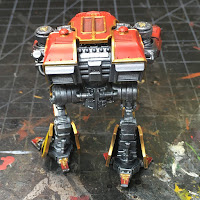
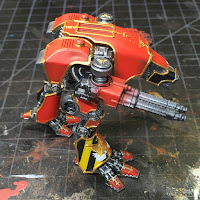
Adeptus Titanicus Warhound Titans - TO DONE


Legio Ignatum Warhound Titans for Adeptus Titanicus

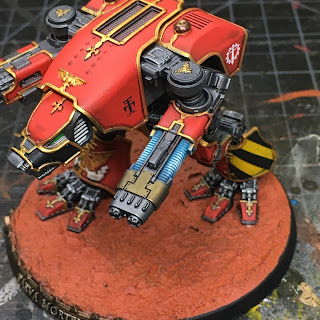
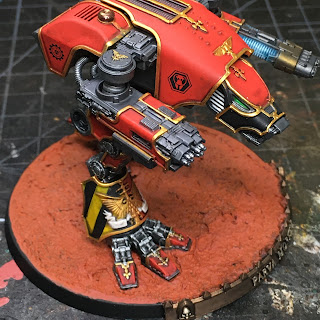
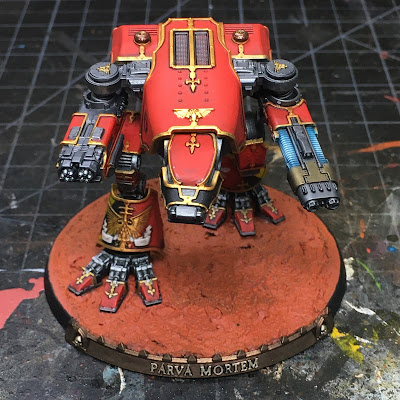
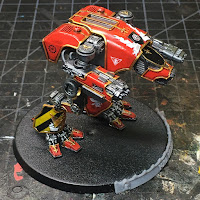
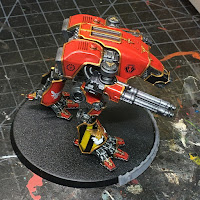
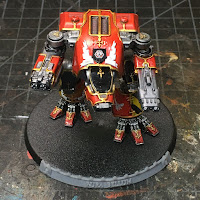
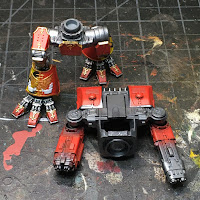
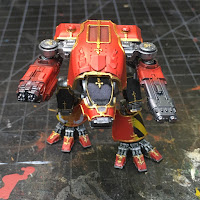
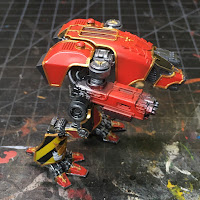
Greetings and welcome back to my Warhoud Titan project for Legio Ignatum in Adeptus Titanicus.  What started as a Warmaster Titan project was quickly redirected by these two puppies as I started out batch paint the lot.  It quickly became clear that I needed to do either the Warmaster, or the Warhounds, but not all three at once.  So, as promised in my last post, I managed to complete the Warhounds.

I'm already on to the the Warmaster now, so in my next post I'll have some progress to show on that beast.  It's great having all the panels painted up (from the initial batch painting exercise), so as I transition from the Warhounds, I'm right into the trim work.  The masking and airbrushing is complete.

Scroll on down if you want a look at the finished Warhounds in more detail.  Click through to get to the larger photos.  As always, thanks very much for stopping by my little corner of the internet.  The paint recipe tab above for Legio Ignatum details all the colors I use (base, shade, and highlights).  I may deviate a little here and there, but if you follow the recipe, you should come very close to these results.  I use weathering powders on the base, which I apply with fixer AFTER I seal everything with matte varnish.  I've had issues with the varnish clouding when sprayed over the dried fixer.  By applying the powder on top, I avoid that with just the risk now that the powders may wear off over time.

Check back later in the week to see progress on the Warmaster Titan.

Stay safe out there.

Cheers and Happy Gaming!

Friday, May 27, 2022

Adeptus Titanicus Warhound Titans WIP - Back to bases

 Legio Ignatum Warhound Titan WIP for Adeptus Titanicus

Greetings and welcome back.  The Legio Ignatum Warhound titans for Adeptus Titanicus are nearly complete now. Weapons are painted and I've started (barely) on the highlights.  The main thing this week was completing the weapons (particularly the plasma blastgun) and the bases.

Legio Ignatum Warhound Titan WIP for Adeptus Titanicus

Nothing new here, just more of my standard plasma recipe. Also in these pics, you can see the eye lenses have been painted in.

Legio Ignatum Warhound Titan WIP for Adeptus Titanicus

Prior to mounting, the titans were given a coat of matte varnish to remove the shiny gloss from the shading stage.  The bases were also varnished after the painting and shading was done.

Legio Ignatum Warhound Titan WIP for Adeptus Titanicus

With the varnish dry, both titans were glued down to their bases with 5-minute 2-part epoxy.  Next up, the highlights will be completed and then the weathering powders applied to the bases for that final Mars desert look.

Legio Ignatum Warhound Titan WIP for Adeptus Titanicus

Super psyched to have these two almost completed.  I'm really looking forward to moving on to the Warmaster Titan while the Legio Ignatum mojo is high. It also feels good to complete the remaining Warhounds to match my Legio Tempestus force.  These two bring me to 18 mini-titans complete across the two Legios.  I have two Reavers waiting for paint (one for each Legio) and of course the Legio Ignatum Warmaster and then a Warmaster Iconoclast for Legio Tempestus still in the box...oh, and two of the new Forge World Heavy Scout Titans on pre-order.  So still a few Titans to paint! Heh.  

Next week I hope to post up the TO DONE post for these two and then on to the Warmaster.

Cheers and Happy Gaming!


Friday, May 20, 2022

Adeptus Titanicus Warhound Titans WIP - Transfered


Legio Ignatum Warhound Titan WIP for Adeptus Titanicus

Greetings, and welcome back.  As promised, I poured on some gas and got these puppies moving.  I even managed to bring the weapons up to a point where I could gloss and then shade all the armor at the same time.

Legio Ignatum Warhound Titan WIP for Adeptus TitanicusLegio Ignatum Warhound Titan WIP for Adeptus Titanicus

With the armor glossed, it was the perfect time to apply the transfers. Click through the pics if you'd like to get a closer look. On the left side, we have Warhound and Collegia Titanicus icons.

Legio Ignatum Warhound Titan WIP for Adeptus TitanicusLegio Ignatum Warhound Titan WIP for Adeptus Titanicus

On the right side we have Legio Ignatum icons, including the inside of the left shin guard if you look carefully. I made a small slip by not applying the transfers before shading, but that's a small thing that will be hardly noticeable in the final result.I may even lay down a second shade coat over the transfers.

Legio Ignatum Warhound Titan WIP for Adeptus TitanicusLegio Ignatum Warhound Titan WIP for Adeptus Titanicus

Another Legio Ignatum icon was put on the black carapace shield of Pura Bellum.  Before glossing the armor, I managed to paint the shield and scrolls.  I was pleased to get the gun armor trimmed and all the red armor cleaned up in one pass for the glossing and shading process.  Now I can carry on with the weapons and finally highlights for these two. Then it'll be down to the bases and final attachment - at the moment the puppies are free standing and not glued to their bases.

Good progress for the week and I'm pleased with the results so far.  All the gloss hurts my eyes, so I look forward to a good solid flat coat to dull everything back to my typical painting style. But I have to say it was worth it.  with the gloss coat, I had a much better time with the shading - the main point being less staining/dulling of the main armor color. Without the gloss coat, I would often have to go back and repaint the center of the armor panels to brighten things back up a bit.  That is not necessary here.

So next week, we may have completed titans here and then it'll be on to the Warmaster.  I'm trying desperately to get these titans done before Horus Heresy fever sets in with the upcoming launch and I go back to painting the First legion.  Hobby Butterfly Syndrome at its best!  Still, no end to the fun projects ahead, no matter the game system.  I'd love to get some paint on more Aeronautica planes too, after getting a game in last month.  So fun!

Stay safe out there.

Cheers and Happy Gaming!

Tuesday, May 17, 2022

Adeptus Titanicus Warhound Titans WIP - Marching on


Legio Ignatum Warhound Titan WIP for Adeptus Titanicus

Greetings and welcome back.  The Warhound titans are coming together, and can stand in their full regalia now.  The Warmaster is idling as I get these two done.  It deserves some 1-on-1 attention and it's been a challenge to batch paint all three.  

Legio Ignatum Warhound Titan WIP for Adeptus TitanicusLegio Ignatum Warhound Titan WIP for Adeptus Titanicus

I quickly sorted out the botched leg armor and got everything repainted.  Then I finished the gold trim and attached all the leg armor to both titans.  That left me with almost fully assembled titans! Next came the bodies, carapace armor and heads.

Legio Ignatum Warhound Titan WIP for Adeptus TitanicusLegio Ignatum Warhound Titan WIP for Adeptus Titanicus

The body "skeleton" was dry brushed to match the legs.  Then I finished the rest of the gold edging on the carapace and body armor panels. Next, I spent some time on the heads. Nothing too fancy on these two. With all the basic colors blocked in, I attached the heads to the bodies and glued down the carapace armor.  with that dry, I glued the bodies to the legs and voila! The two engines walk!  The arms of these two Warhounds are magnetized so it's easy to pull them off and paint them.  That's coming at some pointsoon, I promise.

Legio Ignatum Warhound Titan WIP for Adeptus TitanicusLegio Ignatum Warhound Titan WIP for Adeptus Titanicus

Now we can walk around these two and get a look at the various panels. These two Warhounds will sport just the minimum stripes on the leg armor. There are plenty of other stripes across the battle group!

Legio Ignatum Warhound Titan WIP for Adeptus TitanicusLegio Ignatum Warhound Titan WIP for Adeptus Titanicus

Never let the enemy get behind your titans...there's just not much here to see! 😂

Legio Ignatum Warhound Titan WIP for Adeptus TitanicusLegio Ignatum Warhound Titan WIP for Adeptus Titanicus

And there we are.  I'm going to clean up the red armor and add the transfers.  Once all that is done, I'll gloss coat and shade the titans, then get on with the highlights.  At some point I'll paint the weapons - likely while waiting for various stages of painting the bodies to dry. Also, bases.  I have the bases with name plates attached.  I need to add some ground work, then prime and paint those before the titans can be attached for the final Mars weathering process.  The final matte sealer coat will remove the gloss.  I haven't done a gloss coat prior, but I think I'll have an easier time with the shading so I'm giving it a try.

Hopefully I'll have these moved along nicely for another post by end of week.  It's been a bit slow around here lately, I know!

Stay safe out there.

Cheers and Happy Gaming!


Thursday, May 5, 2022

Adeptus Titanicus Titan WIP - red toenail polish edition


Titan WIP for Adeptus Titanicus

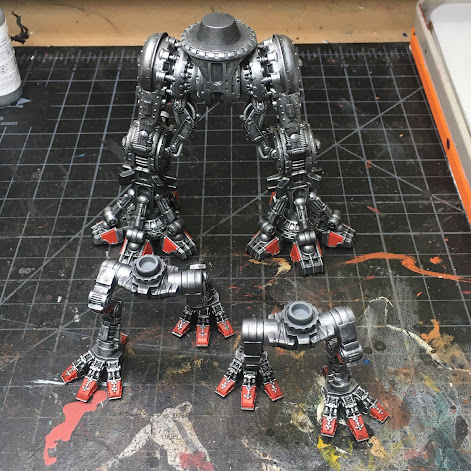
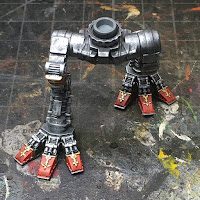
Progress continues on the tiny titans!  I couldn't resist the title.  At this point in the process things DO look a little like these guys just put on the toenail polish.  An in truth, things have progressed a bit farther than can be revealed above.  I started batch painting these titans by shading and then dry brushing the legs.

Warmaster Titan WIP for Adeptus Titanicus

So, shiny but with a bit more definition perhaps?  Then I started in with the red panels on the legs, which led to the inevitable toenail polish look.  On the war hounds, this got more fancy with the edition of gold trim.

Warhound Titan WIP for Adeptus TitanicusWarhound Titan WIP for Adeptus Titanicus

This led me to focus a bit more on the Warhounds since they are smaller and thus easier to complete - oh and much more likely to get used in my games at this point. I may run them to completion before focusing back on the Warmaster.

Legio Ignatum Warhound Titan WIP for Adeptus Titanicus

By now I'm feeling in the groove, ready to assemble the leg armor and move the leg assemblies to a battle ready state so I could move on to the bodies...I'm really moving! So I clip of the lower leg armor, lay it out so I know what goes where and realize this...

The problem (if it isn't obvious) lies with my intended for the Legio Ignatum heraldry for my collection of tiny titans.  The hazard stripes are supposed to be on the *outside* of the armor, not on the inside.  So, only one armor panel above is correct.  Three need to be repainted.  This revelation led to a period of wild gesticulation and much profanity followed by a little sulking, then a mad search through the bits box for extra leg armor parts.  But I had none, except for the unused traitor parts from all my old kits.

Not one to waste an opportunity, I then recognized this was the perfect opportunity to test out a can of Testors Easy Lift Off (ELO) paint remover that I picked up a while back.  As you can see above, the product is quite effective.  Better than effective, though, it is FAST.  I went from disaster to ready to prime in 5 minutes, no kidding.  No over night soaking, no scrubbing and scrubbing, no extra soaking and going at it all again.  Just applied the liquid, let it sit a minute or two as recommended, and brushed the paint off with an old drybrush I had easy to hand (an old tooth brush would have been even better).

The resulting product can be seen above, full of the removed paint.  THIS is something that shall remain in the hobby bunker for years to come.  I can imagine how useful it would be for eBay rescues and the like.  It's both effective and a real time saver.  Now, I will prime the armor again and repaint the heraldry - correctly this time.  I'm pretty sure I even made hay in a prior post about the importance of careful planning to avoid just this kind of issue.  Never let it be said I don't lead by example...even if it's a bad example.

So that was my adventure this week.  I will pick up the posting pace as the project progresses and I have more to show.  The time required to plug through this phase of drybrush and trim doesn't leave a lot of room for sexy progress pics. I'm sorta glad for the little mishap so I had something more interesting (hobby-wise) to post at all!

Best of luck with your own projects.  Go and get some of this Testors ELO product.  If you ever strip hobby paint, you won't regret it for a minute. I should add there is very little odor and my skin appears no worse for the wear.  I'm not particularly cautious with, nor kind to, my hands when hobbying.


Cheers and Happy gaming!