Wednesday, March 30, 2022

MonsterMarch6 - Week four progress

#MonsterMarch6
credit: swordmasterofhoeth.blogspot.com

Greetings and welcome back to #MonsterMarch6. We're drawing to a close and it's looking grim for my chances at securing two painted titans for this challenge.  That said, I've made some great progress and as promised, both titans now walk!

Legio Tempestus Titan Dazzle Camouflage WIP for Adeptus Titanicus

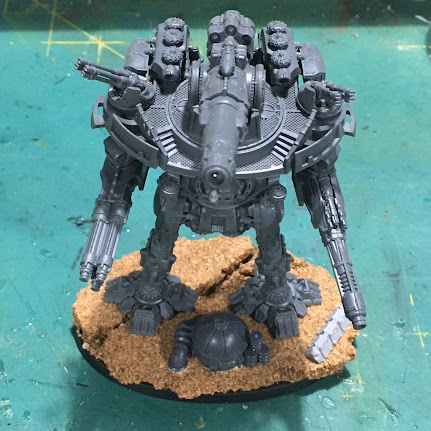
The week started with some more assembly.  I dry-brushed the titan skeleton and applied a few minor details with tin-bitz before removing the armor from the sprue, cleaning things up and gluing them in place.  Funny (um...tragic) story there.  After believing I had been careful to keep track of which parts were left and right, I managed to get the leg/knee armor backwards.  After much cursing and throwing of tools, I quieted down and repainted the knees then reapplied the transfers.  Thankfully I have a good supply of transfers to draw from for these sorts of issues.  Here's a look back at what the legs looked like originally after I applied the first set of transfers.

Legio Tempestus Titan Dazzle Camouflage WIP for Adeptus Titanicus

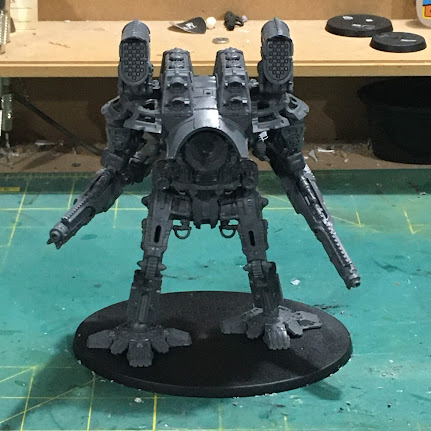
Ugh.  So that cost some precious hobby time. But the truth is, the facts of that mistake are only here on the blog now. The titan looks just fine and the bad memory will soon pass.  Take a lesson from this misadventure and pay careful attention to orientation of parts on the sprue if you choose to paint your projects as I have here.  With the issue fixed, I continued to assemble the main body and glue it down to the legs.  I made the decision back when I started with these models that I wouldn't bother magnetizing the waists.  Martis Renes walks!

Legio Tempestus Warlord Titan WIP for Adeptus Titanicus

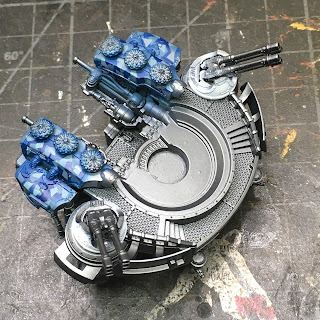
I'm working on the weapons now.  Here are the missile pods after getting the trim and missile nose-cones painted.

Legio Tempestus Warlord Titan WIP for Adeptus Titanicus

While all this was going on, I was also painting a lot of Warbringer armor trim.

Legio Tempestus Titan Dazzle Camouflage WIP for Adeptus Titanicus

 And then some more trim...plus dry-brushing the body in preparation for final assembly.

Legio Tempestus Titan Dazzle Camouflage WIP for Adeptus Titanicus

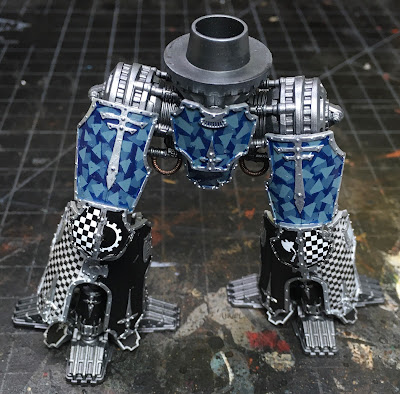
Assembly of the Warbringer leg armor went well without issue.  My custom checkered transfer work on the legs will require a lot of cleanup, but it looks passable from this angle. I made the conscious decisions to just move forward and come back to that later.

Legio Tempestus Titan Dazzle Camouflage WIP for Adeptus Titanicus

And now Liberatus Mortis walks too!

Legio Tempestus Warbringer Titan WIP for Adeptus Titanicus

So, with two days before the end of the month it's clear I won't have these titans complete.  But I'll make a good push on the Warlord, working right up to the bitter end Thursday, no doubt. I'm actually very excited to have these two titans very close to done.  The chosen color scheme is A LOT of work and it will be a good accomplishment to have two more titans complete.  I'll use the momentum to carry me on to completing the remaining Reaver and Warmaster iconoclast titans which will fill out the collection (I also have a Reaver and Warmaster waiting in the wings for Legio Ignatum).

So one more #MonsterMarch6 post after the 31st to share my results for the month, but there will be more to come before these two titans are in the DONE column. Congratulations to all of my fellow #MonsterMarch6 challengers out there!

How are your projects going?

Cheers and Happy Gaming!


Tuesday, March 22, 2022

MonsterMarch6 - Week Three Progress

#MonsterMarch6
credit: swordmasterofhoeth.blogspot.com


Greetings and welcome back to MonsterMarch here at 262Krieg. Happy Spring!  Week three had me peeling the remaining tiny tape flecks off the Warbringer Titan armor for the final camouflage reveal.  That took a lot more time than I expected to do well.

Legio Tempestus Titan Dazzle Camouflage WIP for Adeptus Titanicus

Lots of dazzling armor panels. I'm spoiling the next task for week three - custom checker transfers for the leg armor.  More on than later.

Legio Tempestus Titan Dazzle Camouflage WIP for Adeptus Titanicus

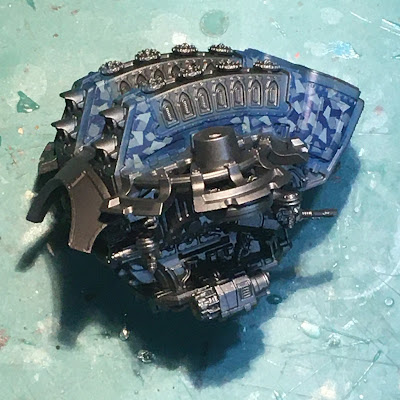
The body of the titan came out well.  There is a lot of metal cleanup needed due to over spray, but the camouflage looks good.

Legio Tempestus Titan Dazzle Camouflage WIP for Adeptus Titanicus

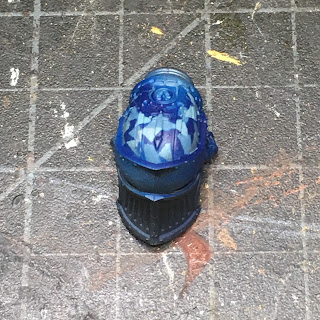
The Warbringer's head sports a camo beanie.  Lots of cleanup and general painting needed on the head now.  But the beanie looks solid.

Legio Tempestus Titan Dazzle Camouflage WIP for Adeptus Titanicus

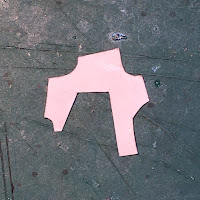
  SO....those checkered leg panels.  I spent/wasted a BUNCH of time working on the transfers.  First I had to make patterns.  Then trace them onto the custom decal sheet and cut out the transfers.  And finally they needed to be applied.

Legio Tempestus Titan Custom Transfers WIP for Adeptus Titanicus

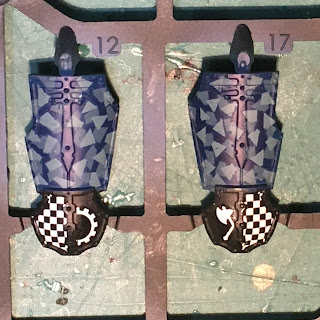
On the left is Warbringer template and on the right is the Warlord template. They are made from heavy paper stock.  I use tracing paper to get the initial shape, then transfer that to paper and hand cut the results to get the best fit using fine, sharp scissors and a hobby knife.

Legio Tempestus Warlord Titan WIP for Adeptus Titanicus

I used an original custom transfer sheet I printed back when the first Tempestus engines were painted.  It's not great and I've learned a lot since.  But I wanted to be sure I has a consistent checkered pattern across all the engines. I wasn't confident that I'd get the check size correct, for instance, if I printed a new sheet. I could have done a better job archiving my artwork there.

Legio Tempestus Warlord Titan WIP for Adeptus Titanicus

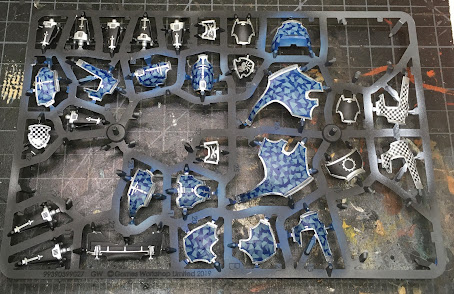
With the little time left me in the week, I got started on the Warlord's armor trim.  And there is plenty of trim to paint.  The colored panels start to show their worth with the trim properly framing the designs.  While I have a lot of parts on sprue, you can begin to see that the project might be further along than it seems. During week four, I will be cleaning up the metal skeleton and dry brushing everything in preparation for assembling all the armor.  

With the titans assembled, all the detail painting will begin...and ultimately the bases will be painted (and in the case of the Warlord, assembled).  I'm pretty happy that March has five weeks this year!  I'm going to need it. But good news, progress will really accelerate now that all the time intensive, fussy bits have been completed.

Check back to see these tiny, yet mighty, engines walk.

Cheers and Happy Gaming!


Tuesday, March 15, 2022

MonsterMarch6 - Week two progress

#MonsterMarch6
credit: swordmasterofhoeth.blogspot.com

Greetings, and welcome to week two of MonsterMarch6.  As you read this, we will likely be in week three with the projects going strong.  Check out the recent challenge page to catch up with all of the other MonsterMarch6 projects.  During week two I kept up a good pace masking and spraying camouflage colors.

Legio Tempestus Titan Dazzle Camouflage WIP for Adeptus Titanicus

After a second round of taping tiny flecks of paint, I sprayed down the final camouflage color and let that dry, hoping for a good result once the tape came off.

Legio Tempestus Titan Dazzle Camouflage WIP for Adeptus Titanicus

While waiting for things to dry, I decided to apply many of the transfers to panels that were not being camouflaged.  I have previously done this at a later stage, but I feel this time I'll get a better result if the transfers are around for the shading/weathering process.

Legio Tempestus Warlord Titan WIP for Adeptus Titanicus

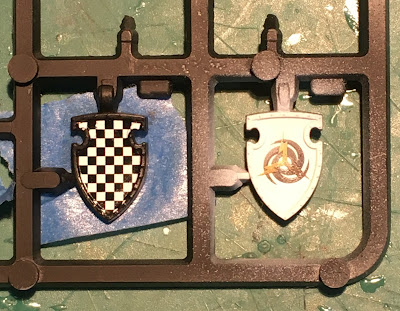
These transfers come from the GW Legio Tempestus transfer sheet.  Fun fact, decals can be applied upside down!  This became critical once I realized that the provided transfers for the gun shields, only fit one way.  By flipping them over, I was able to have the same quadrants checkered on both left and right gun shields. The fit was decent; much better than me trying to hand cut custom decals.

Legio Tempestus Warlord Titan WIP for Adeptus Titanicus

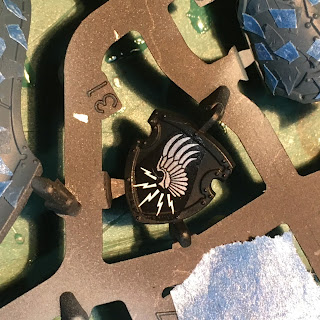
I continue to paint my Tempestus engines as loyalists - apparently only recently turned traitor for the game.  It's interesting that the provided transfer sheets don't provide a traitor look, and stay with loyalist iconography from before the fall - at least there is a noticeable lack of chaos or Horus iconography provided for Legio Tempestus.

Legio Tempestus Titan Dazzle Camouflage WIP for Adeptus Titanicus

I very much appreciated the checkered transfers for the shields and knees.  Here, I have taken advantage of the left and right transfers to split them up and mirror the checkers on the outside lower leg armor (which I will sadly have to cut custom again...).

Legio Tempestus Warbringer Titan WIP for Adeptus Titanicus

The Warbringer gets some sassy shields too.  I'll have to look at the model more as it develops to determine if I add additional transfers to the Warbringer.  I assume I will.  It has many more camouflaged panels, so I am unable to apply transfers at this stage in any case.  At the very least, I'll need to cut custom leg checkers. Much of the iconography does not look great over the dark camouflage, which is also a consideration.

Legio Tempestus Warbringer Titan WIP for Adeptus Titanicus

With the decals applied and the last layer of camouflage paint dry, it was time to begin removing the tape.  The reveal is always a treat, but the process is trying.  The layers of paint hold the tape flecks down well, and some care is needed when lifting them off to avoid making a ton of scratches in the new paint.  A few scratches are fine and can either be touched up or painted as damage.  Here's how the Warlord panels have turned out.  I haven't yet pulled the tape from the Warbringer armor.

Legio Tempestus Titan Dazzle Camouflage WIP for Adeptus Titanicus

Pretty snazzy and appears to match well with the prior engines (all save the Reavers that got the original larger fleck pattern).

Legio Tempestus Titan Dazzle Camouflage WIP for Adeptus Titanicus 
 
There's the Warlord's main body.  With all the details painted up, the little bit of camouflage here should look cool.  I have a bunch of over spray to deal with though, which is a drag, but part of the process unless you really like additional masking fun!
 
Legio Tempestus Titan Dazzle Camouflage WIP for Adeptus Titanicus
 
With the trim painted these leg panels should look great.  Lots of contrast and interest in the leg armor. Early in week three I'll be removing the tape from the Warbringer and cranking up the heat on my brush painting.  There is A LOT to do before the end of the month.
 
Legio Tempestus Titan Dazzle Camouflage WIP for Adeptus Titanicus 
 
So that's it for week two of the painting challenge.  The camouflaged panels are complete and it's time to get cranking on the rest of the paint work.  My goal it to advance the paint work to a point where I can have the models assembled by the end of week three.  That would leave week four for cleanup and base painting.  Not much time for two engines, but we'll see where we get to!

Best of luck with your own projects.

Cheers and Happy Gaming!


Tuesday, March 8, 2022

MonsterMarch6 - Week one progress

#MonsterMarch6
credit: swordmasterofhoeth.blogspot.com

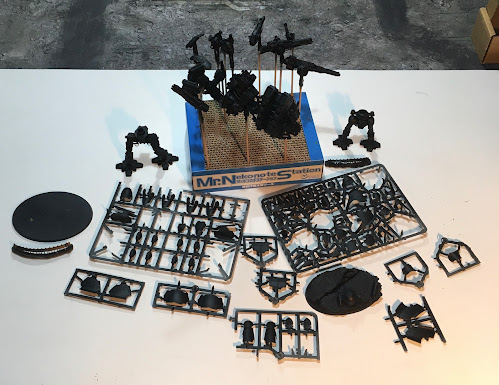
So we're into #MonsterMarch6 with both feet now.  This first week was all about priming and setting the base colors for the armor and infrastructure of the titans. The end results aren't much to look at, despite the progress involved.  Before laying down colors, I spent some time noodling on how I wanted the livery of the titans to come out.  The key decisions for the Tempestus were what was going to be camouflage, and what was going to becheckers, and what was going to be black and/or white.  So just a few things to consider.  This led ultimately to piles of sprue with various colors across them...

Legio Tempestus Titan WIP for Adeptus Titanicus

These bits are either dark steel/silver or black/white in color.  The Legio Tempestus transfer sheet has some white and blue checkers for certain specific components, so those are painted white, along with the things that were going to be white anyway.  I'll have to manage more custom transfers for the leg armor, and possible a couple more bits, but it's a little less than before at least.

Legio Tempestus Titan Dazzle Camouflage WIP for Adeptus Titanicus

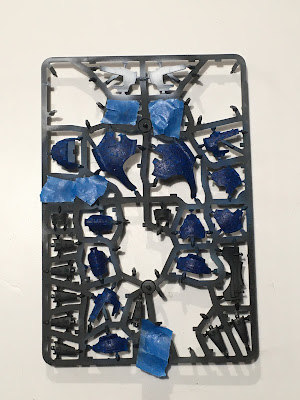
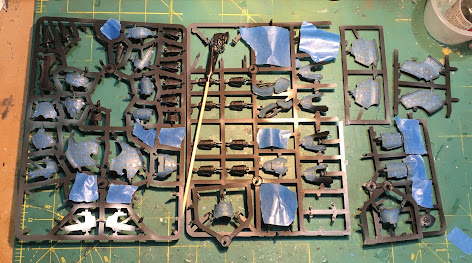
 Then, of course, there is those bits that need camouflage.  In the image above, certain bits are totally masked off against the risk of any over spray from painting the camouflage colors.  Other bits are far enough away that I should be able to miss them, so no masking there.  If you click through, you'll see all the various bits of blue painter's tape masking off the first layer of camo shapes.  This is where most of the week went.  It's a lot of individually cut flecks of tape, lovingly applied in a random, pleasing pattern on each tiny piece.  Oh, and lets not forget the titan bodies...

Legio Tempestus Titan Dazzle Camouflage WIP for Adeptus Titanicus

Getting the tiny pieces of tape into all the little areas of the model is super fun.  Honestly, you really must give it a go some time.

Legio Tempestus Titan Dazzle Camouflage WIP for Adeptus Titanicus

No, really.  Just try it out.  You'll be amazed at how therapeutic it can be.  You'll save lots on needless counseling costs - well you would if the models weren't so damn pricey.  But let's get back to the therapy.

Legio Tempestus Titan Dazzle Camouflage WIP for Adeptus Titanicus

It was so fun, I'm including a simple step by step guide here so you can join me in the journey from little tape fleck to mighty completed Titan.  It all starts with blue painters tape and just enough enthusiasm (insanity?) to make the first cut. And while we're on the topic of cutting, this is the time to replace that nappy dull blade from scraping sprue with a shiny new one.  The process to follow will go MUCH easier if you have a sharp blade...

Legio Tempestus Titan Dazzle Camouflage WIP for Adeptus Titanicus

Ok, so you've cut a strip of tape and stuck it down to a cutting mat (if you chose the dinning room table, I'm not responsible for the consequences...).  Now start with a couple long cuts to divide the tape into small strips, this is going to ultimately determine the size of your flecks, so plan ahead.  I've started using 2" wide tape so I can spend more time cutting flecks and less time setting up the tape.  Next you begin slicing off little triangles, trapezoids, rhomboids, parallelograms, or whatever suits your particular condition.  You'll destroy the cutting mat surface so plan ahead and don't use your favorite mat or any other cherished surface. I think the pic above makes the results clear, so 'nuff said there.

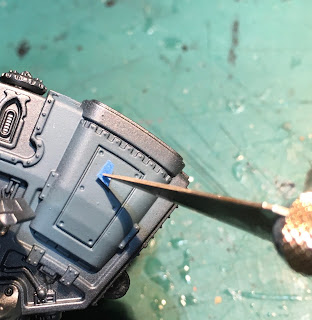
Now, I used to use tweezers, but it's fiddly and I scratched a lot of paint.  So now, I gently stick my craft knife into the fleck and lift it up as shown above.  The painters tape isn't that sticky so this generally works.  When you inevitably pierce, tear, fold, crumple or drop a fleck, simply curse appropriately and cut a new one.  You're going to make hundreds if not thousands of these so a few in the bin is hardly a concern.

Legio Tempestus Titan Dazzle Camouflage WIP for Adeptus Titanicus

Now carefully stick the fleck to the model, being careful not to scratch the paint with the tip of the knife. This mostly works, and pressing down with a finger or other device (not the sharp point of the knife!!) is recommended for a good seal.  If you want sharp crisp shapes, you don't want spray getting under the tape much.  Now keep at it until it looks like the pic below. If you've found a better method, please don't share it.  I have wasted far to much of my life doing it this way to hear about any better methods now.

Legio Tempestus Titan Dazzle Camouflage WIP for Adeptus Titanicus

If you made it this far, congratulations! You only have 2645 more flecks to go.  Keep at it, champ!  Note the somewhat irregular shapes and the random placement.  If there is any art here, it is in the placing of each shape to fill the space with interest.  I try to avoid all the lines and angles going in one direction.  Also, there will be two layers of tape, so you need to leave room for the next round of shapes or you won't get much of an overlapping pattern.  Oh, didn't I mention that at the top?  Yes, that's right.  After a coat of the second camo color dries thoroughly, you'll go back and DO IT ALL AGAIN.  Remember, service is its own reward.  If you stuck with the process above, your panels will look something like this.

Legio Tempestus Titan Dazzle Camouflage WIP for Adeptus Titanicus

I applied tape to 27 panels/parts and two titan bodies. It's a lot.  Leave plenty of time, and have a generous amount of your favorite libation on hand.  And yes, you're using a sharp knife so hobby responsibly, or accept the consequences.

This camouflage approach is painted "inside-out" in the sense that the first layer of paint is the top image that appears in the camo pattern.  The last layer of paint is the color that appears to be "under" all the camouflage flecks. The full recipe is in the Legio Tempestus tab above and a longer tutorial on painting dazzle camouflage is here.  Note that after the first two Reavers, I determined that I liked the pattern better with smaller flecks of tape.  Takes MUCH longer, but the look is less jarring (to me at least), with less dark blue showing.

So...into week two, I'm painting the second camouflage layer, re-taping everything and making some progress on the other panels. I'm interested in how the checker transfers from the GW transfer sheet will work on the panels and looking forward to hand cutting my own custom transfers for the rest.  My scheme for these titans is so much more a hobby project than a painting project, compared to the Legio Ignatum engines.

Best of luck for your projects.  Stay safe out there.

Cheers and Happy Gaming!


Thursday, March 3, 2022

MonsterMarch6 Pledge - 2 Titans for Adeptus Titanicus!
 

#MonsterMarch6
credit: swordmasterofhoeth.blogspot.com

Greetings and welcome to the beginning of #MonsterMarch6!  This is my fourth year participating.  MonsterMarch is a community painting challenge where the main goal is to assemble and paint something monstrous within the month of March. Since I don't currently collect or paint anything in the Fantasy genre, and I don't collect demons, tyranids, or anything else in the sci-fi realm that is a monster, I choose titanic stompy robots.

Legio Tempestus Titans for Adeptus Titanicus WIP

My budget, however, precludes me from collecting anything truly titanic, so I settle for 8mm Titanic monsters.  This year I will be painting not one, but two 8mm scale titans from the Adeptus Titanicus game. I pledge that by the end of March this loose collection of primed black plastic will assemble itself into two gloriously painted Legio Tempestus titans.  There it is in writing, the gauntlet has been thrown down.

Legio Tempestus Warlord Battle Titan for Adeptus Titanicus WIP
Martis Renes during the Rite of Construction

The first monster will be the warlord battle titan Martis Renes.  This is the main goal, if I'm being honest.  This is the second titan for my Legio Tempestus maniple and will be painted in the now infamous traitor camouflage scheme.  It's infamous because I painted my first seven titans in this scheme as loyalists before realizing that I had pulled inspiration for a traitor scheme from the Forge World books. By then the Adptus Titanicus books made clear that Tempestus falls among the traitors in that game anyway.  This, despite the lore allowing for the true loyal members that fought on against the traitor Horus from within various Compliance Fleets and on Mars (briefly, before annihilation at the hands of Legio Mortis).

Legio Tempestus Warbringer Nemesis Battle Titan for Adeptus Titanicus WIP
Liberatus Mortis during the Rite of Construction

The second titan will be the warbringer nemesis battle titan Liberatus Mortis, also with Legio Tempestus.  While a smaller titan, the warbringer has MANY more armor plates to paint, as I learned first hand while painting my first for Legio Ignatum.  I will batch paint these two titans to a point, but if things get tough my focus will be on completing the Warlord. So the warbringer is a private stretch goal.  However, recall that the gauntlet on two titans has indeed been thrown down. So I will not use that as an excuse if I don't meet the pledge!

For information on how I magnetized and based the Warbringer Nemesis titan, checkout the following posts:

 And for a bit of nostalgia, here are my previous MonsterMarch titans:

#MonsterMarch3 Warlord Titan
#MonsterMarch3

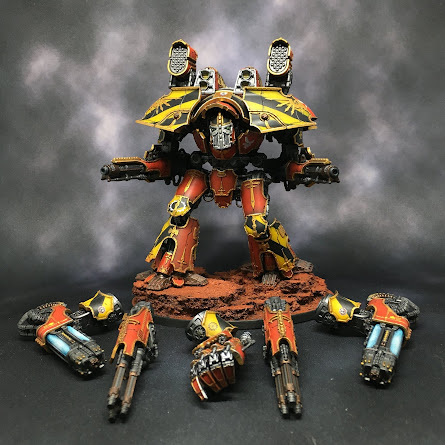
This mighty titan provides a glimpse into the future for #MonsterMarch6.  Martis Renes will soon look similar if all goes well.  Between checkers and camo, this paint scheme is super fun and super fast to complete...NOT.  Seriously, I'll go insane, but the spectacle should be worth the visits, so stick around.

#MonsterMarch4 Warlord Titan
#MonsterMarch4

I'll note here, for any who follow the links, that I had a Legio Ignatum Warbringer as a stretch goal during #MonsterMarch4 as well, but I was too cowardly (wise?) at the time to pledge it formally!  And...I didn't complete it during the challenge either.  This is totally NOT foreshadowing, however.

#MonsterMarch5 Warlord-Sinister Psi-Titan
#MonsterMarch5

Wow.  This is still my favorite of the Warlord class titans that I've painted thus far.  But enough of that indulgence in the nostalgia of past challenges.  It's past time to get painting!!  Best of luck with your own projects if you are joining in the fun (publicly or otherwise - there's no shame in lurking!).  I'll post twice a week during the challenge to share progress and painting stages, provided I have something meaningful show for it. 

That's that for now.  Stay safe out there.

Cheers and Happy Gaming!