Showing posts with label Magnets. Show all posts

Saturday, November 9, 2024

On the Workbench [November] - Dark Angels Primaris Impulsor!


Dark Angels Impulsor WIP
Greetings and welcome back.  Coming off of DreadTober 2024, I needed a painting palate cleanser...a new build was just the thing!  I've been sitting on this Impulsor for quite awhile, including the 3rd party resin upgrades. I have always had a hard time accepting the open back of the Impulsor...so this was a must have upgrade for me.

Dark Angels Impulsor WIP

The details are great, though perhaps tough to see in the translucent resin currently. The back hatch even opens...

Dark Angels Impulsor WIP

The front armor is glued down, but the back has been magnetized so I can still paint and run the transport in it's original form.

Dark Angels Impulsor WIP

Having things this open will make painting the interior a breeze too! You should be able to make out two magnets at the back and two at the top where the roof meets the copula deck. This was a simple modification that helps maintain the original look while catering to my personal taste too. Win!

Dark Angels Impulsor WIP
The top hatch can take all of the Impulsor options.

Dark Angels Impulsor WIP

And then the full roof can be replaced with the original bits...

Dark Angels Impulsor WIP
Pretty cool!  The only sign of the mod is the two magnets at the back, but those won't show much after painting, I shouldn't think. I could go after them with putty and sanding until they were invisible under paint, I suppose...not sure it's going to be worth the effort since I want the roof on most of the time anyway.

Dark Angels Impulsor WIP
So that's what I've been up too. Next I will put this tank aside and finish the squad of terminators I was working on in September prior to DreadTober. They already look great so it shouldn't take too long I hope. Then I'm not sure where I'll go...this tank?  Tiny Horus Heresy models?  I really can't say. Something fun for sure though.

Cheers and Happy Gaming!


Tuesday, October 8, 2024

On the Workbench [September] - Just Move! and other tiny stuff...


Just Move! WIP
Yes, I joined the movement! OK, truth be told, I'm not much of a joiner...and my background in Software and Network Security keeps me off most social media channels.  But when I saw Just Move from Miniwargammer Dave pop up on Instagram, I had to get involved...sort of.  I love the message, and I will paint this mini after DreadTober and share the results on Instagram. I won't likely join the Discord and other social stuff.  But I WILL move...and I am moving.  You should too! It's really easy...Just Move!

Dark Angels Sabre Strike Tanks WIP

I also built Sabre Strike Tanks - so tiny and so fun!!

Solar Auxilia Leman Russ Annihilators for Legions Imperialis WIP

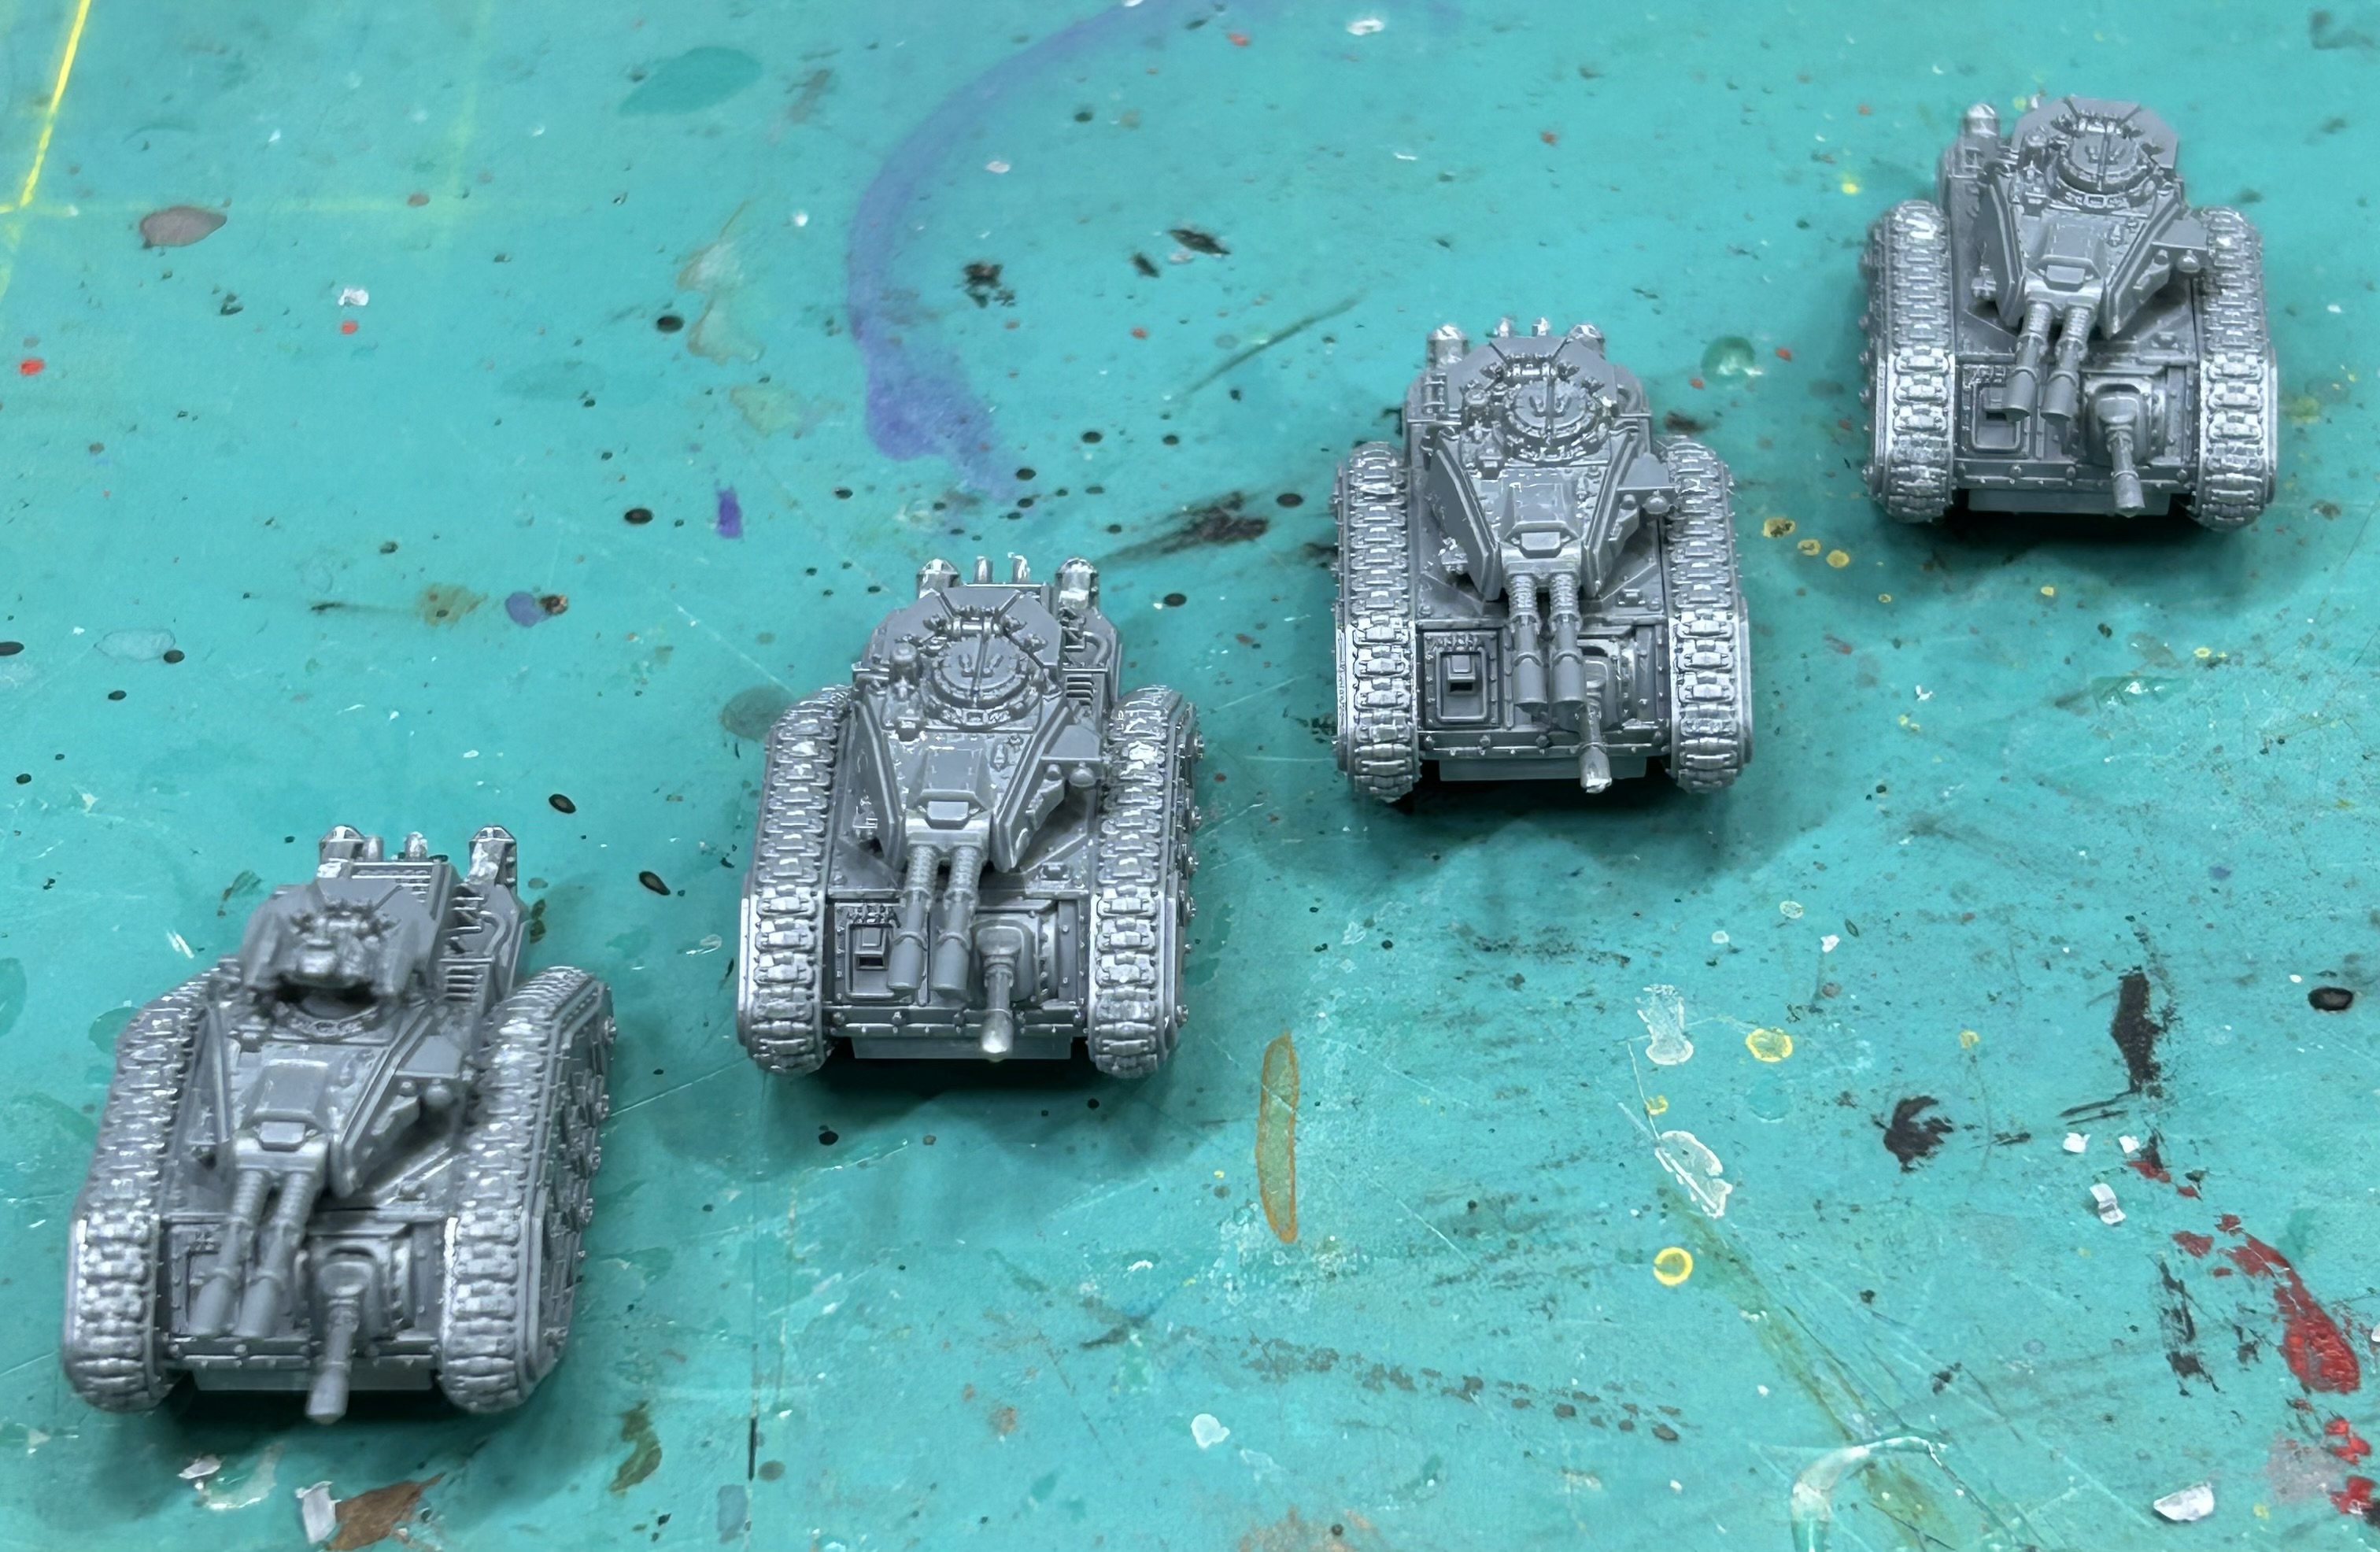
And more Leman Russ battle tanks.  Four Annihilators are pictured here, but I also built four Exterminators, four Executioners and four Demolishers. Somewhere along the line I stopped taking pictures of the builds...I guess because there have just been so many tiny armor kits! I also built two Sicaran Arcus and two Sicaran Punisher variants.  I have a least one of every kit now except for Termite Assault Drills.  I don't love them on the table top, and there are just SO many Astartes transport options. I have more transports than models to put in them!! OK, if I'm being honest, I will of course pick up that kit at some point..but right now I'm standing firm...NO TERMITES! 😁

Solar Auxilia Stormswords for Legions Imperialis WIP

Ah!  And I almost forgot the Stormsword variants.  I did get pictures of these, mostly because I magnetized the options.

Solar Auxilia Stormswords for Legions Imperialis WIP

You just *have* to magnetize these tiny tanks.  You get all the weapon hardware for each variant, so it's a shame *not* to. I used green stuff in the weapons to simply hold the magnets in place using the existing void areas there which were already big enough (mostly) to hold the magnets.  I might have drilled out a bit here and there to enlarge the space. Then I drilled holes in the tanks for the other magnets...keep your polarity straight here! If I ever play this game, it'll no doubt be with the volcano cannons, but I love the look of the plasma (and, Dark Angels!)...so then why leave out the Demolisher's older brother?

So it's been a busy month of builds...no wonder I struggled to complete ten Deathwing Terminators!

But now we're in DreadTober, so time to get back to the Invictor Tactical Warsuit...

Cheers and Happy Gaming!


Friday, October 4, 2024

DreadTober - week 1 progress!


Blades of Vengeance Invictor Tactical Warsuit WIP
Greetings and welcome to DreadTober, that time of year when a group of Warhammer hobbyists rally around to paint up something dreadnought sized. This year I'm painting a Primaris Invictor Tactical Warsuit for the Blades of Vengeance, a successor chapter to the Dark Angels.  I wanted to add a successor to my Dark Angels collection and decided all of the new Primaris vanguard models would fit perfectly into a small force that I could ally into my main collection of Dark Angels space marines.

Blades of Vengeance Invictor Tactical Warsuit WIP

Week one is about the build, priming and getting stuck in with the project.  The Invictor Warsuit naturally builds in these sub assemblies, without effort. The Warsuit cockpit is designed to open in a manner similar to the other Primaris dreadnoughts. So I decided magnets would be the way to go here so I could remove the marine and not be concerned that he'd randomly fall out while handling the model.

Blades of Vengeance Invictor Tactical Warsuit WIP
A simple 2mm x 1.5mm cylinder magnet did the trick nicely. Sure it damages the suit connection point for display purposes, but I expect to keep my marine in the cockpit most of the time.  I could have glued a larger powerful magnet inside behind the seat, perhaps, to hide it.  But this approach provides a firm bond and was quick and easy to do.

Blades of Vengeance Invictor Tactical Warsuit WIP

The same size magnet fit in the cavity at the back of the marine's torso...maybe I drilled it out a little bit?  I should have taken notes...anyway, it does nestle in nicely. I used extra five-minute epoxy to fill the whole space and ultimately secure the magnet in place.

Blades of Vengeance Invictor Tactical Warsuit WIP

Here the drive is seen securely seated in the cockpit. Other than this simple tweak, the remaining model was assembled stock with no further customization. I did look into the bits box for some bling, but I felt my choices were all too specifically Dark Angels, and I don't want the Blades of Vengeance models to look just like Dark Angels with a slightly different paint job.  The Blades are an all Primaris chapter formed from Adept Cawls machinations (Praise be to the Omnissiah), and so they lack the ancient traditions and rituals of the Dark Angels.  This leaves them a little...plain...I guess, in my imagination.

Blades of Vengeance Invictor Tactical Warsuit WIP

Speaking of plain, here are the parts after a coat of matte black primer.  I went with a rattle can, because I have a spray booth vented to the outside; and why not. It let me down this time though, and I got some texture and fuzzing, or dusting, in places. This bummed me out, and I almost switched projects for DreadTober.  But thinking it through, I didn't mind the texture for a war machine.  After paint and weathering, I don't expect it to ruin anything.  it may actually add to the rugged feel of the machine when all is said and done.


In the title pic at the top, you can see much of the main colors blocked in.  I used an air brush to first lay down the dark silver, then the other colors carefully (sort of) over top. Then I went back with the brush and touched up the over spray; that is something I really haven't mastered with the air brush. But practice makes better?  Anyway, as I head into week two the remaining details will be completed, transfers added, and I'll shade everything.  Then I'm guessing I'll be highlighting and cleaning things up during week three.  I may find time to build out the base too, so that I can paint it during week four to complete the project.

That's the rough plan anyway. Any we all know plans seldom survive contact with the enemy, in this case Life(tm); so we'll see how it goes. Thanks for stopping by, and do check out the link at the top for more DreadTober goodness. 

Cheers and Happy Gaming!

Friday, April 22, 2022

Magnetizing the Warmaster Titan for Adeptus Titanicus


Warmaster Titan WIP for Adeptus Titanicus
A naked Warmaster Titan Waiting for Primer

The Rites of Construction for Superbia Martis have finally concluded. I thought I'd take some time today to share what I magnetized and how/why. This process will be consistent with the approach I've taken with the other mini-titan projects that I have completed.  The larger AT kits are expensive and take up enough space that it's worth magnetizing a few options rather than building up an even larger collection of titans, which will then need to be painted, just to represent the various weapon load outs you may wish to play with.

Games Workshop appears to have embraced this reality in their Titanicus models by providing sockets for magnets in many of the expected places.  They also provide many options in a kit so you have something to magnetize. The Warmaster Titan kit is no exception.  In fact, with this kit, you are magnetizing things that don't even have options yet (arm weapons) or for which there are no current rules (the "small arms" on the upper carapace, similar to the Warbringer Nemesis Titan's anti-air guns).

So I'm going to start out with the caveat that some of the Magnetization here is purely for the hobby love and not something that is currently necessary for game play (though who knows where things will turn out down the road).  I'll call this out as I go. So let's get started with the obvious arm weapons...

Warmaster Titan WIP for Adeptus Titanicus

Those are BIG guns...and they never tire! Yes, that isn't an optical illusion - the Warmaster's arm weapons are as long as a Reaver Titan is tall.  We have the Warmaster Iconoclast titan with a different pair of arm weapons, but there is otherwise no optional armaments for the Warmaster at this time.  However, the magnet sockets are there, so why not future proof against the possibility of a future weapons sprue or new resin from Forge World? 

There's nothing novel to discus with the arm weapons.  The arms and shoulders have the expected 5mm x 2mm round sockets ready to go, same as the Warlord Titan.  Just glue the magnets in (watch that polarity!) and you are good to go. Here's what things look like under the "shoulders".

Warmaster Titan WIP for Adeptus Titanicus

But now let's look at the Warmaster's shoulder mounted weapons.  These weapons DO have a profile in the game, and the kit comes with all of the options - six in total.  Five of the weapons use the same shoulder socket, the sixth, missile launchers, attach INSTEAD of the other weapon socket piece which is a pain. I chose to ignore the missile option for now - but  may look into a scratch modification that allows me to attach the missiles to the same socket used by the other weapons.  If I sort that out, I'll post about it here. I imagine others out there in the blog-o-sphere may have already showed off their solution to that problem as well.

Warmaster Titan WIP for Adeptus Titanicus
the weapons socket with internal magnet installed

The socket in question looks like this after assembly.  The two halves that form the rectangular weapon mount include enough space inside for a rectangular magnet, 6mm x 4mm x 2mm. This size magnet was not easy to find, but a little web research landed me here. They shipped promptly and the magnets are quite strong.  I expect I'll find other uses since I only needed two but had to buy 50. 😂 An all too typical hobby story for me...

Warmaster Titan WIP for Adeptus Titanicus

Unfortunately the weapons themselves are not so easy to magnetize. You might consider getting away with some blu-tac or other mounting putty.  But if like me you have a passion for magnets, then there are options.  The male portion of the socket, shown above, is a bit small for a typicall 3mm diameter disc or rod magnet.  I could have saved some time, maybe, by using a 2mm diameter rod magnet, but I had concerns over the strength of the attraction I'd end up with.  So here's what I did.

I carefully sliced off the male portion of the weapon the fits in the shoulder socket, and then drill out two holes for 3mm x 2mm disc magnets underneath it. After the magnets were glued in place (a pain since they want to fight each other due to polarity issues), I glued the male portion that I sliced off back in place over the magnets.  This isn't strictly necessary, but helps the stability of the whole assembly when the weapons are locked in place. This worked well, despite the fidgety work involved, and I was content with the resulting strength of the magnet pull.

However, each weapon is different, so I've only bothered with two options out of the five so far.  I'll come back to that at some point.  It didn't' seem worth holding up the rest of the project for at this time.  Suffice to say that you might find yourself working out five different solutions to get each pair of weapons prepared.  But in the end it's cool to have the weapon swaps since these weapons have stats in the game.

Warmaster Titan WIP for Adeptus Titanicus

The "small arms" on the carapace (only in the 40K universe could demolisher cannon be considered small arms) have pre-molded sockets, so that was back to easy mode.  One word of caution though.  The magnets in the shoulder underneath these can mess with your polarity, so try to think ahead and align everything in the same direction to avoid unneeded hassles later. In this case, I ignored that advice and arbitrarily put magnets in the weapons first before realizing that I chose an orientation opposite what I had used for the arm weapon socket in the shoulder.  Between that and the shoulder weapon socket which is strong and at a 90 degree angle of  pull to the rest, the little magnets on the carapace want to flip over without another thought.  Had I used the same polarity as the arm weapon mount, I should not have had this issue.  It was no big deal in the end, just a bit more patience with the gluing to be sure the magnet doesn't flip in the socket before the glue sets enough to hold it. And the one socket out of four I had to dig the magnet out of and re-glue when I realized it had somehow gotten away from me and flipped anyway.

Warmaster Titan WIP for Adeptus Titanicus

Otherwise this is a trivial magnet project if you have 12 3mm x 2mm (measure - they might have been 3mm x 1mm sockets, I honestly forget) disc magnets. The carapace weapons have no rules currently,  so you wouldn't be wrong to just pick four and glue them down, skipping the extra magnet project. You can choose between what look like demolisher cannon or the same AA guns used by the Warbringer. With the sockets provided, and the magnets already in my inventory, it was a no-brainer for me to just go ahead and magnetize the lot. I'll be smiling if rules come out later that cause me to care what's up there in a game. At least the Warmaster comes with two options unlike the Warbringer which I magnetized for literally no reason in the current model line. 😆

Warmaster Titan WIP for Adeptus Titanicus

So that's my beta on the whole Warmaster magnetization project.  You can magnetize the waist joint as well with BIG disc magnets.  But I am not doing that with any of my AT titans.  I have a floppy, spinny 40K Knight Errant that proved to me why this isn't worth it for gaming.  Best case you use strong magnets and the model holds together but spins about randomly when bumped.  Worst case, you pick up the top and the bottom falls off with the slightest bump.  You'll have enough issues with the arm weapons coming off when you grab the model wrong. It just leaves a fragile/vulnerable point on the model that isn't beneficial unless you have real space constraints for storage. I'm content to store these models on their back using Battlefoam Adeptus Titanicus trays.

So that's way to much to say about magnetizing Warmaster Titans.  I learned most of my hobby skills from many similar accounts on other blogs in the past, so I hope I've provided something useful to you here in return.  Next up will be the first in a series of painting articles on this beast. The primer is already dry and by the time you are reading this, I will no doubt have already put the air brush to work.


Stay safe out there.

Cheers and Happy Gaming!


Tuesday, July 27, 2021

On the Workbench [ Bonus] - Horus Heresy 1st Legion Fast Attack

 Horus Heresy Dark Angels Fast Attack WIP

 Greetings.  Recent work on heavy support options for my First Legion Horus Heresy force got me excited to keep on assembling resin goodies.  So I dug out the fast attack options I've been sitting on and laid them out on the work bench. 

Dark Angels Scimitar Jetbikes WIP for Horus Heresy

Three Scimitar pattern jetbikes backed up by a Javelin attack speeder will one day support my force on the battlefield.  These hovering machines can deep strike and easily maneuver into position to outflank enemy units.  I hope to use them as both a distraction and to support other forward units of the Dark Angels.

Dark Angels Scimitar Jetbikes WIP for Horus Heresy

Assembly was pretty painless, though the riders were a bit fiddly; not due to any issue with the models themselves, just because working with epoxy can be a bit challenging when assembling arms into a specific position. Five minutes is not a long time for glue to set, but compared to superglue, it becomes an eternity. That said, I'm never going back to superglue for the bulk of my non-plastic assembly. Much better overall adhesion with a much less brittle bond.  Using pins could have helped, however then I'd have to be even more precise to get the holes in the bodies and harms just right to be sure the models could hold their handle bars correctly. I liked being able to make small adjustments as the glue set. The angle of the body as it sits on the legs determines the reach of the arms, assuming the arms are properly lined up with the shoulders.  Thankfully, the large shoulder pads cover up most imperfections if the alignment isn't quite right. 

In hindsight, I could have glued the arms to the torsos first, taking care to keep the arms parallel and at 90 degrees (roughly) to the torso.  Then, with that glue set, I could have clamped the hands on the handlebars and just let the torsos drop onto the legs at whatever angle they needed.  As it was, I had the torsos glued to the legs fully upright, with backs to the backrests, and that left the arms just a mm or two too short for the handle bars. So I had to snap the torsos off and glue them again, leaning forward a bit more, to correct the reach.

Here they are fully assembled.  The various weapon options have all been magnetized.  I used 2mm x 5mm rod magnets in the body and 2mm x 3mm rod magnets in each weapon.  For stability, I used two magnets for each as shown in the images below.  Probably not necessary, but I had the magnets and past experience as shown me that skimping can make for some fiddly models with bits dropping off and getting lost when a model is handled..

Magnetizing Scimitar Jetbikes

Lining the magnets up will get you the best effect.  I haven't done a perfect job with that, but the pull is fine and the weapons all snap in solidly.  The rod magnets pull on each other, so while the glue was curing I needed to watch out for one or more of them rising up out of their socket to join their neighbor.  This only happened with a couple, due mostly to the holes being slightly large for the magnet.  This happens when I allow the drill bit to wander while using the pin vise. It's a small issue, but something to look out for if the pull of the two neighboring magnets is strong.

Magnetizing Scimitar Jetbikes

The Javelin attack speeder went together easily too. I was pleasantly surprised to find how well everything fit together, when compared to some other Forge World kits I've worked with in the past. No option come with this kit so nothing is magnetized.  I could have done something fancy with the crewed weapon so I could swap for other options pulled from the bits box, but I decided to stick with the Heavy Bolter.

Dark Angels Javelin Attack Speeder WIP for Horus Heresy

I didn't take any work-in-progress shots as I was building the speeder. But I have a couple different angles to show.

Dark Angels Javelin Attack Speeder WIP for Horus Heresy

I got these models when the Dark Angels had special Heavy Bolter ammunition, something that got removed in book 9 when the rules were updated. Otherwise, I might have preferred lascanon and multi-melta for tank hunting here.  I imagine twin-linked krak missiles will do some work, esp. in all the games I'm not playing. 😂

That does it for the fast skimmer support.  At this point, I have assembled most of the units for the army.  All that is missing now is a handful of specialists, like Apothecaries, Techmarines, and the like. And I have plenty of plastic troops to build should I ever run out of things to add to this project. Oh, but how could I forget - of course, I also have to build the Companions and Lion'el Johnson!

Never mind that we appear to be getting something big and new for the Horus Heresy game in general  later this year...I honestly don't need more models for this particular force or game! 

Always great to have new things to work on though.

Cheers and Happy Gaming!

Monday, May 24, 2021

How To - Magnetizing a Warbringer Nemesis Titan


With Forge World's recent release of a Volcano Canon Carapace weapon for the Warbringer Nemesis Titan, I decided it was time to add this titan to my Legio Tempestus battle group.  This will even up the odds somewhat with my Legio Ignatum force which already possesses a Warbringer Titan.

If you haven't been warned yet, understand that the new Volcano Canon kit for the Warbringer includes just the gun barrel assembly, and not the mount it goes in.  So if you glued in the Quake Canon, as I did, you're going to be out of luck for the new weapon unless you fancy a delicate operation to cut the glued weapon free so you can magnetize everything.

With this new Warbringer, I set out to magnetize everything properly from the start. Let's see how things turned out.

The Warbringer is pretty easy to magnetize, with only a couple scratch build bits, depending on how you want things to turn out.  For example, I like to magnetize the carapace weapon mount.  I did this originally so it could be swapped out with a new weapon mount.  Based on how the new volcano canon option has gone, this step is not really necessary. I went ahead and matched what had already been done for my first Warbringer titan, but feel free to skip this.

I started by gluing a magnet over the hole where the weapon mount attaches, from below and inside the titan's body.  You can see this in the picture above.  I use 5-minute 2-part epoxy and I'm sure to cover the whole magnet in epoxy to limit the possibility that the magnet may one day come lose and rattle around in the body of the titan. magnets are put in the supplied sockets on the upper arms as well.

From the top, you can see the large magnet covering the hole where the carapace weapon mount goes.  Additional small magnets (1mm x 5mm) have been glued into the sockets where the AA guns sit as well. I have lined up all of the magnet polarities top to bottom so they pull on each other rather then repel...otherwise its hard to get the glue to set right if the magnets are being pushed out of their holes by their neighbors above or below.  I guess if you glued things one-at-a-time, letting the glue dry in between, this wouldn't be an issue.  Still, to me this approach just made sense.

2mm x 10mm magnet in place

Now the scratch build - which is really customizing here.  I have used a razor saw to carefully cut off a portion of the weapon mount that would have extended into the hole in the carapace, now covered over by the magnet in the body.  Measure twice, cut once, as the saying goes.  The goal was to take off enough plastic to allow a new magnet to be glued on.  The end result is the mount sitting flush where it belongs in the carapace with full contact between the magnets. Now...I am using large magnets here, based on what I had on hand.  There is a lot of magnetic pull and it is a bit of a pain in the end because the attraction is very strong.  But I don't have to pull the mount off much, so I don't mind.  One could go further with some plasticard and smaller magnets, I imagine, to get the same result with less attractive force (using smaller magnets). Even using a 1mm x 10mm (3/8") magnet might help some.

 
The arm weapons and AA gun mounts get magnets too (1mm x 5mm). When gluing the magnets into the weapons, use care to keep the rectangular sockets free of glue (I had to dig some out as it was drying).  These are where corresponding pegs on the arm slot in based on which side you put the weapon on and align the weapon correctly with the cable coming down from the body.

At this point I had a collection of bits as shown above, magnetized and ready for paint. Now it was time to stare at the Quake Canon a bit to see how bet to magnetize it so the new Volcano Canon option could be swapped in.

The one challenge to over come was removing the rings form the mount halves that would insert into the sides of the barrel.  Magnets will go there, and we can't have anything inserting into the barrel if it has to come out once everything is glued up...I want flush magnet-to-magnet contact only. Also, there isn't enough room for a magnet to sit in in the mount halves, once the rings are removed, so I had to dremmel new holes with a router bit. Not fun, and MUCH care should be used to avoid routing a hole in anything else - like fingers holding the halves during the process.

The barrel was the easy part, just drop in a magnet on each side. A word of advice, I matched the polarity here so everything is in line.  This has the effect of drawing all the parts together (mount and barrel) rather than have things being forced apart.

The dremmel router bit (small) did a a fine job of removing the rims and making a new sockets for the magnets.  I exercised great care here to insure I did not cut through the sides of the mounts.  There is not much plastic to work with here at all.  But I managed a mm deep socket for the 1mm x 5mm magnet. It's not pretty, but once the gun is in place you cant see the magnets or their rough cut holes anyway.

 From the top, you can see that nothing of the magnets is seen to obstruct the gun barrel from dropping smoothly into the mount. The magnets provide enough force and friction to hold the barrel in place at any elevation.

And here we have the mounts and weapon all magnetized in place.  It's a bit of a journey, but as you read, most of it is straight forward with a bunch of 1mm x 5mm magnets.  It's really nice to see Games Workshop put the magnet sockets in the design.  These models are NOT inexpensive and it helps folks make the most of their investment when weapons options can be changed so easily.

That said, there was no such provision  made for the carapace - possibly to future proof sales so that folks would need new titans to use the new gun. I certainly expected the new Volcano would come come with a resin version of the mount so that hobbyists would not have to go to such lengths to use the two weapons on a single titan. With the peg the mount sits on, it seemed like this was an obvious choice (if you don't glue the mount in).

I hope this article helps some out there, and that you found some enjoyment in following along with my process here.  At some point, I'll have more to share with this titan, and the Warlord that is now also waiting for some paint.  These will be two great upgrades to my existing Legio Tempestus battle group.

Stay safe out there.

Cheers and Happy Gaming!


Wednesday, May 5, 2021

On the Workbench [MAY]


Adeptus Titanicus Warhound Titan WIP

Greetings, and welcome to another post from the Workbench.  This month, I've been working on a couple new Warhound titans for my Legio Ignatum collection.  This time around, I wanted to try out the new close combat weapons offered by Forge World.  It is not clear to me that these will be weapons I use often in my games. So I decided it was a good time to bring in magnets to allow me to swap around weapons on these new Warhounds.  Normally, I have found Warhounds inexpensive enough that it didn't seem worth magnetizing the weapons.

Adeptus Titanicus Warhound Titan WIP

To increase pull in such a small area, I decided to try out 2mm x 5mm rare-earth rod magnets.  As shown above, I used a pin vise to drill holes in the Warhound arms deep enough to receive the rods. Here there is some care to be taken to make sure the weapons hang in a pleasing manner once completed.  An early attempt had a terrible angle and I had to use green stuff to fill the original hole, before drilling again at a slightly different angle. A little super glue insures they won't come out, but honestly they fit tight enough on their own.

Adeptus Titanicus Warhound Titan WIP

With less depth to play with in the weapons themselves, I chose 2mm x 3mmm rod magnets to go into the weapons themselves.  A pin vise was again used to drill the holes to a depth that would receive the magnets and allow everything to sit flush when attached to the arms of the model. Here again, you have some flexibility with where you seat the magnets, depending on how you expect the weapons to hang once attached.

Adeptus Titanicus Warhound Titan WIP

Above, the two Forge World weapon options are shown assembled, magnetized and ready for painting.  The Ursa Claw looks especially wicked, doesn't it?  I'll take this method forward now and magnetize the other standard Warhound weapon options to match.  This approach will provide a full suite of weapons to use in games of Adeptus Titanicus. 

It was a simple project and a fun way to try out these new weapons without locking me into keeping them if they work out for gaming.

Moon Elf Sorcerer Moon Elf Sorcerer

Soon, I'll move on to  Blackstone Fortress Heroes.  I took a break to paint this AD&D figure for a 5th edition virtual campaign.  I've been playing in the campaign virtually using a combination of Zoom and Roll20 since the Covid times. This is Meryn Yes'gell'a, a Moon Elf Sorcerer. He's still a work in progress, but I hope to complete the model this week so I can get back to my usual projects. I've been sitting on the model for too long, and needed to complete him before the campaign wraps up and the project becomes moot.

Best wishes for your own projects.  Stay safe out there.

Cheers and Happy Gaming!