Friday, March 29, 2019

#MonsterMarch3 Week Four Status - The Titan Walks!

Adeptus Titanicus Legio Tempestus Warlord Battle Titan - close up

Greetings!

#MonsterMarch3 is coming to a close...only a couple days left and it's not clear that I will manage more time for this project before the end.  The Engine is coming along very well, but is not complete.  I missed two of the expected sessions for this week, which meant I got about half the time I expected to work on it.  That said, I think you'll like what you see and I'm very pleased with how this Warlord is coming out.

After some trim work and Nuln Oil shading, I completed the build of all the parts.

Adeptus Titanicus Legio Tempestus Warlord Battle Titan WIP - assembled

Ahhh...regal and menacing all in the same stride, just how I imagined it!  The waist and the base are the only things not glued at this point. This allows me some freedom to get into all the parts of the model as I paint in details.  The next step was to paint the base so that I could finally glue the feet down.  I broke out the air brush and followed the steps from my paint recipe (see tabs above).  Always a good idea to record the colors and steps used on a model so when you come back to add more, you get a consistent look to everything.

Adeptus Titanicus Legio Tempestus Warlord Battle Titan WIP - based

And I was rewarded for the effort with a base easily matching the two Reavers. Scroll to the end for a family shot that illustrates just how well the three titans match.  I used Vallejo pigments (primarily Dark Red Ochre) and pigment fixer, being sure to add some to the feet and leg armor to tie the model to the base and add to the illusion that this engine has been striding the surface of Mars for some time.

I pinned the legs to the base using brass rod to prevent it being torn from the base in the future and glued them down using 5-minute two part epoxy.  I am MUCH preferring epoxy to super glue and in fact epoxy was used to attach all the armor plates and adhere anything painted where plastic cement couldn't be used.  I used to mask areas to be glued to keep paint off areas I wanted to use plastic cement on.  But this project was labor intensive enough as it was.  We'll see if the paint chips later,  releasing parts and defeating the epoxy.  So far this beast is rock solid.

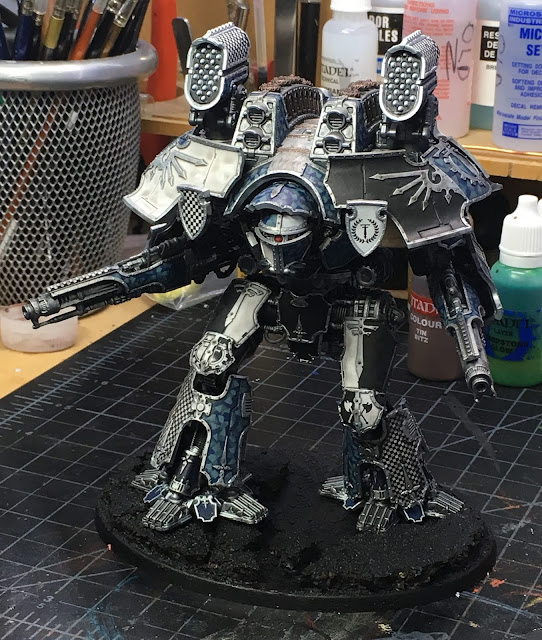
Following the base work and final assembly, I spent some time cleaning up trim and adding a few details. The Warlord has reached a level above a good table top standard and I'm proud of it already.  But it's not done yet!  I will keep at it as we roll into April, finishing the highlights and cleaning up the armor, esp. the white panels.  My shading game is off and the murky staining here is obvious, if fixable. If I'm being honest, I rushed the shading as I moved to get things assembled to complete the challenge.
#MonsterMarch3

I hope you enjoyed following along with my entry for #MonsterMarch3.  While not a monster in the truest sense, this engine is still a BEAST! ;-) I have had a great journey working on it and I look forward to completing the Warhounds, knights and at some point the second Warlord already waiting on the shelf.  Having recently picked up the new Reaver weapon sprue, there will be a couple new weapons assembled and painted for the Reavers too.  Lots of Titan goodness to come!


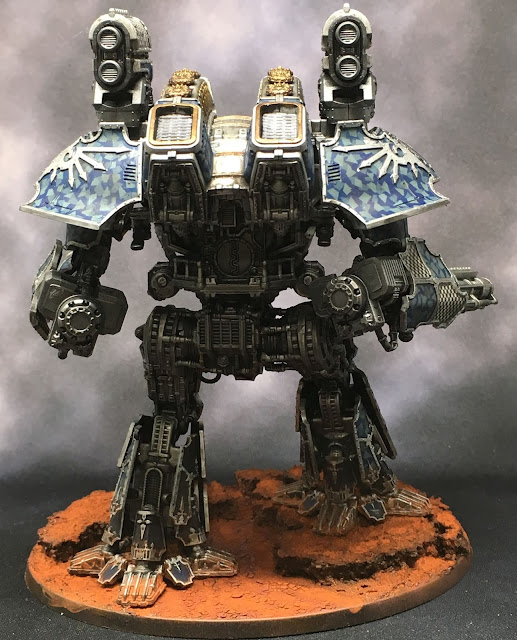
I'll close with a photo shoot from the light box.

Adeptus Titanicus Legio Tempestus Warlord Battle Titan WIP - light box
Come and get some!

Adeptus Titanicus Legio Tempestus Warlord Battle Titan WIP - light box

Adeptus Titanicus Legio Tempestus Warlord Battle Titan WIP - light box
Yay, though I walk through the shadow of death...

Adeptus Titanicus Legio Tempestus Warlord Battle Titan WIP - light box

Adeptus Titanicus Legio Tempestus Warlord Battle Titan WIP - light box
Looking for its next kill...

Adeptus Titanicus Legio Tempestus Warlord Battle Titan WIP - light box
A look at the details on the top...void shield generators!
Adeptus Titanicus Legio Tempestus Battle Titans - light box
Battle Titans of the Legio Tempestus

Adeptus Titanicus Legio Tempestus Axiom Maniple
The Maniple so far (missing knights)

Cheers and Happy Gaming!

Monday, March 25, 2019

#MonsterMarch3 Week four progress. Things start coming together...

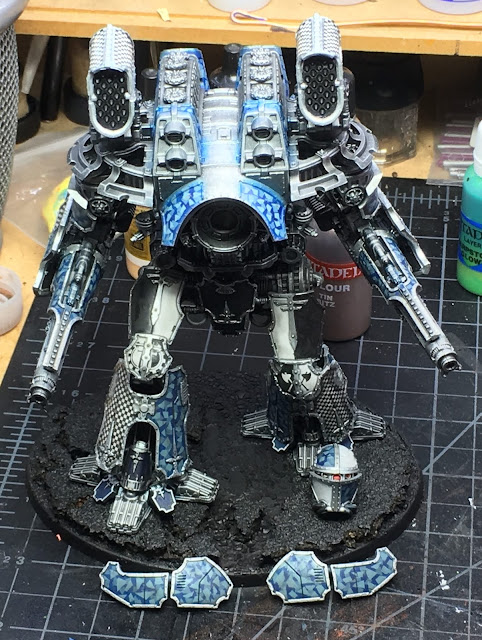
Legio Tempestus Warlord Titan for Adeptus Titanicus WIP

Well, we're into week for of #MonsterMarch3 and I have my work cut out for me this week. Today I post a a quick shot of the engine as it starts to take shape now that the armor base coats and transfer work are complete.

Vallejo Steel was painted on the trim of the various armor pieces, except for the torso. I'm focused primarily on getting the model totally assembled. A coat of 50:50 GW Nuln Oil and GW Lahmian Medium was laid down on all of the armor, followed by the legs, metal portions of the torso, and the arms.  This allowed me to start gluing various plates in place, starting with the legs, as shown above, and the arms.

Next up, the shoulders and remaining body armor will be attached.  I'll follow that up with a marathon detailing session to get things in good shape by the end of the week.  I expect to go up to the final hours during this challenge.  No finishing early for me! But I can probably get together three good sessions this week, and maybe a forth if I'm lucky.  So that'll get me 6-8 hours of project work to move things along.  Now that the fiddly, time consuming work is done, I expect the make more rapid progress.

I'm already psyched to see this much coming together.  The color scheme is matching my expectations and I feel this will be a faithful addition to the Legio Tempestus once complete.

There are some truly great works coming out of the challenge this month, so be sure to checkout #MonsterMarch3 blog site to see more.

#MonsterMarch3


Best wishes for all the challengers and congratulations to those who have already completed their work.

Cheers and Happy Gaming!

Thursday, March 21, 2019

#MonsterMarch3 Week Three Status (Legio Tempestus camouflage revealed!)

Legio Tempestus Warlord Titan for Adeptus Titanicus WIP painting camoflage

Welcome back to #MonsterMarch3.  It's nearing the end of week three and while I'm very happy with how things are coming out. I had expected to be at this point by the end of  week 2.  However, things have taken longer to get right, than I hoped.  The taping took up a lot of time as did the transfers this week.  Still, I'm loving the results so far. So without further ado, lets talk...

#MonsterMarch3 logo

This week it was time finish up the camouflage and get the decals laid down.  I wanted to get the trim done on all the armor too so I could get it all assembled, but that was not to be. I still have another night to work, though, so we'll see.  I had a great time removing all the masking tape to get at the design underneath. It's sorta like opening a present on Christmas.  You might have a pretty good idea what it will be, but there's still no being certain until its opened (or uncovered in this case).  You can see some of it in the title pic above, now here's the rest...

Painting the gun shields

 The gun shields are really looking good, pretty much what I hoped for.

Painting Legio Tempestus camouflage on the armor

The camouflage effect has come out pretty consistent across all the various panels (love it or hate it). I learned a lot more from this effort to add to what I learned doing the Reavers. It is pretty important to seal the first layer of paint with a lacquer to prevent damage while removing the tape, for instance.  This tape is good, and not real sticky on purpose, but the pieces are small and covered in paint so at times I scraped up the base coat while lifting the tape off. No matter as it will become battle damage or get touched up as I go along.
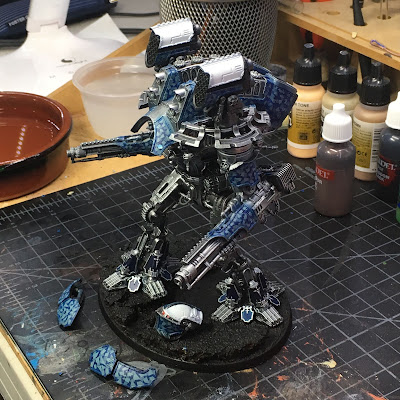
Legio Tempestus Warlord Titan for Adeptus Titanicus WIP

You can see some more of the work on the arms and carapace, as well as the head.  Pretty solid outcome I think. I learned that it is important to keep the first later of masking tape pieces small and a bit more spread out.  The second layer of shapes should be just a bit larger and more numerous than the first pieces. This process must be viewed up side down to get the best effect.  The first color being masked is the "top of the camouflage" which covers the shapes underneath, and you want those shapes to stand out too.  I like what I have here, but it's very heavy on the top shape color - in fact it's tough to even make out the second layer of color at all.

Anyway, moving on - it was time to put on decals.  First some Collegia Titanica iconography.  We don't have proper Legio Tempestus iconography, but the generic Titanicus stuff is still appropriate.

Painting heraldry for Lego Tempestus on the legs and knees

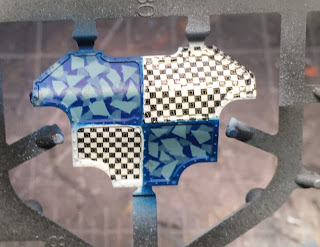
I suppose I could overdue the black/white checkerboard/split color motif at some point, but I decided early on that the livery of this Warlord would be so marked by it.  The right knee got the Collegia Titanicus emblem and the left knee the axes.  With the trim painted, I think these are going to look excellent. As a cautionary tale, I placed all the knee transfers upside down on the first pass.  Ugh.  Fortunately, I recognized this before they dried and was able to carefully scrape them off and start over. I keep seeing the thigh armor as shin armor, no matter the obvious T in the trim helping to call out the correct orientation. Fortunately, there are plenty of extra decals on the sheet.

Painting heraldry for Legio Tempestus on the Warlord's shields.

With the shields, a laurel for the left shield and the checkers for the right.  The checkers are a custom decal I printed in black with my inkjet printer onto Testors clear decal paper.  I used the Testors Decal Bonder (a spray) to seal the ink and this worked very well.  I needed four-ish light coats to get a strong enough film over the ink to make it water proof and prevent damage from Micro Set and Micro Sol. I'm not so good or patient enough to make a perfectly fitted decal for complicated shapes, so the shield above looks a bit rough at the moment while the Micro Sol softens and pulls down the decal over the irregular surfaces. 

Painted up, I don't expect this to be noticeable at all. Four coats of the Decal Bonder might have been a bit much, but I've not worked with the Bonder before. The decals were pretty tough, surviving A LOT of handling and re-positioning, but the extra thickness did make them tougher to seat when compared to GW's production decals, which are a dream to position and adhere to pretty much anything.  So more practice here is needed.

Legio Tempestus checkers on the gun shields

With a project to complete, I plowed on with what I had to hand. Checkers on the gun shields were easier since the shapes were more straight forward. I used wet palette paper to trace and form the pattern for the initial shapes. As with the shield, I expect to be able to paint in the trim and clean up all the bits of transfer overlapping the edges. 

Legio Tempestus checkers on the gun shields.

Then I worked on the lower leg armor...for like two hours.  There was the expected fussy pattern making, of course.  But I had a heck of a time getting the decals positioned right and then stuck down.  I would get things mostly right, the mess it up with just "one more pass" of Micro Sol with the brush; or "one more slight nudge" to re-position things better.  In the end, I wrecked one transfer entirely and had to start over.  It was quite a fun experience as midnight crept ever closer and my eye sight ever more bleary.  

In the end, I got both greaves "good enough" and called it a night.  I'll check back on them and possibly add some more Micro Sol if necessary. The tough bit is getting the decal to really hug down over the T in the trim that sits in the middle of the pattern.  There was no way I was cutting the decal around that...no way...my expectation is to paint the trim over the decal and clean everything up nicely.  Here's how they looked at the end of the night... 
 
Legio Tempestus checkers and camouflage on the legs.

Legio Tempestus checkers and camouflage on the legs

Oh, there's no going to bed for you.  Oh no.  You forgot the missile launchers!

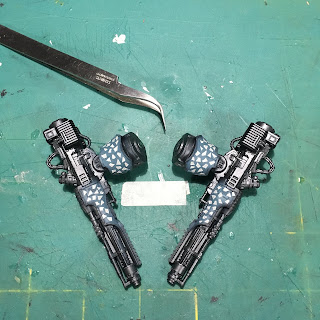
At 11:30, I hunkered down and completed the checkers on the launchers.  A somewhat easier shape thank goodness.  One thing became clear after working on the Reavers and the First Legion checkers for my 30K Dark Angels: the Decal Bonder really does protect the ink.  With all the abuse these custom transfers took, the black ink is pretty much as it was when printed.  Now, the printing on the decal paper isn't perfect at all, but I didn't lose any ink to the process of applying the transfers either which is very cool. My prior attempts would NOT have survived the evening, I assure you. These checkers ended up on the model sharper than the the prior attempts on the Reavers with little to no need for any touch up.

Legio Tempestus checkers on the missile pods.

So there we have it.  The camouflage is painted and the checkers and other decals applied. Now I'm on to the brush work.  I am really excited to get the trim and other basic paintwork done so I can finish the assembly and take in the final appearance of the heraldry.  This is a Warlord Battle Titan after all, one of the grandest of the Emperor's God Machines.  It needs to look the part.

I hope you'll check back with me next week to see how it come out. Best of luck with your own projects and I hope some of my anecdotes, description, and pics help another hobbyist out there chart a clearer course though the immaterium of our hobby.

Cheers and Happy Gaming! 

Monday, March 18, 2019

#MonsterMarch3 Week three progress. More camo!

Painting Legio Tempestus Camouflage WIP

So I managed to get the second pass of masking tape on all of the armor panels.  Whew...it's a lot of itsy bitsy tape to cut and stick.  I'm excited to get the last coat of paint on so I can see how things came out.  The pieces above will all get a good dry brush of Vallejo Steel before I lay down the final camouflage coat of Vallejo Air Deep Sky. here's a bit more detail on all the panels now that they have the final masking in place.

Painting Legio Tempestus Camouflage WIP

Painting Legio Tempestus Camouflage WIP

Painting Legio Tempestus Camouflage WIP

Painting Legio Tempestus Camouflage WIP

Painting Legio Tempestus Camouflage WIP

In the close-ups you can see the first layer of tape under the paint.  The new masking is carefully laid down on areas that have not been taped yet, or positioned to overlap existing tape.  This approach varies the pattern and ensures that lifting off the bottom (first) masking layer doesn't also lift all the second layer of color.  The top (second) masking layer is meant to preserve the second layer of paint as a "middle" later of interesting shapes which may be partially covered by the top layer of shapes (which is actually the result of the first layer of masking).  Ugh...it makes one's head hurt to think about it.
 
Painting Legio Tempestus Camouflage WIP

I still wonder if the pattern is too sparse.  It is definitely more dense than the first attempt on the Reavers, so we'll see.  Check back in Thursday or Friday when I post up the official week three status post to see how things came out!  I hope to have all of the tape off by then and the final camouflage pattern will be revealed.

Cheers and Happy Gamming!

Thursday, March 14, 2019

#MonsterMarch3 Week Two Status (painting Legio Tempestus camouflage!)


On to week two of #MonsterMarch3. #ithinkibitofftoomuch, #suckitup, #getonwithit.

Lots happened this week but the results don't necessarily reflect the work involved.  It's time to get the armor painted.  And for Legio Tempestus, that means lots and lots of urban camouflage.  When I painted the two Reavers, I felt I used a pattern that was too sparse and too large making the resulting camo a bit chunky in my mind, at such a large scale (relatively speaking).  To that end, I'm working with smaller shapes this time, and more of them which means a lot more masking...and the Warlord has a LOT more armor panels!
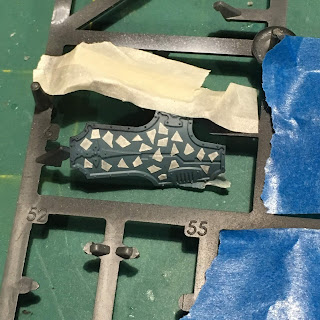
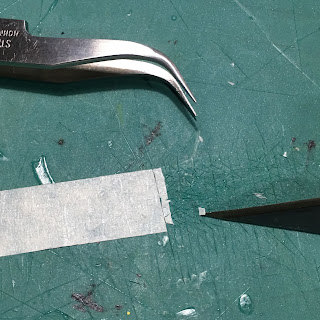
To mask out the shapes, I use simple masking tape (an artist's/drafting variety that won't lift the paint when removed) and a sharp X-acto blade to cut the shapes.  Then either the knife blade or tweezers are used to lift and put the pieces in place.  Here's a a bit of what that looks like.  I stick a strip of tape to my cutting mat and then start cutting the shapes off and applying them to the armor.

masking camouflage patterns on an adeptus titanicus warlord titan

The shapes are varied using irregular triangles, trapezoids, squares, etc..  Here's how the pattern looks once applied to all the various panels...

masking camouflage patterns on an adeptus titanicus warlord titanLegio Tempestus Warlord Titan for Adeptus Titanicus WIP


Legio Tempestus Warlord Titan for Adeptus Titanicus WIP

Legio Tempestus Warlord Titan for Adeptus Titanicus WIP

Legio Tempestus Warlord Titan for Adeptus Titanicus WIP

I may look ridiculous to some, but no worries. I think it's petty neat, but wait...there's more...

Legio Tempestus Warlord Titan for Adeptus Titanicus WIP

Legio Tempestus Warlord Titan for Adeptus Titanicus WIP

Legio Tempestus Warlord Titan for Adeptus Titanicus WIP

Legio Tempestus Warlord Titan for Adeptus Titanicus WIP

Ok, that should do it.  This took me roughly five hours over two evening painting sessions.  Granted, I was not trying to win any races so I could have got it done a bit more quickly with proper incentives. As you'll see at the end, I also put some work in on the base.

Next, I laid down a thin (I hope!) coat of Vallejo Air USAF Light Blue with the air brush.  Last time, I laid the paint down a bit too think both in terms of the paint in the pot and the amount on the Reavers' armor.  This time I thinned the paint more and lowered the pressure on the airbrush and tried to lay down a light coat of paint over the masking. Here are some examples.

Legio Tempestus Warlord Titan for Adeptus Titanicus WIP

Legio Tempestus Warlord Titan for Adeptus Titanicus WIP

Now it's back to masking the second layer of shapes for the camouflage pattern over all the armor panels again. Once I have the new color masked, I'll do all the dry brushing for the metal so that any over brushing on the armor will get painted over by the last layer of color.

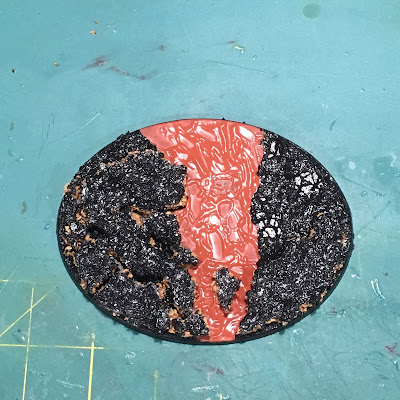
Is mentioned above, I did take short breaks to work on the Warlord's base while masking the armor.  I used my usual Vallejo Black Lava to grit the flat surfaces of the base and then applied GW Martian Ironearth to an area I designated as a long dead river bed.  This breaks the terrain up a bit and will match similar work on the Warhounds, I hope.

Custom base WIP for an Adeptus Titanicus Warlord titan

The Martian Ironearth dries well on the base, but is pretty fragile and flakes of easily.  You can see a couple missing flakes of color near the top rim of the base.  To stop this, I sealed everything with some flat lacquer spray prior to priming. I could simply have primed over everything to seal it, but I felt the lacquer would be a bit tougher to dislodge in the future.

Custom base WIP for an Adeptus Titanicus Warlord titan
 
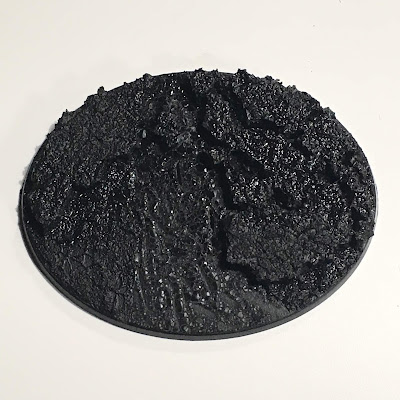
Here's the primed result.  As with the Reaver bases, I'm painting the black primer overall, but will bring back the red martian soil in the end. I chose the ironearth for it's ability to vary the texture of the base, not for its color.  The shot below is flipped 180 degrees as it would be seen from the rear of the titan.

Custom base WIP for an Adeptus Titanicus Warlord titan

And that's where I am today.  I have one more painting session this week to get cracking on the second layer of masking for the camouflage, but I felt that wasn't interesting enough to make the post - once you've seen the first layer, you've got the point, I'm certain.  Check back next week to see where things get as I finish the camouflage layers and get to work on the metal skeleton.

At some point there must be checkers as well, so I need to print up my decals for that soon too!

Best of luck to all the other #MonsterMarch3 challengers out there.

Cheers and Happy Gaming!