One week in, here's my status on the Legio Tempestus Warlord. Following assembly, it was time to begin priming the model using Vallejo Surface Primer Black and my airbrush. I love priming this way since I can do it inside easily without fumes using my spray booth (which exhausts outside). I started with the bits still on sprue.
 |
| Priming the armor panels |
 |
| Priming the heads and weapon shields. |
I decided to prime all the options for convenience. Obviously I won't be using the traitor armor, ick. :) Next I stuck some of the loos bits to some double-sided tape and primed those.
 |
| Priming the armored foot pistons |
 |
| Priming some loose body armor. |
Then it was time to prime the rest of the (mostly) assembled warlord. I have more work to do on the base that is waiting for supplies so it is not primed at this stage.
 |
| Priming the legs |
 |
| Priming the body and magnetized weapons |
Once this had dried completely, I laid down a base coat on all the metal parts using
Scale 75 Black Metal and my airbrush. Too lazy to mask at this stage, I just tried to be careful and not go crazy covering areas I would later be painting another color.
And now the Warlord with its metal bits...
And that's where things stand for now. The Warlord is looking good, looming over the rest of the maniple so far...
 |
| Legio Tempestus Titan Maniple WIP |
Next up, I began base coating the rest of the model in preparation for painting the camouflage pattern and laying down the checkers. I'm printing a new custom decal sheet of black checkers on a clear background. I picked up some Testors Decal Bonder spray which can be used to seal inject printed custom decals with a normal decal film. This will be much better, I feel, than using matte spray over the decal paper. I hope the Decal Bonder will stop an issue I've had with the black rubbing off while positioning the decals, despite the matte spray trying to seal it in. I'll cover the whole process and my evaluation of the results in a later post.
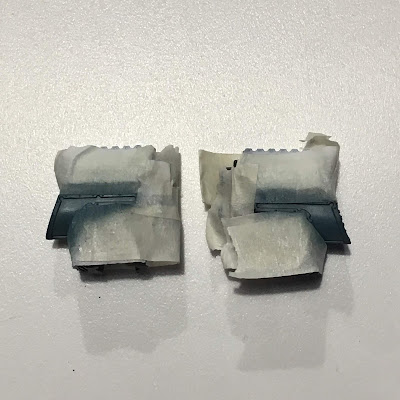
So to prepare, I sprayed GW White Scar on the white areas and Vallejo Air Medium Gray on the parts to be camouflaged. Masking tape was used to protect various areas during painting, particularly those parts I'm not going to use on this titan.
 |
| painting armor panels onthe sprue |
The tilting shields will have a white field. I'm thinking one will be checkered, and the other plain white with a decal of some sort. The left pectoral armor will be white with some black pattern on it, which the rest of the armor will be camouflaged. I thought the knee and thigh armor would look cool quartered with white and black for this titan; sort of an exaggeration of the smaller checks as personal heraldry for the engine.
 |
| painting more bits on sprue |
I'm experimenting with one head option that will be quarters with white and black with camouflage on the opposite quarters. The gun shields will also be quartered with camo and white. One white quarter will be checkered, the other plain white, I think. Its quite fun planning out the heraldry on these large models. I think it'll look a bit busy, but I guess that's also the point!
 |
| Torso armor to be camouflaged |
 |
| painting the missile launchers |
The missile launchers will be black and white checkers on top and camouflage on the bottom.
 |
| Plates on the torso and weapons to get camouflage |
 |
| Thinking about camouflaging the torso... |
So that ends week 1 of #MonsterMarch3 for me. I'm busy with family for the long weekend, then I get stuck back in for week two. I'm very excited to watch this beast take form as the various colors get laid down.
Cheers and Happy Gaming!


No comments:
Post a Comment