Tuesday, June 29, 2021

Dark Angels Redemptor Dreanought WIP - Part 3


Dark Angels Redemptor Dreadnought WIP

Greetings and welcome back for more pics of this Redemptor dreadnought that I've been working on.  As promised, the project has accelerated now that I've stopped distracting myself with cool things to build.

Dark Angels Redemptor Dreadnought WIP

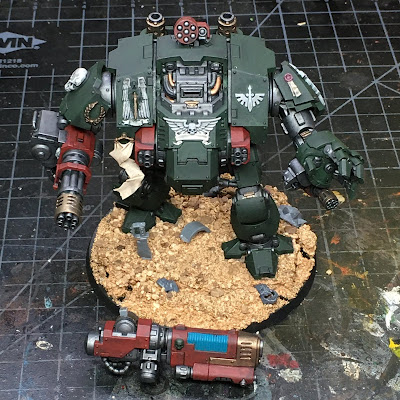
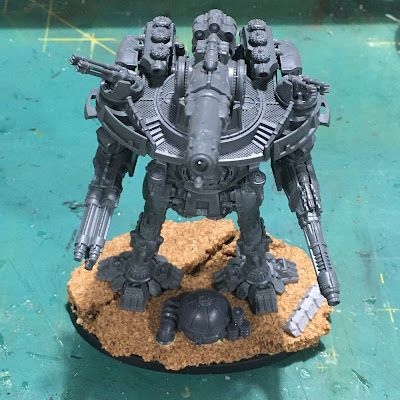
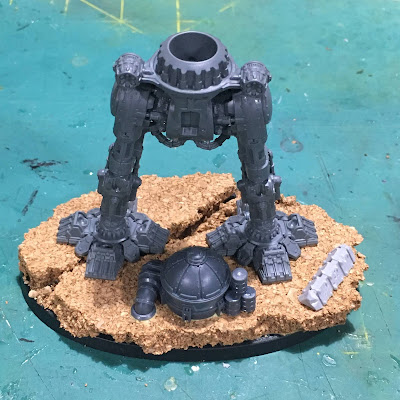
I dug around in my xenos bits bin and found a few scraps left over from building an Ork kill team. So those got added to the base with the skulls. Simple stuff, but I like to have a little narrative going on with these bigger bases.

Dark Angels Redemptor Dreadnought WIP

After finishing a few of the details, GW Nuln Oil was added all over to shade the model.  I avoided a few areas that I wanted to be more brown than black (like scrolls and gold/brass stuff). When that dried, I got to business with the highlighting...so much highlighting...

Dark Angels Redemptor Dreadnought WIP

Here the white, red, green, and silver have been highlighted.  The plasma coils have also been shaded and highlighted.  I am always wary of too cartoon-y a look, so my highlights are generally subtle.  I am pleased any my progress here though, with none of the edge highlights coming out blotchy or pudgy.  Pretty decent effort, I must say.

Dark Angels Redemptor Dreadnought WIP

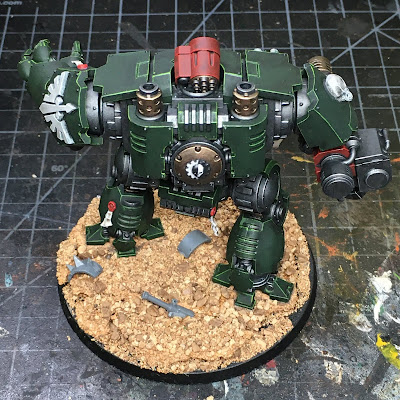
 At the back, I have the Cog Mechanicum painted in the traditional half-black-half-white color scheme. Oh, and the brass/bronze areas have been highlighted here as well. The beast is battle ready for sure, but let's keep going a bit.

Dark Angels Redemptor Dreadnought WIP

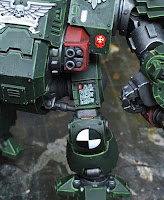
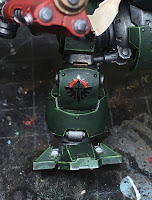
With the highlights completed, it was time for decals/transfers.  This walker will join my 5th company forces and bears the company icon on the left knee to match the troops.  Additional honors have been added to mark the marine within a combat veteran of the chapter, worthy of such a fine suit of armor.

Dark Angels Redemptor Dreadnought WIP Dark Angels Redemptor Dreadnought WIP

I was pleased to find a decal of writing on an old Sisters of Battle sheet that fit the left thigh perfectly. The rest of the decals come from a Primaris Decal sheet or the GW Dark Angels sheet.  I collect decals like models and have a decent sized collect to pull from, which helps spice up these projects a bit.

Dark Angels Redemptor Dreadnought WIP

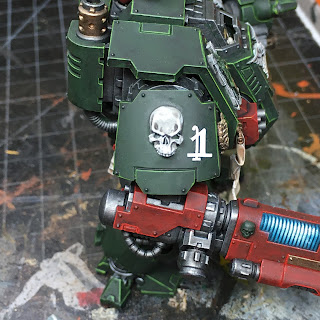
I felt obliged to add a vehicle number, and since this is the first Dreadnought for the force...and of course this also pays homage to the First Legion roots of the chapter. I put a little attention into the scroll next.  Due to its windy, flappy nature, no decal was going to help here.  So I broke out the Pigma Micron 005 (0.20mm line) pens.

Dark Angels Redemptor Dreadnought WIP
Looked at this close, it's a bit rough.  But taken at it's normal perspective on the table things look just fine.  I'm no good with a brush like this yet.  So the pens REALLY help.  The point here was to give the impression of some fancy script.  I was not attempting any kind of award winning freehand drawing here! 😂

Dark Angels Redemptor Dreadnought WIP
With decals applied, it was time to prime and paint the base. As shown here, the base has been painted and shaded.  I went to work on the Orky bits with some GW Ryza Rust technical paint.  I left this to dry for the night, and during my next session, I will add highlights and touch up a few things like the skulls. Then the dreadnought will be glued down (and possible pinned) to the base for good.

Dark Angels Redemptor Dreadnought WIP

 Here's how things look all put together so far. I am quite satisfied with the results. The models is imposing on its own and so much more dynamic that the standard marine dreadnoughts. Even Contemptors have to take a pause when this dude stomps by.  I didn't love some of the models look when it was first released, but it has totally grown on me.

So, a few more bits and bobs and I'll post up the TO DONE post by the end of the week.  Then what next?  I'm really looking forward to painting more titans so that is quite likely...but there are also three Blackstone Fortress adventurers for my little party that now look quite drab next to Janus Draik. And of course I have loads of Horus Heresy Dark Angels in the queue...

Well, stay safe out there, and check back later to see where this crazy train stops next.

Cheers and Happy Gaming!


Friday, June 25, 2021

Dark Angels Redemptor Dreanought WIP - Part 2


Dark Angels Redemptor Dreadnought WIP

Greetings all.  The Redemptor project continues on a piece. I'm almost done blocking in all the base colors so I can begin shading. So far, so good.  I like how this dreadnought is taking shape.

Dark Angels Redemptor Dreadnought WIP

The model is still in sub assemblies for painting.  I'll be gluing some things into their final positions once the base colors are laid down.  I plan to shade and highlight with the model in its final pose so I don't end up putting highlights on something that is in shadows, etc.  The right arm weapons are magnetized and will be the only bits not glued down in the end.

Dark Angels Redemptor Dreadnought WIP

I built a custom base with pieces of cork board to give the model a little extra height and presence within the collection.  I use wood glue to fix everything down and a mix of model railroad scale ballast to fill in blank areas on the base and provide additional ground texture.

Dark Angels Redemptor Dreadnought WIP

I used pencil to trace around the feet when adding texture to the surface of the cork. You want your model to sink into the terrain, not float over it.  The effect lends weight to the model and helps trick the eye a bit, perhaps.

Dark Angels Redemptor Dreadnought WIP

Here is how the base looks with the dreadnought standing on it.  I decided on some Ork skulls for interest. If I can locate some other Ork stuff in my bin of xenos bits I might add more.

Dark Angels Redemptor Dreadnought WIP

I'll leave you with a peek at the interior detail so far.  Still a lot to do in there. Over all, the project is going well and should accelerate now that I've stopped building 30K stuff. 😂 I *really* like building models and sometimes I just can't stop myself to make room for painting in my limited hobby time. But it's all hobby right?

So that's that for now.  Check back next week for more on this project.

Cheers and Happy Gaming!


Wednesday, June 23, 2021

First Legion Heavy Support for Horus Heresy

 Horus Heresy Heavy Armor WIP

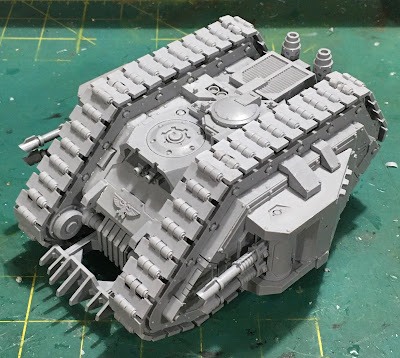
I've been watching various Forge World kits for 30K going out of stock recently and decided I better settle up with a few of the kits I've been holding off buying. I picked up a Legion Javelin Attack Speeder to support my Scimitar Jetbike squadron and the Land Raider Armored Proteus shown above.  Most of the Sicaran variants are no longer available, so I went to eBay and rescued this Sicaran Venator.

Legion Sicaran Venator WIP

The venator was in great shape, although it bears a traitor's eye.  I had to repair the pintle mounted heavy bolter and the sponson lascanons. But the repairs were minor and the rites of purification have begun.  Once complete, this beauty will be ready to sport First Legion colors and begun once again hunting enemy armor. 

Legion Sicaran Venator WIP

I have a decent amount of foot marines at this point, and some reasonably support in the form of dreadnoughts and skimmers.  What I lack is mobile anti-armor. Problem solved.  Further, I love the main weapon here which fits well with the First Legion's special access to some of the more esoteric weapons of war from Old Night and the early days of the Great Crusade.

Land Raider Armoured Proteus WIP

And the force was always going to have a Land Raider.  This iconic heavy transport is a must for every Space Marin army whether 30K or 40K. This old pattern holds a special place in my heart for the early days of 40K.  I put my original plastic version on eBay some time ago, but it was fun to get it back updated in resin.  I chose the armored pattern since the sponsons would be less fragile, and I'd most likely play it with extra armor add-ons in a game anyway.

Land Raider Armoured Proteus WIP

These additions make the force generally playable now, even without the skimmers assembled.  I have a rhino and an anti-infantry predator. So I can move some troops around, foot slog the rest, and generally lay down some decent fire on other heavy targets.  Of course, this is all in my head since I have only one friend with a 30K army, little time for games in any case, and we're still not ready to join folks indoors for games besides. Maybe once I get my wee ones vaccinated.

Regardless, the hobby sirens call and I must obey.  Building and painting is really why I'm into all this anyway.  Games are just a great perk for me at this point, when they occur. 😂

Now, it's past time to put these distractions aside so I can return to painting the 40K Dark Angels Redemptor Dreadnought.  Expect to see more of that by the end of the week. So many fun things to hobby on!  This heavy armor will appear back on the blog before long, though, you can be sure of it.


Cheers and Happy Gaming!


Tuesday, June 15, 2021

Dark Angels Redemptor Dreanought WIP - Part 1


Dark Angels Redemptor Dreadnought WIP

Greetings and welcome to another Dark Angels WIP.  I decided to put together a Redemptor Dreadnought to support my recently completed group of Primaris Dark Angels. Regular readers likely already see that I have a soft spot for Dreadnoughts and other walking war machines.

Dark Angels Redemptor Dreadnought WIP

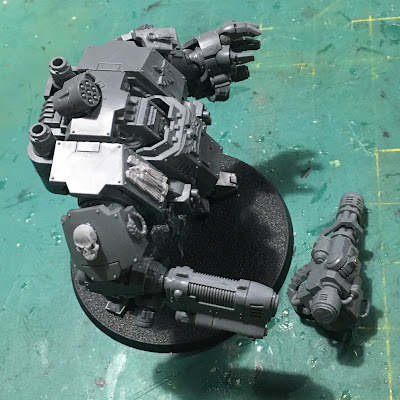
 A simple stock build was followed with the application of a few Dark Angels icons. The only magnetization I did was the connection for the main arm weapons.  It was hard not to since the kit provides two complete arms and has already been designed to allow the parts to friction fit without magnets.  I used 2mm x 3mm rod magnets here because the friction fit wasn't tight enough to keep the plasma arm from falling out.  You can see the small magnet set in the mounting post on the Gatling canon arm if you zoom in, above.

Dark Angels Redemptor Dreadnought WIP

A little gentle persuasion (and copious amounts of plastic cement) allowed me to form the DA chapter icon over the rounded shoulder armor so it sits flush to the curves.  You can see a signs of stress in the icon from the bending and gluing, but after paint this isn't noticeable at all.  Nothing cracked, at least.

Dark Angels Redemptor Dreadnought WIP

 A skull from a Forge World Dark Angels icon pack went on the opposite shoulder along with a winged angel symbol on the right side of the sarcophagus. A smattering of other plastic purity seals, icons and scrolls finished the look.

Dark Angels Redemptor Dreadnought WIP

Next I tried out some zenith highlighting using the new primers from Monument hobbies.  I started with the green primer (which is more of an army olive drab), than sprayed white down from above.  I still don't see that this adds much, but I'm hoping there is a subtle difference that shows, even if my old eyes don't get it. 👴

Dark Angels Redemptor Dreadnought WIP

Here is what the dreadnought looked like after a healthy coat of Pro Acryl Black Green (a reasonable substitute for GW Caliban Green).

Dark Angels Redemptor Dreadnought WIP

I'm sure the top surfaces are lighter than the underneath surfaces in some way, but I'm not sure it is worth the time and clean up for the white zenith coat.  But hey, at least I know the machines is good and primed. 😂 I likely need to use a lighter hand with the base coat to really appreciate the pre-highlighting. I'll keep working at it from time to time.  So far I have only tried it with this dark green and black. Both are dark with solid coverage that doesn't show much underneath.  Liekly, I need to use a thinned down base coat?  Anyway - I got to where I'm used to regardless, so the project goes on.

Next will be shading with GW Nuln Oil, followed by the edge highlights and then the usual detail painting for the rest.  Check back towards the end of the week to see more progress. Blue-Tac is holding the torso and legs together, and the arms still have some articulation so the pose will shift as I complete painting and glue everything to set the final pose.

Cheers and Happy Gaming!


Saturday, June 12, 2021

On the Workbench [June]


Horus Heresy Dark Angels Destroyers WIP

Greetings!  Things have been busy around the old homestead recently with family birthdays, vacations, and other warmer weather activities.  This has put a crimp on the 262Krieg hobby time, but no worries.  I'm still active and new projects are underway.  

Today, I'm sharing some recent builds I've done while taking a short painting break to refresh my inspiration.  I like to move back and forth between painting and building to mix things up and prevent burnout on any one aspect of the hobby.

Horus Heresy Dark Angels Destroyers WIP
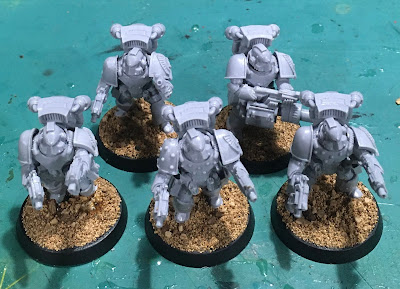
This month, I built five more First Legion Destroyers to round out a squad of ten (shown above). Then I moved on to assemble five more Interemptors that I also had waiting on the to-do shelf.

Horus Heresy Dark Angels Interemptors WIP

This brought my Interemptors up to ten men as well. My challenge here will be to do a decent enough job with the painting to make sure the new recruits blend in well with the squad veterans. This brings my Dreadwing strength to 20 marines and one character, a Legion Moritat.

Horus Heresy Dark Angels Interemptors WIP

Lots of Forge World stuff seems to be sold out and not returning so I went ahead and purchased a few new models which I'll be sharing in future posts to round out this force of Horus Heresy era Dark Angels.  I take long enough with these projects that things are almost always OOP by the time I'm painting them. 😢  Fortunately, I have plenty of storage in the 262Krieg man cave to tuck these models away until I can get to them.

Dark Angels Ravenwing Talonmaster WIP

 As a final workbench project this month, I was inspired by a blog post to finally convert a Ravenwing Talonmaster for my Dark Angels 40K army.  I have a bunch of bikes and speeders, but never modeled the Talonmaster, despite having all the necessary parts.  So I took a partially painted speeder from my collection and set to work removing some bits and adding others.

Dark Angels Ravenwing Talonmaster WIP

I have ample Ravenwing bits form various upgrade sprues so this project really was a no-brainer to put together. I have to say that being able to fly a hovering speeder AND fight with an immense power sword is one of the things that make the Ravenwing truly something special. 😂

Dark Angels Ravenwing Talonmaster WIP

I used a Black Knight shoulder pad to represent the Talonmaster being drawn from their ranks. I figured that Talonmasters are likely permitted to keep their Black Knight honors. I've kept the original back and arms required to fit in the speeder, but added new heads (and a chest for the Talonmaster) to further call out their esteemed rank within the Ravenwing. I chose to avoid any hooded heads as I think they look out of place on bikes and speeders (the force of wind in their faces and all that).  I like the sharp beaky helmets for that. It's really kind funny how we can suspend our disbelief for so many things, then get hung up on something specific like keeping hoods on while riding bikes and speeders. :) 

All of that aside, I think I put together a reasonably Talonmaster conversion.  I mean, it's barely a conversion as it is, since all of the key parts come form the Ravenwing upgrade accessory sprue pretty much for the purpose.

That's my show and tell for today.  I'm getting back to painting and should have some new WIP posts up soon.  I'm still going though the process of setting my inspirations.  I'd really like to have my Titanicus stuff completed; but I also want to see progress on Blackstone Fortress characters and both my 30K and 40K Dark Angels collections.  Clearly, I can't do it all at once! I miss the seasonal blogger challenges that help me narrow down my choices.  Heh.

I hope you and yours are staying safe out there.

Cheers and Happy Gaming!


Wednesday, June 2, 2021

Warbringer Nemesis Titan for Adeptus Titanicus - WIP


Legio Tempestus Warbringer Nemesis Titan WIP

Greetings.  I thought I'd share a little bit about my process for basing these tiny titans.  While much smaller than their 28mm cousins, these 8mm titans are still large enough to play with the bases.  No need to simply glue them down to the supplied plastic base and leave it go.  Have some fun! 

For my collection, I have chosen Legios that all hail from Mars.  I pictured the titans striding across a broken martian landscape, rather than in amongst the many Mechanicum facilities, if for no other reason that they'd be constantly crushing stuff. I use cork board to represent broken ground, selecting boards with cork pieces that are not too coarse. You can get cork board on Amazon.com easy enough, and in various thicknesses.

Legio Tempestus Warbringer Nemesis Titan WIP

It's super easy to break these up and I encourage the avid hobbyist to experiment with different shapes, and even stack pieces for elevation, though that requires planning ahead when building the model. Here, I've settled on a simple bit of cracked ground, maybe carved by an ancient martian river.  Adding a few bits of Titanicus terrain (or something similarly scaled to 8mm), give a bit of narrative to the base and will provide some visual interest that helps communicate the towering scale of the titans.

Legio Tempestus Warbringer Nemesis Titan WIP

I like to keep the legs around for a reference while I'm modelling a base to be sure everything will fit and look good when I'm done gluing things down.  For cork, I generally use wood glue which I feel has a bit better grip and longevity over standard white (PVA) glue.  I don't like super glue for this as I often move things around a bit and the longer setting time of a white or wood glue doesn't get in the way there. Also, while the glue is still not set, I sprinkle some of my mixed railroad ballast on it to give texture to exposed bits of the plastic base not covered by cork.

Legio Tempestus Warbringer Nemesis Titan WIP

My last step is to use Vallejo Black Lava to texture the flat surfaces of the cork, and cover up its obvious texture and "corkiness".  I hold the titan's feet in place and paint the gloppy black lava around the feet, trying to not get much on the model.  It wipes off before dry with some water on a wet paper towel, though, so no worries.  This approach leaves a good smooth surface to glue the titan to once the project is finished.  We want these huge engines to appear sunk into the ground, not floating over it, after all. 

On other bases, I have also used GW texture paints that crack when dry so simulate dry river beds and other parched ground that isn't so rocky. And that's that!  You can really go free and crazy with your imagination here. Search the web to find many many examples.  I hope this simple base sparks your own creativity for your projects.  Hopefully we'll see some paint on this Warbringer before too long.

Stay safe out there.

Cheers and Happy Gaming!