Friday, December 30, 2016

2016 Wrap-up!

As 2016 slips behind us, I wanted to join the legions of Bloggers reporting on what they were able to accomplish in 2016.  This was the first year I chose to formalize a TODO list which was put together at the end of August. I liked the visual reminder and sense of accomplishment I felt ticking things off the list so I will reprise the TODO list for 2017 in a follow up post. I also participated in Dreadtober 2016, completing a Deathwatch dreadnought. This was a fun challenge and cool web community event! it definitely pushed me to spend a bit more time on the dreadnought model than I may have otherwise...

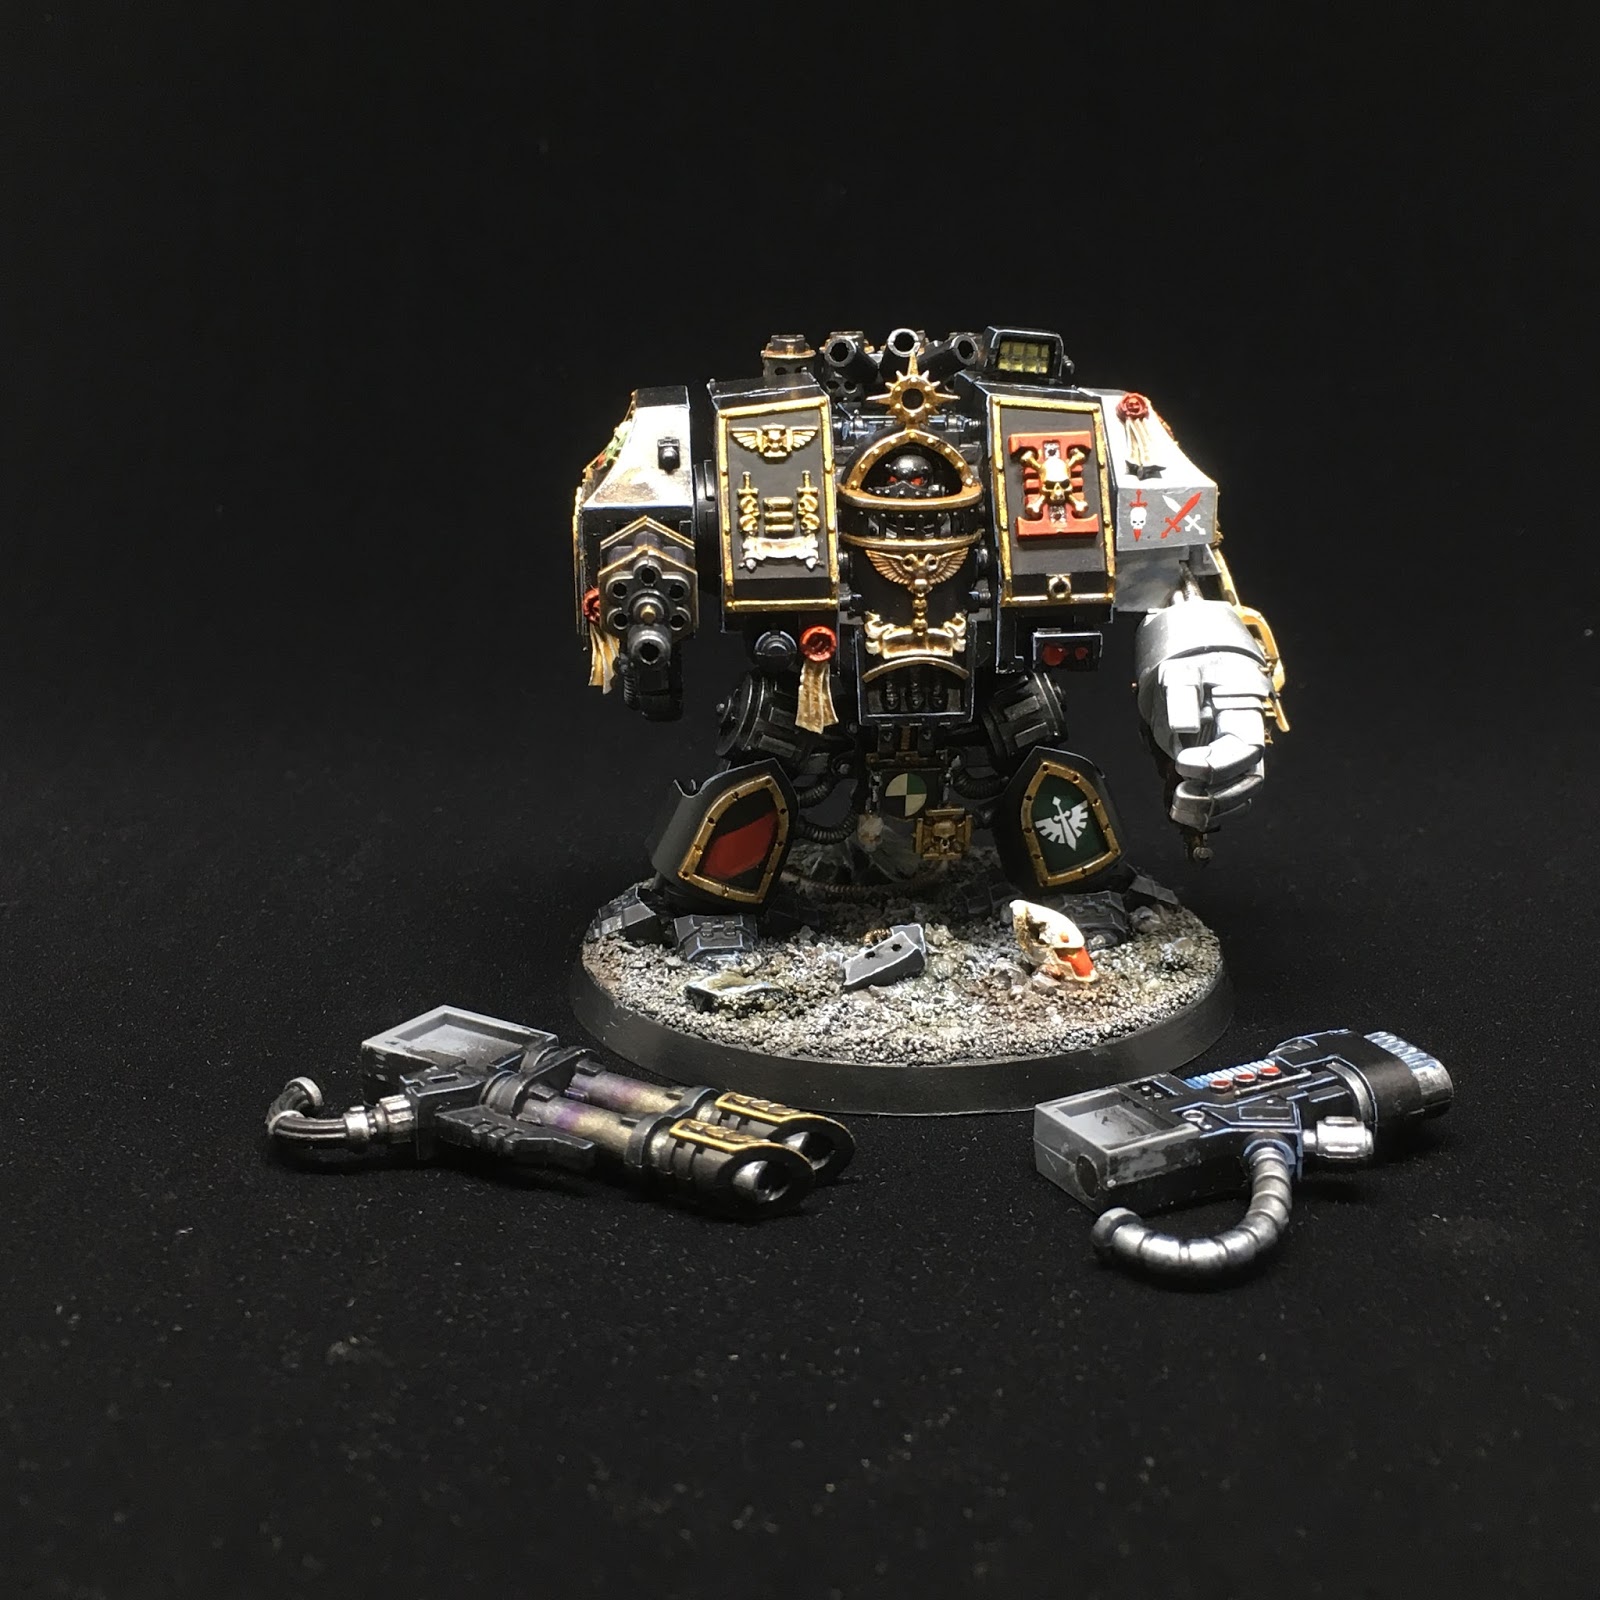
So, in 2016 I completed the following:

  • Deathwatch Dreadnought
  • Deathwatch Drop Pod
While that doesn't seem like much, I also moved the following from non-existent to PRIMED or at least ASSEMBLED:

Deathwatch:
  • Deathwatch Watch Master assembled and painted - PRIMED
  • Deathwatch Watch Captain assembled and painted - PRIMED
  • Deathwatch Watch Captain w/jump pack assembled and painted - PRIMED
  • Deathwatch Kill Team Cassius assembled and painted - 11 PRIMED
  • Deathwatch Terminators assembled and painted - 6 PRIMED 
  • Deathwatch Vanguard Veterans assembled and painted - 5 PRIMED
  • Deathwatch Veteran squad assembled and painted - 5 PRIMED
  • Deathwatch Veteran squad assembled and painted - 5 PRIMED
  • Deathwatch Veteran squad assembled and painted - 5 PRIMED
  • Deathwatch Veteran squad assembled and painted - 5 ASSEMBLED 
  • Deathwatch Land Raider assembled and painted - PRIMED
  • Deathwatch Rhino/Razorback assembled and painted - PRIMED
  • Deathwatch Dreadnought Drop Pod assembled and painted - PRIMED
  • Deathwatch Corvus Blackstar assembled and painted - ASSEMBLED
Dark Angels:
  •  Dark Angels Nephilim jet fighter assembled and painted - ASSEMBLED
  • Dark Angels Assault Squad painted - PRIMED + Partial Paint
 Imperial Knights:
  • Freeblade Knight Paladin painted - Partial Paint
 Terrain:
  • Complete terrain project (6 buildings assembled and painted) - ASSEMBLED  
  • BONUS: assembled and primed three containers from the new 40 containers set.
  • BONUS: Assembled, based, and painted four pieces of scatter terrain/objectives using crates and barrels from the container set mixed with other elements from the bitz box.
That's a good deal of modelling for me! I end 2016 with a new army (Deathwatch) assembled and primed and a new city terrain set to go with four rubber 4'x6' gaming mats from Gamemat.eu that I purchased over the course of the year. Granted only some of the terrain is painted and most has not yet been mounted to a base or primed...but it's usable in a friendly game.

It's worth noting I completed my first 30K 1st Legion test model (assembled and painted), a special weapons trooper with missile launcher and assembled/primed four additional troopers w/missile launcher for the squad. When Deathwatch launched, I chose to use them to work on techniques for painting black armor (edge highlighting!  Ugh...) before continuing with the 1st Legion.  I also assembled and primed three 1st legion Contemptor Dreadnoughts based on the Betrayal at Caalth plastics. A 30k 1st Legion predator was also built and primed.

Oh...and I assembled my model of Garro from Forge world. So there is a good deal I modeled that did no make the TODO list as well. My 30K modeling is a side project since I don't have any outlet for playing 30K games currently...though I LOVE the flavor and the models.  It has been a personal passion for me to one day build a force of 1st legion space marines.  So it is very cool to have the models for that now.  I have a decent force of unassembled marines, terminators, and special characters waiting int he wings for that project.

I hope your 2016 has been filled with much gamig and modeling! If for nothing else, let's enjoy the excuse to keep our heads down and find peace among the upheaval 2017 promises for politics and the world as a whole...

Here's to a very happy and productive 2017!

Cheers and Happy Gaming!  

Thursday, October 27, 2016

Dreadtober 2016: Update 4

Photo/Drawing/Logo by Todd @ Sincain40k

My Dreadtober 2016 project is complete!  This week I tweaked the highlights to lighten them strategically where I felt I hadn't done enough to sharpen the highlights and call out the areas catching the most light. This included some additional highlights on the base.  I also decided to add heat effects to the barrels of the lascanon and assault canon as well as the exhaust stacks on the dreadnought's back.  This and some other cleanup complete, I laid down the final coat of flat varnish and chose to call this one DONE.


Following advice from Kenny Boucher over at Next Level Painting, I choose Testors Model Master Lacquer Overcoat Lusterless (Flat). Bell of Lost Souls has a post from him where this is recommended.

Here are some closeups of the heat effects work.  I'm really new with the techniques for this effect, but pleased none-the-less with the results!  My approach was to focus on the darkest discoloration coming from where the heat source originates, lightening as things get farther away and begin to cool (relatively speaking).


 I will close with a final set of project pictures.


 Cheers and Happy Gaming!


Thursday, October 20, 2016

Dreadtober 2016: Update 3

Photo/Drawing/Logo by Todd @ Sincain40k

Coming through week three, the remaining two weapon options have been completed.  Additional highlights have been applied to the dread and base both. If I were honest, there's a lot of fussing going on as I decide how far to go before calling it done.  The plasma cannon got additional edge highlights. I intentionally chose a more subdued color scheme for the weapons, keeping the cases black instead of the red I am using on the infantry weapons. 

Rotating Deathwatch Venerable Dreadnought

Had fun trying out my new Foldio360 that I acquired through their Kickstarter.

Dread w/assault cannon

Dread w/lascannon

Close-up of the barrel details...a little washed out sadly.

I'm content with where things are at.  I will look at the highlights next week and consider refining them.  The blue-gray edges, for example, are just a single pass.  I could lighten them up on the highest spots, for example. Could also dress up the weapons with heat effects. I'll use the opportunity to make one last pass over the whole model to catch anything I might have missed as well.  I find it's good to step away and come back to catch stuff I'm blind over otherwise.

That's where I'm at for update three.  The fourth and final update will wrap this guy up...should name this veteran now that I think of it...look for a name too then...

Cheers and Happy Gaming!

Thursday, October 13, 2016

Dreadtober 2016: Update 2

Photo/Drawing/Logo by Todd @ Sincain40k 
Closing out the second full week of October, more progress on the dread. For the first session this week,  I finally got to the edge highlighting on the black armor, using a Vallejo blue-grey color.


Additional high lights went on all the gold and other metal elements as well.  Several additional details have been touched here, including the search light and highlighting of the smoke launchers.

 WIP: Deathwatch Dreadnought Front 

The plasma canon got some love as well.  This will be a Dark Angels veteran, so plasma is only fitting!  The other arm weapons will also get done before the project completes.
 
WIP: Deathwatch Dreadnought (Right Side)

The Left arm still looking good after additional highlights.
 
WIP: Deathwatch Dreadnought (Left Side)

More highlights on the rear chassis as well...


For the second session this week, I tackled the base and added decals.  This hero is a veteran of the Dark Angel's 5th company who has achieved many honors, some of which are reflected on his left arm. The company logo doesn't feature well in this shot, but it is displayed on an honor roll hanging between the mighty dreadnought's legs. 

WIP: Deathwatch Dreadnought (Front)

I enjoyed hacking away at the base...there are few rules at this stage and it is quite freeing! A layer of dark grey to set the shadows of the surface of an industrial wasteland.  The a few dry brush layers of lighter greys...then spot washes of GW green, agrax earth shade and sepia. I picked out the pieces of beams in a darker shade and then did some looking around for examples of Eldar helms, never having painted the filthy xenos myself before...I had fun with the blackened hole on the right side of the helm.  This spot is likely where the warrior met his demise.

WIP: Deathwatch Dreadnought (Rear)

Dressed up the back with additional highlights and spot colors such as the small plaque above the chains on the engine cowl. The base is shaping up with the random hose (made from green stuff, using a tentacle maker from Green Stuff Industries) getting some bronze/brass treatment.  This will get some additional weathering as the project continues.  The dread's feet have finally been highlighted as well. I will need to add additional age and weathering to the engine and the stacks, but I really like how they are progressing so far.

So there we are after week two.  Hope the other projects are going well out there.

Cheers and happy gaming!

Friday, October 7, 2016

Dreadtober 2016: Update 1

Dreadtober Logo by Todd @Sincain40k
Photo/Drawing/Logo by Todd @ Sincain40k
As I close out the first week of Dreadtober, I wanted to post an update of my progress.  I was able to get a couple short sessions in this week which I felt helped propel the project ahead of schedule for now.
Clicking through to get a larger view of the picture above, you should see some of the detail in the head.  The head and sarcophagus are all assembled now.  Detail in the armor underneath is now lost from view, but no worries.  I know it's there! I got a little carried away painting trim and other details.  Hopefully this doesn't overly complicate all the fun edge highlighting to come on the black.  

A close up from the front.  Lots of detail work.  I plan to put a Dark Angels logo decal on the left leg.  Perhaps a little non-standard for Deathwatch, but the right shoulder I chose was not going allow me enough latitude to honor this veteran's chapter of origin. I randomly chose a watch company which I'll now have to replicate across my new Deathwatch members as they get painted. I thought the diagonal stripe worked well here. My attempt to pen "ZAEL" on the sarcophagus scroll came out more like "ZAR"...not sure if I'll keep it as is or try, try again.  I need better skills with free hand text, especially at such small scale...


Only some basic work on the back of the dreadnought.  Again, got a bit excited about scrolls, purity seals and oath papers when I probably should have been edge highlighting. :)


Deathwatch Dreadnought WIP

I had a lot of fun with the left arm, especially the litany scroll and the beginnings of the flamer. Had to just let inspiration run ragged here in place of discipline.  I guess it is one reason I like painting in sub-assemblies.  It was easy to go to town on this arm without affecting all the black and doing many retouches, etc..  I am hoping it all looks right together after assembly in terms of shading, intensity, and color matching.  One good reason to get all the details on various parts done at once I guess.

So that's where I stand on this project as week one closes.  I won't get time this weekend, so I'll see where I can get one or two nights next week.  Best of luck to all the other Dreadtober participants out there.

Cheers and Happy Gaming!


Monday, October 3, 2016

WIP - Deathwatch Drop Pod


More progress on the drop pod over the weekend.  While not apparent from the pic (which is WAY washed out for some reason...took this late and should have looked at it before closing for the night...), A lot of clean up was done to the black to fix some over painting from all the work on the inside, mostly around the door edges.

The bulk of the session was dedicated to the five Deathwatch insignias. This done, next session with this project will see me tackle the dreaded edge highlighting for the black areas and some additional highlights for the metal/silver areas. I need lots of practice edge high lighting (too many years spent dry bushing instead).  I hope the work on this large project will set me up for the rest of the Deathwatch and really mature skills I'd like to have before returning to the 1st Legion 30K project I have on the back burner.

With Dreadtober launched, the drop pod work will slow a pace so I can commit enough time to finish my Dread for the challenge!

Happy Gaming.

Dreadtober 2016

Dreadtober 2016 - image credit Todd @ Sincain40k
Photo/Drawing/Logo by Todd @ Sincain40k

I haven't made the official role yet (working on that), but I intend to complete the Dreadtober challenged over at the Broken Paintbrush. As it so happens, this times nicely with the recent release of Deathwatch minis. I'm completing the drop pod so this is a great time to move on to the Dreadnought. Below is a pick of the initial build, complete with magnetized weapons for the right arm.

Deathwatch Dreadnought - build complete - Dreadtober 2016

So for week one of the challenge kickoff, the dread is assembled and primed black...

Deathwatch Dreadnought - Priming complete - Dreadtober 2016

Looking forward to carrying the project forward this week by blocking in some base colors (yeah, I know....that's mostly just some more black! :P).  Stay tuned for more as the I rise to the challenge.

Cheers and Happy Gaming!

Friday, September 30, 2016

WIP - Deathwatch Drop Pod work continues

 Another session and now the pod is fully assembled and glued permanently.  A great milestone! After some Google images searches I decided on how I wanted the console to look.  First up was some freehand work to draw in a tactical screen on the console's center dome.  I saw an example with blue form the internet and thought that was a nice change form the typical green screens I have seen (and done elsewhere). So I based the screen black, drew in the screen with a Vallejo light blue of some color, I forget. I then washed the whole screen with GW Drakenhof Nightshade.  After that dried, a layer of gloss coat completed the effect.


Some small screens were then painted in around the console where the crew might get individual views on various tactical plots and order updates, etc.  These were painted identically to the main dome screen. Some red buttons where added in to break up the endless metal dry brushing. In addition some brass/gold elements were painted in.  Vallejo Chrome was used to highlight the metal areas.  The pod assembled, I may go back and add some additional highlights at some as needed.


Here is a shot of the base with the console glued down.

 Deathwatch Drop Pod Base with Console 

And a close up of the engine which had been competed during a previous session. Here, just enough detail and highlights were added to give the pod interest when the doors are down.  I am pleased with the how the metal areas came out.  The photo is a little out of focus unfortunately. I didn't notice until writing up this post. It's all glued in now, so no goign back to this sort of shot.


Here is the assembled pod.  No longer will it be pulled apart.  Everything is glued in. I was disappointed to learn that some small amount of super glue apparently ran into the gun mount and froze it in place....thankfully it is oriented shooting out an open door and not into one of the fins. Annoying after the effort to assemble it and carefully paint it keep from freezing it in a fixed position in the first place.


I love how this is coming together...a larger and more in-depth project than I expected at the outset.  With all the detail in this kit it is worth the effort though and I'm really psyched to see it coming together.   Time to wrap up any highlighting of the insides and close it up so I can complete the outside!!

I decided to join the Dreadtober 2016 effort this year after watching all the fun projects that come out of the Dreadtober 2015 event last year. This year, by coincidence, I have a Deathwatch Dreadnought to paint and this will be the perfect incentive to get it done and advance my Deathwatch project. Stayed tuned for some Dreadtober posts as the month of October advances!

As always, Happy Gaming!

Thursday, September 29, 2016

WIP - Deathwatch Progress

Today I wanted to share some progress with my Deathwatch project.  I very much like to the new release sculpts for the Deathwatch Space Marines. Things are coming together.  First a crowd shot of where I'm at with the build...

Deathwatch WIP

Above the various assembled models have been divided into 5-man veteran squads with characters and individuals towards the center.  Using the Deathwatch upgrade bits among other things I was able to make use of a partially assembled land raider I have received as part of a bits lot from the Spiky Bitz/The Long War Kickstarter. I like the Redeemer variant, but I already have an Inquisitorial Land Raider Redeemer which can be seconded to the Deathwatch at any time, so I went with the cavernous and very shooty Crusader variant to aid in the delivery of the Emperor's wrath to the very heart of the Xenos.

Deathwatch Kill Team Cassius WIP
Kill Team Cassius Assembled
Shown above, models can be pulled from the whole force to assemble Kill Team Cassius if need be. The individual formations introduced by the various box sets are interesting, but I fancied building my own force of Deathwatch Space Marines unconstrained. Missing from these pictures are 5 additional Vanguard Veterans, a dreadnought, a drop pod, and a Space Wolf terminator with thunder hammer and storm shield.  More terminators are planned to give additional options when building kill teams.  I am considering adding another Veteran squad as well just to bulk things out a bit more. All but the 5 Vanguard Veterans and new terminator have been based black in preparation for painting.

I will close this post with some WIP shots of the drop pod which is currently on my painting table. I left the pod in sub assemblies - the base with doors, the center console and harnesses, the five fins, and the engine/weapon mount.  They friction fit very well after being based black and the whole pod can be assembled or disassembled at will currently.

Deathwatch Drop Pod WIP 3
This is what it looked like last night when I sat down to make progress.  The bare metal has been done, largely through dry brushing with increasingly light Vallejo silver colors (gun metal, oily steel, aluminum). I am using brass for the explosive door bolts and a few other details.  The engine mount is largely painted, though doesn't show well here.  The Stormbolter's gun cowling is based red. Last night I came to the mad conclusion that I needed the ubiquitous hazard stripes on the doors...


I chose a sparse pattern and used a pencil to draw the stripes in freehand.  I made use of the various bolt holes to help mark out the symetry of the stripes so they look more consistent across each separate door. This probably should have been done with the air brush and masking, but as I said this was a MAD inspiration, so of course I brushed it all in.  Above is the result after close to four hours of my noob brush work. 

I started with harvest brown (I think that;s right) from the master series paint line and painted over the black along all the edges where the stripes would go.  I then drew in the stripes and use Vallejo medium yellow to fill in the yellow portions.  I say fill in...really I layered yellow over the brown in seemingly endless coats...maybe fourteen or fifteen...seriously...many coats...until I got the yellow to a point where I was satisfied.  I favor a darker, dirty style, for my 40K work so I didn't bring the yellow up to bright Imperial Fists standards. :) This done, and my eyes bleeding, I filled in the black which went predictably quicker.

I tidied up the inside of the door edges between stripes and flood panels using a Vallejo black metal which comes out like a very dark gun metal. I then painted Vallejo brass into each and every bolt hole in the hazard stripes...there are many. This done, the stripes were washed using Agrax Earthshade and the black-metal inside edges were washed with Nuln Oil. Lastly, I poked a bead of Nuln Oil into each and every bolt hole along the stripes so the brass holes appear just a bit sooty from being blown open. :)

Deathwatch Drop Pod WIP 3
The drop pod reassembled after the Long Night of Hazards
So moving along...will exterior AND interior detail, a drop pod is a fairly involved project if you want to do more than a simple three color standard for the table top.  There is still highlighting and weathering to do on the inside of the doors, and I haven 't started on the outside of them.  The console will get some love too.  I plan to freehand some sort of tactical plot onto the center dome screen as well as catching any other significant details with color to add interest and prevent the middle of the pod from remaining a riot of plain silver dry brushing. The fines are all base coated with a simple Nuln Oil wash. They will require highlighting and weathering.

The guts complete, I'll glue the thing together for a final assembly and then close up the doors to get started on the outside...

Thats the Deathwatch so far.

Happy Gaming!

Wednesday, August 17, 2016

2016 Project To Do List - PROGRESS

This post will track the progress against my 2016 TODO list. I will update it as progress continues with each update showing changes in BOLD. This should prevent spamming the blog with repeated posts of progress text while still allowing me to compare the original TODO list post against the final progress post. Check back to see changes and watch the LAST UPDATED date to track my updates to this post.

[LAST UPDATED: 12-27-2016]

Ordo Xenos:
  • Ordo Xenos Inquisitor and Retinue assembled and painted
  • Inquisitorial Land Raider Redeemer painted - ASSEMBLED
  • Deathwatch Watch Master assembled and painted - PRIMED
  • Deathwatch Watch Captain assembled and painted - PRIMED
  • Deathwatch Watch Captain w/jump pack assembled and painted - PRIMED
  • Deathwatch Kill Team Cassius assembled and painted - 11 PRIMED
  • Deathwatch Dreadnought assembled and painted - DONE
  • Deathwatch Terminators assembled and painted - 6 PRIMED 
  • Deathwatch Vanguard Veterans assembled and painted - 5 PRIMED
  • Deathwatch Veteran squad assembled and painted - 5 PRIMED
  • Deathwatch Veteran squad assembled and painted - 5 PRIMED
  • Deathwatch Veteran squad assembled and painted - 5 PRIMED
  • Deathwatch Veteran squad assembled and painted - 5 ASSEMBLED 
  • Deathwatch Land Raider assembled and painted - PRIMED
  • Deathwatch Rhino/Razorback assembled and painted - PRIMED
  • Deathwatch Drop Pod assembled and painted - Painted to Tabletop Standard+
  • Deathwatch Dreadnought Drop Pod assembled and painted - PRIMED
  • Deathwatch Corvus Blackstar assembled and painted - ASSEMBLED
Red Hunters:
  • Red Hunters HQ assembled and painted
  • Red Hunters troop choice assembled and painted
  • Red Hunters troop choice assembled and painted
Dark Angels:
  • Dark Angels Nephilim jet fighter assembled and painted - ASSEMBLED
  • Dark Angels Assault Squad painted - PRIMED + Partial Paint
  • Dark Angels 30K Heavy Support Squad (Missile Launchers) painted 
  • Dark Angels 30K Dreadnought Talon painted
  • Dark Angels 30K Predator painted
  • Dark Angels 30K Tactical squad assembled and painted  
Imperial Knights:
  • Freeblade Knight Paladin painted - Partial Paint
  • Determine plans for remaining knights still on sprue
Terrain:
  • Complete terrain project (6 buildings assembled and painted) - ASSEMBLED

Progress...progress...progress...

Cheers and Happy Gaming!

Project To Do List

As summer draws to a close with the promise of cold and less clement weather soon on the horizon, I thought it a good time to document a to do list for the coming cold season. I was further inspired by this post from Confessions of a 40K Addict. Anything we can do as hobbyists to keep the hobby mojo going can't be a bad thing.  So that said, here's my list in no particular order...

Ordo Xenos:
  • Ordo Xenos Inquisitor and Retinue assembled and painted
  • Inquisitorial Land Raider Redeemer painted
  • Deathwatch Kill Team Cassius assembled and painted
  • Deathwatch Veteran squad and transport assembled and painted
  • Deathwatch Veteran squad and transport assembled and painted
  • Deathwatch Vanguard squad assembled and painted
  • Deathwatch Watch Captain assembled and painted
  • Deathwatch Corvus Darkstar assembled and painted
Red Hunters:
  • Red Hunters HQ assembled and painted
  • Red Hunters troop choice assembled and painted
  • Red Hunters troop choice assembled and painted
Dark Angels:
  • Dark Angels Nephilim Jetfighter assembled and painted
  • Dark Angels Assault Squad painted
  • Dark Angels 30K Heavy Support Squad (Missile Launchers) painted 
  • Dark Angels 30K Dreadnought Talon painted
  • Dark Angels 30K Predator painted
  • Dark Angels 30K Tactical squad assembled and painted  
Imperial Knights:
  • Freeblade Knight Paladin painted 
  • Determine plans for remaining knights still on sprues
Terrain:
  • Complete terrain project (6 buildings assembled and painted) 

So lots to look forward to!  I will come back to this post and update it regularly as progress is made so check back form time to time...

Cheers and Happy Gaming!

Deathwatch Kill Team Cassius

Here's a pic of the assembled Deathwatch kill team from the Deathwatch Overkill boxed set.  I managed to get them finished earlier this month and ready for paint just in time for the new codex release! The bases are traditional glue-and-gravel with some additional bits added from on of the GW 40K basing kits. The servo skull is on a custom resin base from Secret Weapons Miniatures - just a spare from the bitz box. This guy may end up used with an Inquisitor or other model so I wanted it to have more "visual interest".    

Deathwatch Kill Team Cassius WIP
Speaking on visual interest, these new models are really great looking.  The details are amazing in the plastic as we've come to expect and the poses are fun too. I will have the new Death Masque boxed set soon to bulk out this initial force and I'm looking forward to the bitz form the new veteran Deathwatch sprues.

In addition to that, I already have two five-man squads assembled and mostly painted from the past.  One is a Deathwatch Veteran squad I purchased on eBay a while back.  It's already painted and can fit right in, though these are converted models and will lack the flair of the recent releases.  I'll use them to bulk out list in larger games. The second is a Deathwatch Vanguard squad I built as a fast attack hit team to join my Imperial Inquisition forces form time to time.  These guys are well on their way to being painted, but need chapter pauldrons completed among other details. I built these using the new Assault Marines sprues so they look a bit less dated though still lack some of the veteran panache. :). once I see what I have for bits left over from the new sprues and can compare looks, I may make some modifications to the existing models before completing their paint jobs.

I'm looking forward to spending more time with the codex to develop a list and sort out what I want to build and paint to "finish" a small force of Deathwatch. I have a couple inquisitorial Rhinos that will likely get requisitioned (there were originally targeted as Stormtrooper transports when they were a thing in the Grey Knights codex). I also have an Inquisitorial Land Raider Redeemer that my just be requisitioned into the Deathwatch and occasionally seconded to Transport high value Inquisitors when needed. So I think maybe a Razorback with a couple turret options would be a good add...and of course the new flier/transport!! :)

I also reached out to eBay for a couple additional Deathwatch upgrade sprues to allow me to add a few more marines where necessary to complete new kill teams. This will help me make use of my rich collection of marine kits in the bitz box.

And all of this has me thinking more about the Red Hunters Space Marine chapter that I started working on just before moving house last year...It's going to be a good time for the forces of the Inquisition!  Having completed a Ordos Malleus inquisitor and retinue last year to pal around with the Grey Knights, I now think its high time I completed an Ordo Xenos inquisitor to hang with the Deathwatch...I mean it's only fair, right?

There really is no end to the project opportunities!

Cheers, and Happy Gaming!

Nephilum Jetfighter WIP

Greetings.

It's been quiet here of late so I wanted to catch up with some projects on the backlog.  Here, I have the start of a Nephilim Jetfighter for the Dark Angels. It has sat in the box for too long and with the release of the new Death for the Sky supplement, I felt I needed to get some of my fliers done.  I have a Grey Knight Storm Talon to paint as well as a Vendetta for the Death Korps of Kreig.  But today I'm showing off the initial cockpit work for the Dark Angel's Nephilim Jetfighter.

Unsure that I would find the time for this work, I had come very close to assembling this unpainted with the goal of painting over the cockpit, as some folks do, to obscure the nice details and simplify the overall assembly and painting task. Then I said, "Naw, let's just go for it!".  And so the cockpit assembly sat half assembled with the pilot in two halves waiting to be painted for a month or two now...

Then last night I stuck in, driven by a desire to practice painting black in preparation for the onslaught of Deathwatch being released this month!  This 40K hobbyist has been waiting a LONG time for an official Deathwatch codex and model line...but more of that in a later post.

Here are the WIP shots of the Jetfighter cockpit after initial painting and assembly.

Nephilim Jetfighter Cockpit WIP Front View
Front view

Nephilim Jetfighter Cockpit WIP Rear View
Rear view
In the extreme close up, the main targeting screen on the dash looks a bit rough.  It's satisfying enough at a normal viewing distance though and will likely be pretty obscured anyway once the canopy is a attached. I can use a lot more work on my free hand, even simply stuff like this...partly my close-up eye sight going and partly that I just cant get even a small detail brush to cooperate when painting lines.  Regardless, I figured this is a case where I just have to leave it alone and not keep fidgeting at it....numerous repaint attempts will only leave the screen piled in paint and blobby looking anyway.

That criticism aside, the front view is the money shot for me.  Definitely a decent table top standard, with enough extra effort to leave me feeling like I did good work there and didn't rush to finish things. One thing I cam away with is that in addition to having trouble with freehand target screen painting, I need a lot more practice with edge highlighting black.  I found this very difficult and had to repeatedly fix blobs where fine lines were desired. Between the Deathwatch and my 30K Dark Angels build, I'll get plenty of practice no doubt...

Happy Gaming!

Friday, May 27, 2016

Fallen Imperial Eagle Terrain

In pushing through to furnish new terrain for my tabletop, I pulled out the fallen Imperial eagle from the Honored Imperium terrain set. Last year I posted an article about painting the space marine statue.  You can see it again at the end of this post along with the new eagle.

The fallen eagle is fairly simple to paint.  I based the whole thing black, then used my Iwata Eclipse airbrush to paint almost the whole thing.  I started with a Vallejo German grey, then a lighter grey to highlight the stone/plasticrete eagle.  The airbrush is great for this.  By carefully pulsing the trigger and varying the distance to the model, it was a simple matter to lighted the raised portions and add some color variations to some of the large flat surfaces.


With the greys done, I used two colors of Vallejo browns for the earthy parts.  This included spraying brown carefully on the bits of earth scattered across the grey eagle itself.  here again, the airbrush really helped blend this in and make it convincing with now hard paint lines. 

Once the base coating and early highlights were added, I washed the whole thing with GW Nuln Oil.  After letting this dry, I selectively washed the earth portions with GW Agrax Earthshade. I carefully ashed just the cracks and lines in the stonework of the eagle to give a dirty implression to the stone work without adding too much brown overall.

With all of that dry, I then dry brushed a Vallejo bone color over the earth parts, applying a heavy coat over the skulls so they pop a bit more from the earth.  A dry brush of a light grey then went over all the sharp parts of the fallen eagle itself.  This was then sealed with Testors Master Series Lusterless Flat Lacquer.  This is the best flat coat out there, buy some and use it! :)

Above, we have the eagle on one of my new mats from gamemat.eu. These "mouse pad" material mats are the best thing I've seen for a simple, portable game surface. Below, I added the bronze space marine statue I painted last year to see how they look together on the table.

I love the way these pieces have come out. My next plan is to experiment with weathering powders in preparation to using powders on my armor and other models.  These simple pieces seem like a good place to try the new powder techniques. 

I also started another building based on the pieces I had left over from the Sector Imperialis box set combined with the sprues form the Imperial Knight Renegade box set. I'll post about that when I have more to show there.  All painted, this will give me a richly appointed 4x6 game board when combined with the game mats.  I look forward to actually gaming on them soon! 

But really, my 40k experience is more about the hobby and less about the playing these days...

Cheers and Happy Gaming!


Tuesday, May 10, 2016

Knight Paladin WIP - Adventures with the Airbrush

The various armor panels of the Knight paladin went into the paint booth last week.  After too much deliberation (I can seldom make up my mind on the best scheme...), I opted for a split white/green paint scheme.  This will be a scheme that departs from the palettes of my existing Imperial armies and should help the Paladin stand out in my collection. This is also a new challenge as I have not painted white in any amount, esp. not on armor and the split scheme allowed me to toy with masking and airbrushing. So first the white...


Please pardon the crazy image look.  I have been doing ALOT of black base coating so the spray booth is black and the white LEDs cast an odd color in these shots. I used my new Iwata Eclipse airbrush with Vallejo game air colors.  I started with a coat of 72.734 Bonewhite laid right over the black base coat, leaving the back of the panels black and avoiding the trim within reason.  I will brush paint the trim back to black later to prep for brass or gold.  I am using a strip of stiff cardboard with double-sided tape to hold the various small pieces in place for spraying - a great pro tip! I used to hold the pieces which led to all sorts of shenanigans, even with latex gloves on.

Next, a layer of 72.701 Dead White went on, sprayed from the center out, avoiding the edges next to trim to leave some shadow. I plan to use washes or glazes to tint the armor later to blend all the colors and add depth, some age, and details to the panels.  This will happen after the trim is base coated to tie everything together.

Above, the greens have been added.  I first flat coated the white and let it dry.  Then I masked off the areas that would remain white and laid down a coat of 72.728 Dark Green followed by highlights of
72.729 Sick Green. As with the Dead White above, I sprayed from the center out avoiding the edges against the trim. One this dried, I removed the tape.  

I was immediately reminded of how important careful taping is.  Some green bled under the white in spots and will have to be cleaned up by brush.  Not what I had hoped for, but hopefully recoverable.  Overall, I was very pleased with how this came out. here's a shot of the painted pieces in their current on the gaming table.


Freeblade Imperial Knight Paladin WIP

I used the airbrush to carefully base the armor shields on the weapons at the same time I was basing the larger pieces.  Also, some base coat metals have been dry brushed on the main skeleton using Vallejo model color 70.865 oily steel over 70.863 gun metal. This is just a start and more metals will be added to build up some contrast and interest around the large sections of metal skeleton.

That's the progress so far.  Stay tuned for follow up articles as more progress is made.  Comments are welcome, particularly if there are questions or suggestions for more or less detail in these posts.

Cheers, and Happy Gaming!