I have had inquiries about how I set about my bases, so I thought I'd put up a short how-to article using the Adeptus Custodes Haldberd Squad for example. This squad comes with 40mm round bases which are great for customizing as there is lots of room for fun details while still leaving space for the model to be stuck down. For the Custodes, I decided long back to use cork to build up some height and provide the illusion of sound ground for the emperors finest to trod.
You can find cork in all manner of forms. Folks use old drink coasters, old bulletin boards or kitchen trivets. I, however, turned to my trusty online source Amazon.com for 12"x12" tiles in various thicknesses. I believe I'm using either 3/16" or 1/4" for these Custodes bases. But really, it's just to taste, based on how much height you want and what look you are going for. If I wand to have layers, or stacks of rock, then I use a couple thinner layers...or I might se a thin piece under the edge of a thicker piece to prop up an edge and put a slant to the ground for interest. Your imagination is the only boundary here.
I didn't think to snap any pictures of the pieces prior to gluing. Basically, I tear off a piece roughly the size I want, then crumble off any straight edges or extra bits that hang over until I get something the right size for the base I'm using. Keep all these little bits that get broken/torn off as they make excellent rubble for bases or larger terrain. Also, a couple smaller bits can be put down to illustrate broken ground to add variety to your bases. Here's a step by step of one of the Custodes bases coming together.
 |
| The cork glued down |
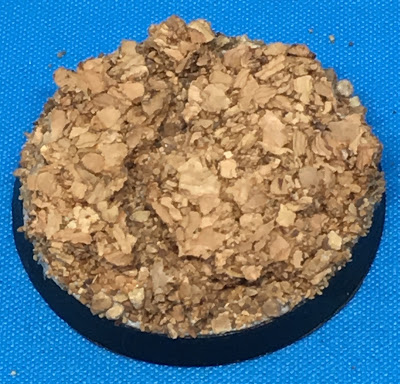
First, the cork is glued down using a quality wood or carpenters glue. Wood glue, is basically a thicker version of white glue that has good tack and dries quickly. It dries somewhat cloudier than white glue, but we don't care about that since we're painting over it all anyway. In the example above, I've used various cast off pieces of cork to make some broke ground. Again, the sky is the limit for what you choose to do here with the cork. For important characters, I put in much more effort to generate a unique and cool looking bit of turf.
 |
| After a quick dip in the ballast tub |
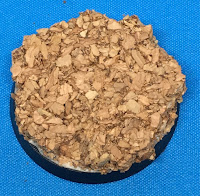
While the glue is still wet, I put the whole thing into my tub of railroad ballast. The bases is thoroughly covers and I push the mix down to set it into any exposed glue. Then the base is pulled out, tapped off, and any unsightly bits rubbed off, particularly around the rim of the base where I want a smooth finish. This step adds some natural elements to the base and blends everything together. At this point, the cork starts to hide a bit, except for the broad flat surfaces where its obvious pattern can still be seen. We'll deal with that later.
 |
| Some details added |
After being dipped in the tub and left to dry, a base is generally done. However, I prefer to go further and add some additional interest and detail. In this case, I'm putting in a few skulls here and there in the cracks where they might reasonably settle after being blasted and kicked around a battlefield in the 41st millennium. You can continue to use the wood glue here, but I generally switch to my super glue. The super glue dries much quicker so i don't have to worry about my carefully placed details becoming dislodged and ending up on the floor or in some other less desirable location on the base itself.
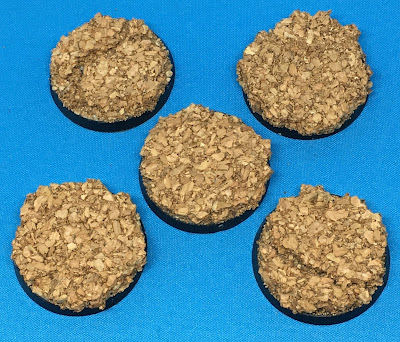
Here are additional closeups of the remaining bases for the Custodes squad.
This base was done with a single sheet of cork, instead of separate pieces. An xacto knife was used to carve out a bit of a crack, into which a daemon skull from the recent GW skulls boxed set was glued.
This base was made with two pieces of cork with a resin skull glued down in the crack.
These last two bases are just simple one piece cork bases. They all could be done this way to make the whole process simpler. But I like to vary my bases some to add interest among a squad of models, in the same manned a set of themed resin bases typically offers some variety.
The last step is to lay down some Vallejo Black Lava over the flat surfaces to add a nice gritty ground texture and mask the obvious pattern of the cork. On larger bases, or in spot application for effect, I might instead glue down more of my basing ballast as rocks and gravel strewn about...often putting it around various cork layers on a multi-layer base to illustrate material crumbling from the larger features. This can even be added into the black lava to vary the texture. In addition, other details like grass tufts, bits of debris, etc. could be glued down. I choose a base theme for an army and stick to it throughout the force. In this case, I'm going with a simple blasted/barren ground theme so that nothing on the base will distract from the glorious details of the Adeptus Custodes.
Once the base is complete, it is painted separate of the miniature. In many cases, clear spaces are left on the base where the model will be glued down. In other cases, I may scrape away a bit with a knife to clear a flat space for boot or limb. While a model may be simply glued down to the finished base with super glue, I find it all to easy for the new paint to lift off with the miniature which is very frustrating. As a result, I always pin my models to cork bases. For small models, a single foot pinned down serves. For a knight or other large model, I might pin both feet.
When pinning, I use a pin vise to drill straight through the whole base. I then make sure to use a length rod that penetrates all the way through once the model is glued down. This is important since the cork is quite malleable and it will be easy for models to get bent or twisted off the base under any firm pressure otherwise. With the pin all the way through the plastic base beneath, I've never had this happen. Any extra pin can be carefully trimmed away at the bottom so the model sits flat. Be careful not to leave sharp cut ends under the base that may stick you during later handling. I say this from experience. Lastly, I turn the model upside down and put a drop of super glue over the pin end(s). I give this a blast with the super glue accelerator to dry it quickly. This last step may be more superstition than science, but I fancy that it puts as stop at the back of the pin to make it less likely to pull back out later.
So that's it! :)
I hope this simple tutorial has proved interesting. There is a wealth of custom bases on the market and I make use of them for some of my models. However, it is also very easy and pretty cheap to create truly unique and interesting bases like this on your own with very modest modelling skills. May you be inspired to create some custom bases of your own for future projects. If so, please come back and comment here with some links to share.
Cheers and Happy Gaming!


No comments:
Post a Comment