A journal of my efforts towards completing various and sundry Warhammer 40K projects involving the many Armies of the Imperium of Mankind.
Enjoy and feel free to comment...
- Home
- Adeptus Custodes Paint Recipe
- Adeptus Mechanicus Paint Recipe
- Aeronautica Imperialis Paint Recipes
- Blades of Vengeance Paint Recipe
- Dark Angels (Pre-Heresy) Paint Recipe
- Dark Angels Paint Recipe
- Death Korps of Krieg Paint Recipe
- Deathwatch Paint Recipe
- Grey Knight Paint Recipe
- House Taranis Paint Recipe
- Legio Ignatum Paint Recipe
- Legio Tempestus Paint Recipe
- About
Tuesday, April 3, 2018
On the Workbench [ April] - An Armiger Warglaive
I decided to put together one of the Warglaives, as I take a break from painting for a couple days to mix things up. No worries, I will get right back to painting the three characters I have in progress. With the rumor of a Imperial Knight codex coming, and my interest in the Mechanicum, I think it's time to move away from Freeblade knights and choose a house. So it is that this little fella will become my first knight of House Taranis. I have three knights on sprue waiting in the wings, plus one more Warglaive, also on sprue. Then there is the Forge World Cerastus Knight-Castigator still unwashed and in its original bag. A good force for House Taranis, I think.
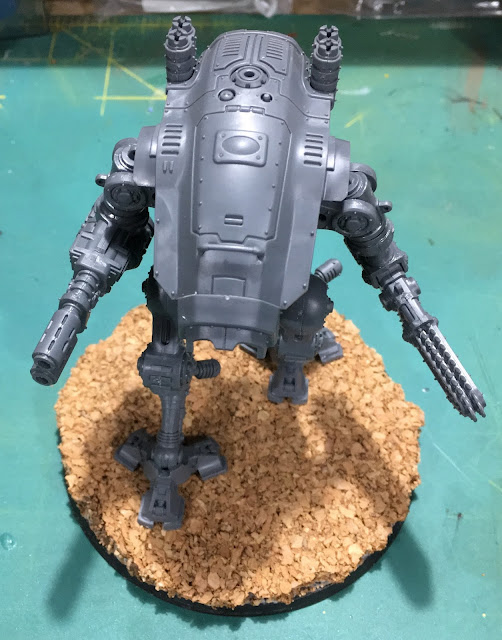
So, on the workbench in April, I have a new Armiger Warglaive. This was a simple kit to assemble. I left the armor off for painting, except for the carapace which fit really tight between the exhaust stacks and really just seemed best to glue down on this little guy. here is what things looked like after assembly was complete.
The small arms sit on a decent peg that is small and fits tightly enough that a magnet didn't seem worth it. I expect to be able to swap the weapons out as needed without much trouble. The arms attach and detach easily after assembly, so I'm leaving them off for now to make it easier to paint everything unobstructed.
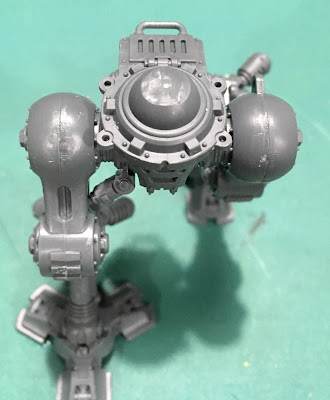
I magnetized the body and legs to make it easier to stow the knight in the future. It was a simple matter to glue magnets inside the body using epoxy during assembly. For the legs, I cut off the very top where and unfortunate peg got in the way. This peg attaches to nothing and serves no purpose I could find. I expect it may prove out in some future design. Regardless, it has to go in order to accommodate the magnet in the body. I used some modelling putty to fix the magnets up under the dome of the waist joint during assembly. This putty should ensure the magnets don't come loose and drop down into the legs. For good attraction, I used three different sized magnets assembled in sort of a cone shape to fit up inside the dome of the waist. I neglected to get a picture of that step. But here are some closeups of the result.
Everything sits snug and secure once assembled. I almost prepared the arms it magnets in anticipation of future weapon options. But that would have just robbed me the chance to build more cool knights! So I put the crazy notion aside with a chuckle. here is a shot of the finished assembly.
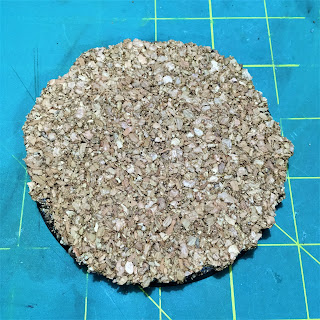
The last step was to begin a custom cork base for the knights. For now, just a simple rough disc to match the circle base. After marking out where the feet will set, I'll add base material and something scenic. I'm considering using pieces of Sector Mechanicus terrain; or possibly left overs from my Sector Imperialis kits. We'll see where inspiration strikes.
I hope to set things up so the new Taranis knights mix well with my freeblades so they all could stand together when needed with some coherency. Which reminds me...I think I need to get the Knight Paladin back on the painting table once I finish the current batch of characters...
Cheers and Happy Gaming!
Labels:
40K,
Armiger Warglaive,
Imperial Knight,
Modelling,
Workbench
Subscribe to:
Post Comments (Atom)


No comments:
Post a Comment