Greetings and welcome back to another article about whats on my workbench. I skipped a couple months due to focus on my painting projects, but here's a project I thought would be worth sharing. I was able to pick up a copy of Kill Team: Pariah Nexus and immediately set to building the marines. These models will join the Indomitus Dark Angels force I recently painted up. I chose to build the Heavy Intercessors with the "executor" option for increased damage potential at range. The only problem was, all the sergeant arms used the default Heavy Bolt Rifle, with no option to swap the clips. This was a bummer, as I love to keep things WYSIWYG. So there was nothing to do but get out the tools and start hacking...
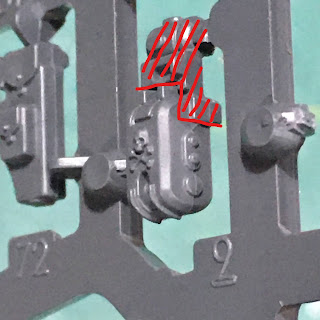
In order to to make a clip that could attach to the sergeant's bolt gun, I needed to cut away the plastic that would be part of the gun. There is no need, in my opinion, to try and get the whole part in there as the differences are mainly to the size and shape of the clip itself, not the receiver/port ejector, etc. And as you'll see below, the arm I chose hides most of this anyway from all but very close inspection.The pic above illustrates the plastic I removed from the clip, I made special effort to save the two prongs just below the removed plastic...I bent them a bit, but was mostly successful.
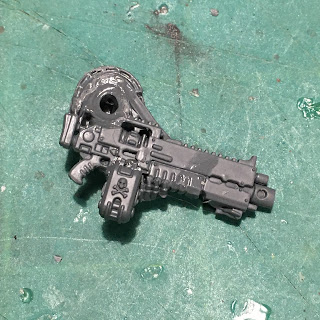
I didn't take detailed pictures of the modifications to the sergeant's arm, but you can see the results above. Using the blade of the forearm as a plane, I cut the existing clip off with flush cutters (sharp sprue cutters). A small saw would have worked if I was careful too. I then clipped off the front of the clip being VERY careful to preserve the fingers that were up against it. The new clip is shown above so you can see the notch I cut out of it to fit over the modified bolt gun.
Here it is again with the clip oriented as it will be glued down. The two prong bits at the top are easy to see to now, with some white discoloration from accidentally bending them...but I didn't snap or cut them off fortunately!
With the clip glued on, you are hard pressed to tell that this is not an Executor Bolt Rifle without careful comparison to and original. And this view is hard against the model's body once attached so you can't even see it without careful inspection.
From the other side, it looks totally normal. Let's see how things look fully assembled.
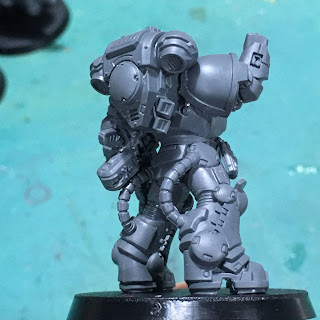
The clip visible from the underside of the arm. Once painted up, I doubt it will be obvious at all that this isn't and original part.
From the left side of the model, the obvious view now looks like the profile of an Executor bolt rifle. It's a pretty simple conversion that will keep the squad looking coherent since they must be armed with the same weapons. I'm a stickler for details. 😂 If you don't fancy cutting up the models like this, don't worry. There is currently no point difference between the three different options for this squad, so WYSIWYG is more of an aesthetic thing anyway here, though it can certainly avoid confusion for those who know what to look for.
Fun Fact: There is no indication in the instructions or the Space marine codex of what each pattern of bolt rifle look like. However, if you poke through the Pariah Nexus rule book, there are color photos of the models. And if you read the captions carefully you can find examples of the models called out with the various options - though I think there are mistakes/inconsistencies to watch out for in the examples.
So that's all that I have on the workbench in March. I really need to get back to the Warlord-Sinister Psi-titan I'm painting for #MonsterMarch5.
Stay safe out there.
Cheers and Happy Gaming!


No comments:
Post a Comment