Wednesday, March 6, 2019

#MonsterMarch3 Week One Status


One week in, here's my status on the Legio Tempestus Warlord.  Following assembly, it was time to begin priming the model using Vallejo Surface Primer Black and my airbrush.  I love priming this way since I can do it inside easily without fumes using my spray booth (which exhausts outside). I started with the bits still on sprue.

Priming the armor panels

Priming the heads and weapon shields. 

I decided to prime all the options for convenience.  Obviously I won't be using the traitor armor, ick. :) Next I stuck some of the loos bits to some double-sided tape and primed those.

Priming the armored foot pistons

Priming some loose body armor.

Then it was time to prime the rest of the (mostly) assembled warlord.  I have more work to do on the base that is waiting for supplies so it is not primed at this stage.

Adeptus Titanicus Warlord WIP - legs primed
Priming the legs

Adeptus Titanicus Warlord WIP - torso and arms primed
Priming the body and magnetized weapons
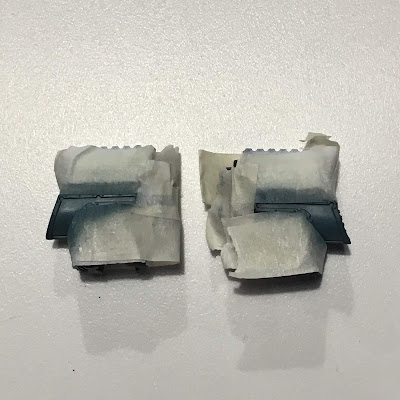
Once this had dried completely, I laid down a base coat on all the metal parts using Scale 75 Black Metal and my airbrush.  Too lazy to mask at this stage, I just tried to be careful and not go crazy covering areas I would later be painting another color.


And now the Warlord with its metal bits...

Adeptus Titanicus Warlord WIP - Front

Adeptus Titanicus Warlord WIP - back

And that's where things stand for now.  The Warlord is looking good, looming over the rest of the maniple so far...

Legio Tempestus Titan Maniple WIP


Next up, I began base coating the rest of the model in preparation for painting the camouflage pattern and laying down the checkers.  I'm printing a new custom decal sheet of black checkers on a clear background. I picked up some Testors Decal Bonder spray which can be used to seal inject printed custom decals with a normal decal film.  This will be much better, I feel, than using matte spray over the decal paper. I hope the Decal Bonder will stop an issue I've had with the black rubbing off while positioning the decals, despite the matte spray trying to seal it in. I'll cover the whole process and my evaluation of the results in a later post.

So to prepare, I sprayed GW White Scar on the white areas and Vallejo Air Medium Gray on the parts to be camouflaged.  Masking tape was used to protect various areas during painting, particularly those parts I'm not going to use on this titan.

Adeptus Titanicus Warlord Legio Tempestus WIP - base coating the armor
painting armor panels onthe sprue
 The tilting shields will have a white field.  I'm thinking one will be checkered, and the other plain white with a decal of some sort. The left pectoral armor will be white with some black pattern on it, which the rest of the armor will be camouflaged.  I thought the knee and thigh armor would look cool quartered with white and black for this titan; sort of an exaggeration of the smaller checks as personal heraldry for the engine.

Adeptus Titanicus Warlord Legio Tempestus WIP - base coating
painting more bits on sprue
 I'm experimenting with one head option that will be quarters with white and black with camouflage on the opposite quarters.  The gun shields will also be quartered with camo and white.  One white quarter will be checkered, the other plain white, I think. Its quite fun planning out the heraldry on these large models.  I think it'll look a bit busy, but I guess that's also the point!

Adeptus Titanicus Warlord Legio Tempestus WIP - starting the camouflage
Torso armor to be camouflaged

Adeptus Titanicus Warlord Legio Tempestus WIP - base coating the missile launchers
painting the missile launchers
 The missile launchers will be black and white checkers on top and camouflage on the bottom.

Adeptus Titanicus Warlord Legio Tempestus WIP - base coating the torso and weapons
Plates on the torso and weapons to get camouflage 

Adeptus Titanicus Warlord Legio Tempestus WIP - base coating the torso
Thinking about camouflaging the torso...

So that ends week 1 of #MonsterMarch3 for me.  I'm busy with family for the long weekend, then I get stuck back in for week two.  I'm very excited to watch this beast take form as the various colors get laid down.

Cheers and Happy Gaming!


Monday, March 4, 2019

#MonsterMarch3 Week One progress. Assembly!


Welcome to my first update for #MonsterMarch3.  For this challenge, I did not have an assembled model, so I'm following the program and using week 1 for assembly.  The Adeptus Titanicus Warlord kit is a lot of fun to assemble.  Following along with the instructions, I started with the leg assembly.

Adeptus Titanicus Warlord Titan WIP - leg assembly

To add an element of motion to the engine, I'm posing it stepping onto (and cracking) a rocky out cropping as it strides forward. The cork is only loosely placed at this point to provide enough area to get the legs posed well.  I'll clean up and glue down the cork so it resembles a landscape cracked by the weight of the engine as it stomps down.

The assembly is stock otherwise.  It's cool how easy the legs are to pose.  Great set up for the knees combined with the ball joints at the ankles and hips. While the glue dried on the legs, I set to the torso. All armor panels are left off for painting and I won't glue the waist until much later after the painting is well underway.  These models are small enough that I chose not to magnetize their waists.

Speaking of magnets, this model was designed to accommodate them in the shoulders and carapace weapon mounts. Very cool.  I chose to drill the magnet holes a smidgen deeper to accommodate the 2mm thick  magnets I had - I also wanted the slightly larger magnets for better hold. The supplied sockets fit a 1mm thick round magnet.  I don't recall the diameter, but you can find that info easily online with a simple search,

Adeptus Titanicus Warlord Titan WIP - magnetizing the arms
The upper arms will click in with these magnets.
Adeptus Titanicus Warlord Titan WIP - magnetizing the missile launchers
The Carapace weapons will set down on these magnets.
The upper arms have a socket as well as the shoulder mounts for the other side of that magnets.  Make sure to keep good track of your polarities!

Adeptus Titanicus Warlord Titan WIP - magnetizing the arms
Upper arms with magnets installed.  
Adeptus Titanicus Warlord Titan WIP - magnetizing the volcano canon
Right volcano canon assembled with shoulder
Adeptus Titanicus Warlord Titan WIP - magnetizing the volcano canon
Left volcano canon assembled with shoulder
Last up, magnets were glued into the carapace apocalypse missile launchers.  I use 2-part 5-minute  epoxy for this, but super glue could work as well.  I find epoxy a more flexible and "sticky" bond with the magnets.  I've used superglue as well, and it works, but the bonds are brittle and occasionally a magnet will pop free.  So far, I've not have that issue with epoxy.

Adeptus Titanicus Warlord Titan WIP - magnetizing the missile launchers
Magnet glue into an apocalypse missile launcher.
 And now, for the grand reveal, we have the Warlord assembled (mostly) and striding forward with purpose.

Adeptus Titanicus Warlord Titan WIP

The armor and head bits are still on sprue.  I'll start the painting there using an airbrush.  Then I'll assemble those bits later on in the project.  Next up, the base will get finalized and priming will begin.  That should round out week 1.  I'm still considering names for my Tempestus titans.  This beauty will need a name before the challenge is complete!

Best of luck to all the fellow challengers for #MonsterMarch3.  And even if you aren't participating, best of luck with whatever you are working on.

Cheers and Happy Gaming!

Thursday, February 28, 2019

My pledge for #MonsterMarch3

image courtesy of swordmasterofhoeth.blogspot.com

Well, those following my blog understand I like a good blogger challenge.  And having just finished up with Squaduary 2019, its now time for #MonsterMarch3!  Since I was looking at moving on to some Adeptus Titanicus work, I think I'll take the opportunity to tackle my first Warlord Titan for Legio Tempestus.  For those interested in the Legio Tempestus color scheme, check out my Reavers here.


I have both Warlord Titan kits so I'll have to decide which to build first for the challenge.  As cool as the claw looks, I expect both my warlords will bear shooty arms, similar to the GW stock model above.  Though, if the magnetization works out well, perhaps I'll build a claw for fun any way.  I'll have to see how the build goes.

For now, there is my pledge.  Expect regular updates as MonsterMarch3 gets underway.

Cheers and Happy Gaming!


Squaduary 2019 Week 4 Update - Horus Heresy Dark Angels


We're in the final day for Squaduary.  I completed my pledge last week and decided to take up the second tactical squad that I had not finished in January.  They had come along nicely, but were missing highlights and the sergeant's head was unpainted.  That was no good, so I started there.


Just a simple base coat of Vallejo flesh with GW Reikland Fleshshade and a follow up of GW Carroburg Crimson on the lips and around they eyes.  GW White Scar was used to paint in the eyes and a careful dotting of GW Abbadon Black set the pupils.  More Vallejo Flesh was used to highlight the nose, brow ridge, chin, etc..


I had been watching the Oscars the night before...and maybe its just me...but doesn't this sergeant look a bit like a post-human Willem Defoe?  Anyway...I got to laughing so hard I had to take a break.

Next up the squad got metal highlights with Vallejo Steel and the power sword got some Vallejo Brass painted on the inlay.  Scrolls on the Sergeant's chest plate and one other trooper were also painted using my standard recipe.


One more session tonight will put paid to this squad I think.  The sergeant got his Vallejo Ghost Grey highlights on the black armor and bolt pistol, but the rest of the squad still needs these highlights. Then I'd like to lay down some additional decals to match the support squads.  Some red legion symbols on the knees that aren't studded and a squad number on the right knees.  Easy enough for one session.


There have been some truly great projects done this Squaduary.  Congratulation to all the participants this year!

With the completion of this tactical squad, I'll likely take a break and got back to painting Titans and Knights for Adeptus Titanicus...and probably put work in on the Blackstone Fortress models.  Plenty of new work to pick up and lots of interesting projects.  I'm especially looking forward to refining my skills with the Legio Tempestus camo and heraldry.

Until next time.

Cheers and Happy Gaming!

Thursday, February 21, 2019

Squaduary 2019 Week 3 Update - Horus Heresy Dark Angels


It's time for a Squaduary 2019 week three progress report.  This week I tidies up highlights, did a lot of work on transfers for squad markings and legion symbols, then brought both squads to DONE!

1st Legion Dark Angels  WIP

It started with the highlights...always the highlights...this time the Oily Steel needed a plain steel highlight to brighten and define the edges.  This provides a good highlight after Nuln Oil in my opinion for a simple silver metal look.  Then, I took to the decals.  I chose the same custom white horizontal double arrows for the tactical folks and the typical heavy icon also in white from the same custom transfer sheet I downloaded from bolter and chainsword to get the double arrows.

1st Legion Dark Angels Terran Tactical Support  Squad WIP

1st Legion Dark Angels Terran Tactical Support  Squad WIP

I had less than perfect results with the arrows, but no matter.  This gets cleaned up later.  This squad is also using a small black and white checker box for heraldry on their shoulder pads. A small nod to the checkers used by the other two tactical squads.  Below, you can see the heavy support icons laid down on the missile launcher marines.

1st Legion Dark Angels Calibanite Heavy Support  Squad WIP

I decided to use a red skull as heraldry for the missile launcher squad.  This laid down nicely over the heavy support icon. I then put squad numbers on the right knees and a legion icon on the left knees where there was a place.  I left it off any knee pad that had studs all over it, obviously.  After several coats of micro-sol to get everything to lay down tight over the curves and dissolve some of the decal film, I painted a thin coat of GW Lahmium Medium over all the transfers to seal them in.

Then it was just some tidying up and a final heavy spray of Model Masters Lusterless Flat Coat over all to seal the hard work and provide a consistent finish to all the surfaces.  Here's some shots of the squads from the light box.  It was getting late and I didn't get the focus or white balance down very well, but the pics are usable.

1st Legion Dark Angels Terran Tactical Support  Squad with plasma weapons

1st Legion Dark Angels Terran Tactical Support  Squad with plasma weapons

1st Legion Dark Angels Terran Tactical Support  Squad with plasma weapons

1st Legion Dark Angels Terran Tactical Support  Squad with plasma weapons


I really like the plasma squad in the mark III plate.  I hope the heavy plate keeps them alive long enough to lay the smack down on some traitors...at least until Horus Heresy moves to 8th edition rules for plasma.  Now on to the heavy support squad.

1st Legion Dark Angels Calibanite Heavy Support  Squad with missile launchers

1st Legion Dark Angels Calibanite Heavy Support  Squad

1st Legion Dark Angels Calibanite Heavy Support  Squad with missile launchers

1st Legion Dark Angels Calibanite Heavy Support  Squad with missile launchers

So with that, I'm calling this Squaduary 2019 project DONE.  And with a week left, I'm on to the bonus round where I'll either paint the HQ that got left out of my January challenge, or I'll complete the 10-man tactical squad that didn't' get finished in January either.  It'll probably be the tactical squad so I can call 31 HH marines done for two months effort.  That's a big time record for me.

I'm loving the other Squaduary 2019 projects going on and completed.  Best of luck with yours.


Cheers and Happy Gaming!