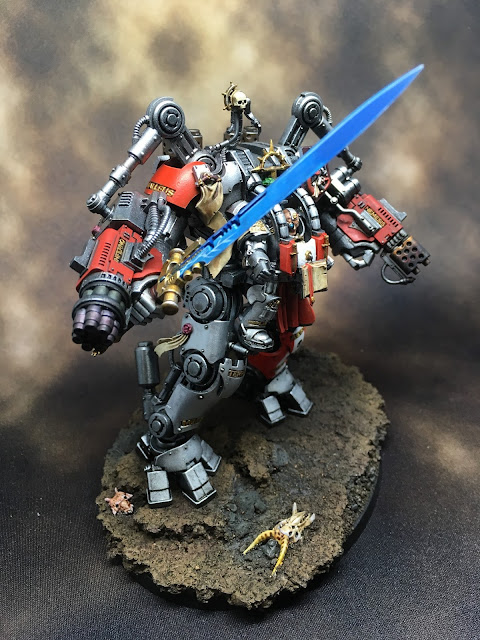
Greetings and welcome to my end of week two DreadTober 2017 post! By the end of the week, all surfaces had some paint on them and the project overall is coming together nicely. I should be able to coast through the final weeks addressing highlights, correcting what ever isn't really working, finalizing the base and fixing the model in its final position. I'm also considering magnetizing the top half to the legs to make it easier to pack up and transport in the future.
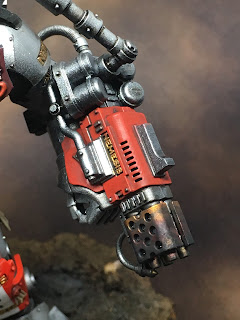
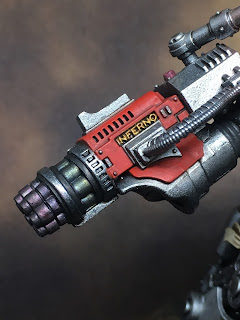
Lots to go over for this week, so I hope you have a cup of coffee or tea to hand. The week started with some attention paid to the arm mounted weapons. GW Evil Sunz Scarlet was layered over a base coat of the old GW Mechrite Red foundation paint. The lettering was hit up with Vallejo Brass and a coat of GW Agrax Earthshade was washed over all with a focus on the recesses. Special care was take with a damp brush to draw off any puddles that tried to form on the broad flat surfaces.
Heat effects and general weathering were applied to the business end of the weapons to carry the impression of heavily use, midst battle. The flammer got some purple and yellow washes followed by a heave dry brush of GW Abaddon Black. The psi-lencer got many progressive washes of purple, blue, green, and yellow as I moved up the barrels from the front to the back. A heavy Nuln Oil wash was laid down last to aid in blending the washes and normalizing the shadows. I'm no hot-metal scientist, but I like the effect.
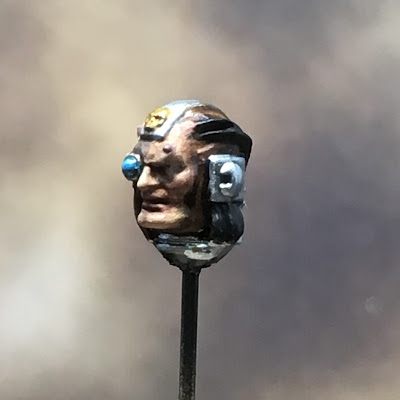
Next up was the Grand Master's head. A basic Vallejo flesh color was used as a base followed by several rounds of washing and highlighting until I had things where I wanted them. GW Reikland Fleshshade was used as a general wash with Carroburg Crimson and Druchii Violet used around the eyes, cheeks and mouth. Reaper Masters Series Harvest Brown was used on the hood with a GW Agrax Earthshade wash. The metal bits were painted using GW steel with a Nuln Oil wash. More Vallejo Brass with a GW Agrax Earthshade wash was used for the gold bits. A Vallejo light blue was used on the optical lense with a GW Nuln Oil Gloss wash. I went with a grey eye again, with washes to further define the space and blend things in. I like how this turned out on My Deathwatch Watch Master and it doesn't disappoint here.
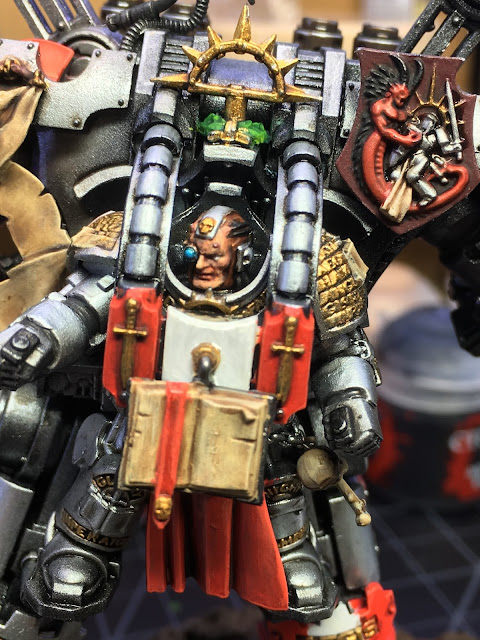
Then, the head was clipped from the cork and dropped into the knight suit to see how things would look when assembled. I left enough wire to pin the head in place when all is said and done. I thought of leaving it to turn, but I don't think I'll do that in the end.
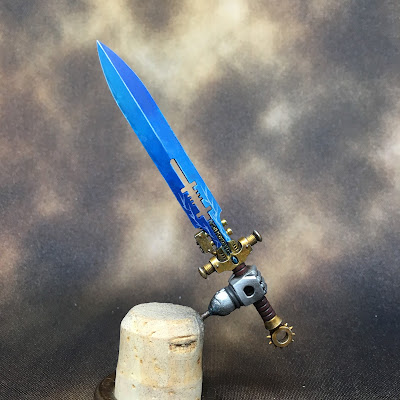
The final session of the week saw me take on the sword for some power weapon effects. After considering my options (and reviewing some great videos on youtube.com), I decided to give Duncan's approach a whirl from the GW Warhammer TV channel. I secured the necessary paints, and as week 2 drew to a close, I cracked on with the paint job.
Earlier in the week, I had completed the hilt to a decent standard. I can leave things here, or come back in with additional highlights and some detail later in the month if time permits. Below are the final pics of the blade work.
I won't go into the paint recipe except to state that I was was forced to use GW Temple Guard Blue in place of GW Baharroth Blue as I wasn't able to secure a pot in time for the session. Overall, I guess I got what I was after. In critique, I don't feel I carried the effect well. In hindsight, it might not have been the best idea to try this type of effect on such a large blade for the very first time. I would have been better served had I practiced a couple times on some of the MANY spare Grey Knight force weapons in my bitz box. Clicking to get the zoomed image should make it clear where I did not carry off the fades well; and the edge highlighting is blobby in spots as well along the blade edge.
Still, an honest critique aside, the blade still looks cool when viewed at tabletop distance and I don't feel I ruined it by far. I will state for the record, however, that I did assemble a spare sword from the bits box in preparation for a replacement while waiting for one of the many coats of paint to dry. I departed form Duncan's recipe at the end by applying a careful coat of GW Drakenhof Nightshade to help blend the various layers and highlights together. This softened some of the harsh contrasts where colors met and were not blended as well as I might have liked. Looking at these final pics, I am considering coming back in with some scratches/nicks to the blade to perhaps address some of the highlight issues along the blade edge...but maybe I'm over thinking that.
I'll close with a couple more shots of the assembled model at the end of week two. It was great to see everything basically painted!
Moving into week three, I'll look at painting in the remaining details and completing the highlights. If successful, I'll have all of week four to mount the dreadknight to the base and complete any scenic work. This is where I'll take on the magnets too. It should be a simple matter to do this and I'm not sure why it didn't occur to me earlier during the initial assembly.
I'm really enjoying following the progress of the rest of the DreadTober 2017 crew. My best wishes to all for their week three.
Cheers and Happy Gaming!







That's fantastic, its really come on well. I love the face too. I think the blending on the sword is really great, perhaps the lightning could be less straight lines? That might change your perception of it, but maybe next time?
ReplyDeleteThank you, Dave! I have to chuckle at your comment to use less straight lines. Not because it isn't good advice, it's the right approach! But I was so overcome in that moment by the fact I managed accurate, even, thin lines at all that I all but forgot what I was about in the first place. Trying for such lines on a parchment or scroll, for example, or other freehand in the past has left me with blobby uneven lines.
DeleteMy brush work dialed in and I forgot my subject for sure. I think with time left this month I might try to go back and address the lightning as you suggest. I appreciate the encouragement!
Beautifully done, man! Love how that is coming along - keep up the great work!
ReplyDeleteThanks! I'm diggin' the post-modern Grand Master baby carrier!:)
DeleteLooking awesome Dave! I like the little effects like the heat damage and the power sword looks great!
ReplyDeleteThanks, Joe! It's those things that carry off the over all narrative of the model, right?
Delete