A journal of my efforts towards completing various and sundry Warhammer 40K projects involving the many Armies of the Imperium of Mankind.
Enjoy and feel free to comment...
- Home
- Adeptus Custodes Paint Recipe
- Adeptus Mechanicus Paint Recipe
- Aeronautica Imperialis Paint Recipes
- Blades of Vengeance Paint Recipe
- Dark Angels (Pre-Heresy) Paint Recipe
- Dark Angels Paint Recipe
- Death Korps of Krieg Paint Recipe
- Deathwatch Paint Recipe
- Grey Knight Paint Recipe
- House Taranis Paint Recipe
- Legio Ignatum Paint Recipe
- Legio Tempestus Paint Recipe
- About
Thursday, June 7, 2018
WIP: Armiger Warglaives from House Taranis - Part 7
OK, so I just posted this project as DONE...so what gives? Well, regular readers may have noted that I started this project with TWO Warglaives. So while I gave myself a happy DONE stamp for the first, I still have to complete the second. I wouldn't do this for a squad models, but these guys are large enough to celebrate each individual completion. Also, I decided to stop batch painting them after the airbrushing was complete. I wanted to focus more on each model, and allow for learning and improving. For example, I learned that I want to try shading over a gloss varnish for the second model after not getting the effect I wanted on the first. Had I just batch painted the shade, I wouldn't have been able to try the new technique until some future project (Helverins!). Instead, hopefully the second Warglaive will benefit from my new insight on shading.
Work on the second Warglaive is accelerated somewhat since I had primed and airbrushed the armor for both Warglaives at the same time (and posted previously about it). As the models are so similar, I will not post as much WIP content to avoid adding a bunch of redundant detail. I'll stick to some overall progress shots, instead. I always find this useful when I read other hobby posts. It is one ting to read about the techniques. I find it more helpful to see the progress shots to get a visual on what the stages look like.
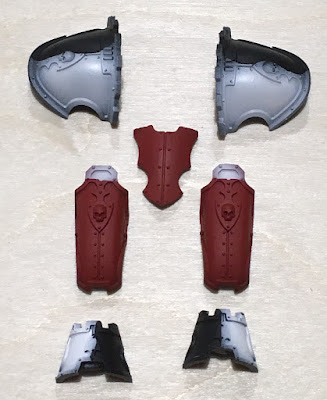
So, to recap I am starting with the armor done as shown below:
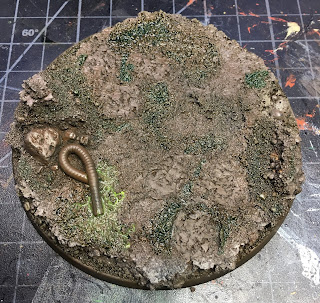
and the base well along as shown here:
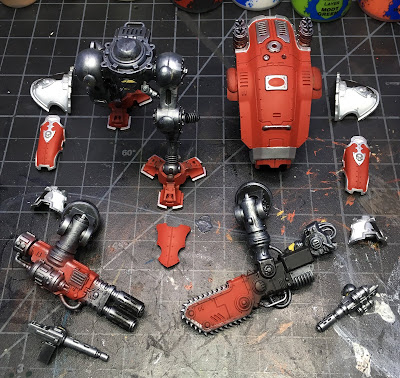
As I did with the first Warglaive, brush painting started with a heavy dry brush of Vallejo Gunmetal on all the metal skeleton areas. Next, I hit up the trim on all the armor panels with Vallejo Steel. Vallejo Oily Steel was painted on some of the carapace details and I then went back and cleaned up the red on all the armor panels using GW Mephiston Red. The white and black areas still require cleanup.
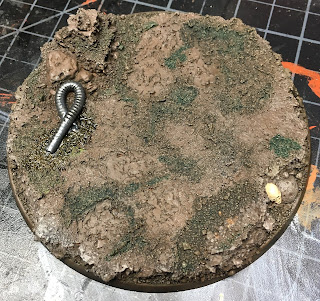
While the metals were on the palette, I dry brushed some of the Vallejo Oily Steel on the hose on the base as well. Then I shaded it with GW Nuln Oil. The Secret Weapons Miniatures Fallout Wash all but disappeared after drying and is now covered more by the Nuln Oil. So I will go back and layer a few more coats until I get some good toxic color seeping form the broken hose.
Next, I cleaned up the white and black areas on the armor plates. Then I worked in some GW Tin Bitz on the weapons and exhaust stacks. I also completed the trim on the chain blade with Vallejo Steel. Now the armor should be ready for a coat of gloss varnish in preparation for shading.
With the first Warglaive, I shaded the armor directly without the gloss varnish which predictably resulted in much staining of the reds and whites. That led to unnecessary cleanup and re-painting - to much rework! This time around, I want to go slower and use the gloss varnish to see how the shading changes. I know using gloss varnish is an accepted and widely used technique, however I have never made use of it personally.
In my next post, I hope to illustrate the results of shading over a gloss coat. I expect this will be a very helpful technique as I look at other knight projects in the future.
With warm weather returning, weekends are getting busy and some of my painting time will have to be given over to packing for various camping trips and what not with the family. I hope readers will bear with me as the pace and amount of work I am able to do on the hobby slows. I have many big hobby plans regardless, so expect to see new content here even if it comes out with less frequency.
Cheers and Happy Gaming!
Subscribe to:
Post Comments (Atom)


Love the basing! Looking forward to seeing how this comes together.
ReplyDeleteThanks, Mike!
Delete