A journal of my efforts towards completing various and sundry Warhammer 40K projects involving the many Armies of the Imperium of Mankind.
Enjoy and feel free to comment...
- Home
- Adeptus Custodes Paint Recipe
- Adeptus Mechanicus Paint Recipe
- Aeronautica Imperialis Paint Recipes
- Blades of Vengeance Paint Recipe
- Dark Angels (Pre-Heresy) Paint Recipe
- Dark Angels Paint Recipe
- Death Korps of Krieg Paint Recipe
- Deathwatch Paint Recipe
- Grey Knight Paint Recipe
- House Taranis Paint Recipe
- Legio Ignatum Paint Recipe
- Legio Tempestus Paint Recipe
- About
Friday, May 10, 2019
WIP: Adeptus Titanicus Legio Tempestus Warhound Titans - Part 2
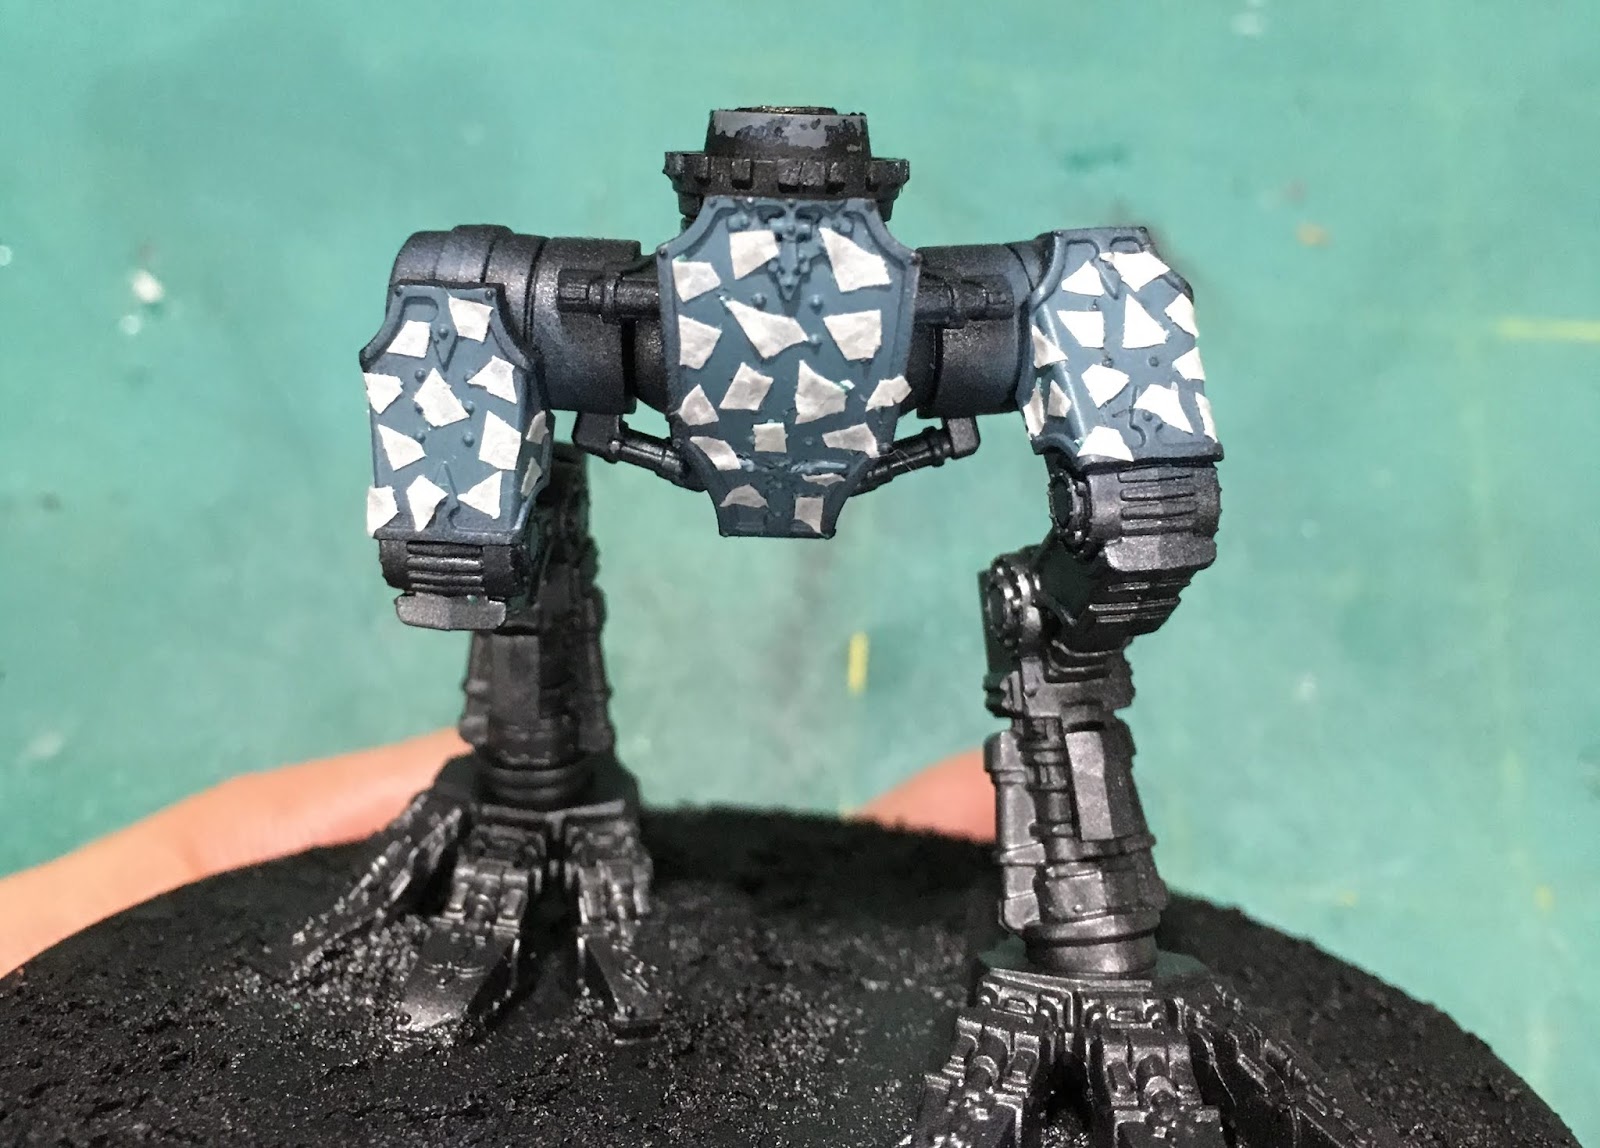
Not a lot to show for progress on the baby Warhound titans this week. Lots of little pieces of tape to cut and place all over the armor. I'm maybe half way to done for the first layer of masking here? A little more than half way?
Shin armor is done. One Warhound will have black and white shins, so only three sets to add camouflage to. It is not hard work at all, just time consuming to cut all the little shapes and get them on the model in an interesting pattern without scratching the finish too much (battle damage!). Scratching is due to using fine pointed tweezers and the hobby knife to work the pieces in place.
Above we have Facta Belli's legs and below a shot of her carapace and head. Still have to finish the weapons and exhaust covers at the rear of the carapace.
Here is Lux Curet, who is the only Warhound complete in terms of camouflage masking tape.
From the top, you get a better idea of how the weapons look. So many little pieces of tape...
Not very exciting for a week of hobby, but represents more time than you might imagine. I'll complete it at some point next week, then lay down the second coat of camouflage color. Then I start all over again with the second and final layer of tape followed by the last camouflage color. Whew! Then I can get to painting the trim and the rest of the detail work. This project is going to stretch out a bit more than other recent ones have.
These Warhounds should look fantastic among the Warlord and Reavers I already have painted. Once they are completed, I can build the final Warlord and the extra Forge World Warlord weapons I managed to pick up before they sold out! Check back next week for more on these Warhounds, in the meantime.
Cheers and Happy Gaming!
Monday, May 6, 2019
WIP: Adeptus Titanicus Legio Tempestus Warhound Titans
Time for a change of pace. After painting up 1K of 30K Dark Angels, it's time to get back to my Legio Tempestus project for Adeptus Titanicus. During #MonsterMarch3, I finished up the Warlord Titan in the picture above. In April, I built the last two Warhounds. Now I'm batch painting the four Warhound Titans together. Well, at least through the the camo stage. Once all the armor plates are done, I may got titan-by-titan to wrap things up.
Oh - and all of the titans have names now! So first up, let's have a look at Turbo Canus. As with all of my projects, the first stage is a primer coat using Vallejo Surface Primer Black prayed through an airbrush. This allows me to prime inside with no odors or mess...though I do use a spray booth that vents outside.
Then some poster tack was used to mask out areas that I planned to spray white. I am using white and back to present interesting livery/heraldry on each titan so there is uniqueness among all the camouflage.
Next, the white was masked so I could spray down the first camouflage color. This is mostly helping me to control over spray. I'm not going crazy with the masking. I'll have some cleanup to do as a result, but nothing too bad. I am preferring the putty/poster tack as it doesn't stick to the paint but adheres over all the rough areas so there won't be much if any under spray. Using masking tape on these rough surfaces doesn't always work well, and can allow of a lot of under spray which means more cleanup.
Here is the result of the first camouflage coat. While put on first, this is actually the "top" layer of camouflage. When using this method, you have to think of your color scheme upside down. So the top color is first, then the middle color, then the final bottom color. I've described this in detail with the Reaver and Warlord paint jobs in past posts.
Next up was Facta Belli. All four Warhounds were sprayed with Scale 75 Black Metal over skeletons and metal weapon bits. Facta Belli got a white head. Some white panels will stay white, others will get black checkers.
After painting the white, it had to be masked over so I could paint in the first camouflage layer.
And there we have it...
Next came Dente Ferrum, with the same treatment.
Dente Ferum will sport a half-black, half-white heraldry pattern.
Black is easy to touch up, so I've only masked away the white here while laying down the first layer of camouflage.
And last up was Lux Curat.
Lux Curat gets a white head and chest. Might get checkers as well. I'm still thinking on where checkers will go, other than on the leg armor, of course. More on that later.
And final masking for the camouflage layers.
So that's four titans ready for camouflage masking. Lots of little tape pieces to cut now. I batch painted the leg armor stuck down to cardboard with double sided tape.
After a coat of white for one side, the masking was moved so I could paint the first layer of camouflage paint. For Legion Tempestus, we want black and white checkers on the "outside" halves of the leg armor, and the rest of the livery on the inside.
Once titan will have black on the inside, the other three will get camouflage. Working out checkers with the embossed shin armor should be interesting.
So a picture heavy post, but I wanted to demonstrate how each titan can get simple changes to make them unique while maintaining a consistent over all legio color scheme. lots of tape work to do now as I mask in and paint the camouflage patterns. But at least the panels are relatively small, except for the main carapace. I look forward to getting more paint on these awesome models.
Cheers and Happy Gaming!
Friday, May 3, 2019
WIP: Heresy Era Dark Angels Legion Champion - TO DONE
| "What did you call me?" |
The large two-handed sword was already a great representation for the Terranic Great Swords used by the First Legion. He'll cleave through much with it, I hope.
A Dark Angels mk.IV shoulder pad signals his allegiance.
Great pose, and the custom base when melded with my usual ground cover will provide some visual interest and height when he is set among his brothers on the table or in the display case. While priming the model, I realized that...something...was...off. This champion of the First needed something else to help him stand out. How about a new lid??
Ah...now THAT'S the ticket. Perfect. Ok, I admit this has become a cliche' mod for Dark Angels models in both 30k and 40k armies. It is still iconic, and I HAD to have it. Where better than a Legion Champion then? To be honest, I built the helm for the Praetor, but the swept wings run afoul of the high collars on all the command models I have. The champion is basically made for it, however! S I primed that too and got on with the paint work.
Yes, better. I followed my paint recipe (see tabs above) for the model and made great progress in a single session. This was my first model painted using the GW handle. Very secure hold and worked well for me. Still something to get used to, but it did not hold me back at all during the first session with it.
GW Agrax Earthshade was still drying on the base in these pics, the last step before I called it quits for the session. The broken masonry is painted in relatively light colors to help the champion stand out. I wrestled a bit with how to paint the wings. I originally was going to paint them as entirely whit, then felt I'd get a better armored look if the steel trim continued from where they meet the brow and sides of the helm.
Another veteran of the Unification Wars, this warrior was honored in service to the Emperor of Mankind and bears the eagle head backpack to prove it.
During the final painting session, I completed the highlights and worked on the base and power sword. The base was highlighted, the shaded with additional coats of GW Athonian Camoshade and GW Biel-Tan Green. These were painted in the cracks and over areas I wanted to appear as moss\lichen\etc..
The power sword was a bit of an experiment. I didn't want this to appear as the same blades as my Custodes. I wanted more of a true sword look with perhaps a bit of a powered halo. So I took to highlighting the blade with GW Baharroth Blue and shading it with layers of GW Drakenhof Nightshade, being careful to pull away any shade puddles that threatened to darken things too much in any one area. A final edge highlight of Baharroth Blue insured that there was still a light glow at the edges and tip of the blade.
I don't love the power sword, but I don't hate it either. I got most of the way to where I wanted to be. The shading is perhaps a bit to splotchy on the blade. Probably should have tried thinner coats and used more patience. The main thing I achieved was to prevent the blade for sticking out too much on the model. With the brilliant gold Custodes, this is not as much an issue. On this dark model, I was concerned the blue power effects of the Custodes blade would over whelm things and stick out too much.
The winged helm is right where I want it though, cliche' as it may be. So there is is. Another (small) project in the DONE column and a completion of the 1000 points of HH Dark Angels I set out to paint in January.
I'll close with a few gallery shots of the model in the light box. From here, I'll move away form the First Legion and return to the Legio Tempestus while I complete the four Warhound Titans waiting in the wings.
Cheers and Happy Gaming!
Wednesday, May 1, 2019
Heresy Era Dark Angels Deredeo Pattern Dreadnought - TO DONE
It's done! Well, done enough anyway. I think I could putter and poke at these larger projects forever sometimes. I'm super psyched to get this in the done column. I'm one HQ model away from a completed 1000 point force for Horus Heresy (30k) games. Now, that is a very small force for a typical game of 30k, but still represents a new achievement. In all the years I've been doing this (and we're talking back to the mid-90's), I have never completed an army, any army. Ever. Odd that. The best I did was a small Dark Angels compulsory force of 1 HQ and two troops (tactical squads) back in...6th edition? Anyway....we're taking this 30k force to 2000 points by the end of the hobby season and possibly beyond by the end of the calendar year.
After some research among the many decal sheets in my collection, I settled on a suitable decal to represent battle honors for being a veteran of the Unification wars. It comes from a Baneblade sheet, I think, and I cut it in half for this purpose.
An Aquila and some lightning bolts for the Emperor of Mankind. Check! I also put kill markings on the right leg armor (see gallery pics below). With that, the decals were complete and it was time to finish up the highlights and mount the model to its base (which also needed painting). Vallejo Steel was used to highlight all the silver metal and top off rivets/bolt heads. Vallejo Dark Rubber was used for the power cables, and GW Tinbitz finished off the cable ties. GW Nuln Oil was then used to shade the cables.
The base went quite quickly. I used the air brush to spray a couple Vallejo browns on the base - first a coat of German C. Black Brown (70.822), then a lighter coat of Chocolate Brown (70.872) over the top, avoiding the shadowy parts. Next I dry brushed the base with Khaki Brown (71.024) and topped it all off with a final dry brush of Light Brown (71.027). The lightest color is focused around the edges and highest points of rocks, etc. as a final highlight.
The picture is a bit washed out, but I think you can get the point. Normally, I would use a heavy coat of GW Agrax Earthshade over all. This time, however, I skipped that step and instead went right to applying spot shades using GW Athonian Camoshade and GW Biel-Tan Green. My goal here is to keep the base on the light side since the model is already so dark. I don't want to over all look too dark, and this also helps the show piece model stand out on the base a little more.
After the shade dried, I pinned and glued the dreadnought in place using 2-part 5-minute epoxy. In this case, the epoxy not only provides a strong bond, but helps fill in under the feet for good contact with the textured base.
Here are a few gallery shots all around from within the light box. I'm very happy with the over all results. I believe I achieved a good mix of contrast and a balance of visual elements so the model is interesting but not too "busy" or visually chaotic looking. I'd look forward to any comments on the completed model you'd care to share.
When I have the whole force together, I'll likely come back to all of the models and add some weathering powders to get even weathering across the whole force. But for now, I'm giving myself a big old stamp of DONE.
Cheers and Happy Gaming!
Labels:
30K,
Dark Angels,
First Legion,
Painting,
To Do List,
Unforgiven
Subscribe to:
Posts (Atom)