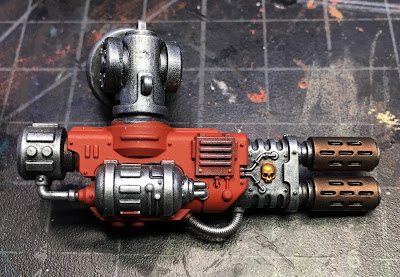
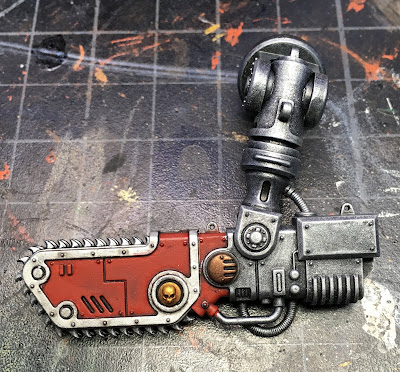
More paint on the first of my two Armiger Warglaives for House Taranis. I started by cleaning up the panels where I got trim paint on the other colors. Then I laid down some GW Nuln Oil for shading. In hindsight, I think I should have gone ahead with a gloss coat varnish prior to this step...or perhaps used more care to do a pin wash instead of an all over shading. I wanted a darker dirtier feel, which I got in spades, but there is a lot more cleanup and panel rework than would have been necessary otherwise.
A dry fit assembly of the parts so far. The shoulders are not glued on yet, since the arms don't have enough clearance to come off once the shoulders are glued down. Making progress! I took a break from the armor to paint the head up enough to mount. It's simple, but effective. I'll add some highlights to improve it as a focal point on the model. The title picture shows some improvements I made after the shot above was taken.
Not much work on the main arm weapon...just brightened the red some. This pic instead shows the shoulder armor in more detail. I'm looking forward to getting some decals on, but need to wait a bit longer.
I got some trim painted on the chain blade and brightened the red a bit before shading it all with more GW Nuln Oil. The other shoulder is in full view here as well. I'm pleased with how the armor is coming out, even though I will be modifying my technique with the second Warglaive. This is all practice for the larger House Taranis knights to come. It is a simple scheme, but the white needs to stand out and not be too muddy.
Next I began picking out gold and bronze details; this was a good use for my last pot of GW Tin Bitz that I've been hanging on to. I also painted in more metal detail on the feet. I shaded the gold and bronze carefully with GW Agrax Earthshade, making sure didn't run amok.
Here are some close ups of where things stand at this point.
Many more details to go, then all the highlighting. I'm probably going to hold off on final assembly until I see what gets released for a new Warglaive kit. Internet rumors indicate some new weapon options and new rules, so I want to be sure I don't make any final decisions at this point that I'll come to regret later. I don't plan to have a bunch of these models so I'm not looking to build more to get new weapons. It may be that I cut the arms for magnets if we get cool additional weapon options, much like a standard Knight. This would be pretty easy with the arms made the way they are.
Here's a parting shot of the the Warglaive fully assembled.
At least one more session of painting, maybe two to finish the remaining details and highlights. Then its decals and any final shading/weathering.
I'm looking forward to the new Imperial Knight codex, and the rumors that there may be new weapons for the Warglaives as well. Time will tell...
Cheers and Happy Gaming!


Great work! Looking forward to seeing the finished product.
ReplyDeleteThanks Mike. I got some highlights on last night and will put in another session tonight. So I hope to show good progress in a post tomorrow or Friday.
DeleteSome genuinely interesting details you have written.Helped
ReplyDeleteme a lot, just what I was looking for :D.