Thursday, December 27, 2018

Legio Tempestus Reavers (Adeptus Titanicus) - TO DONE

Legio Tempestus Reavers for Adeptus Titanicus

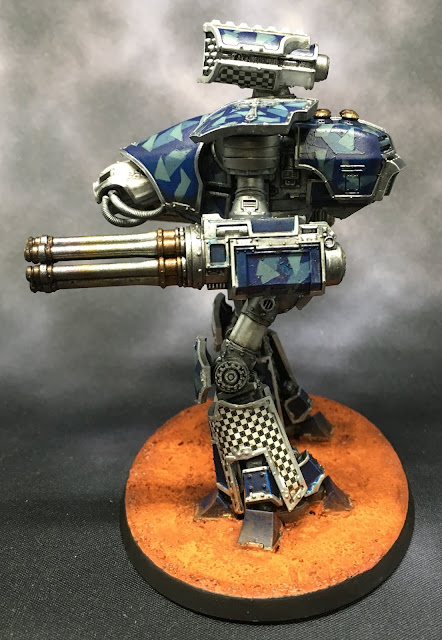
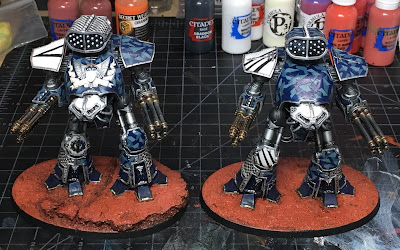
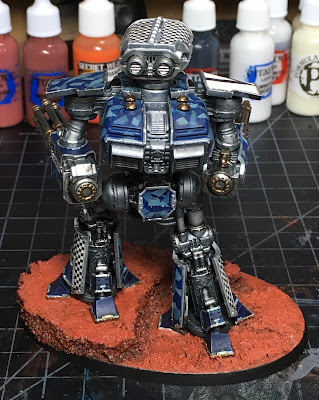
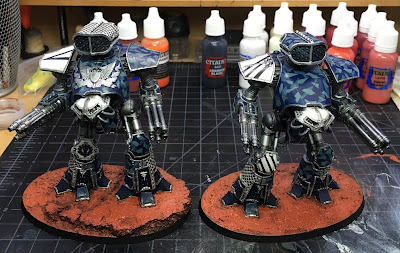
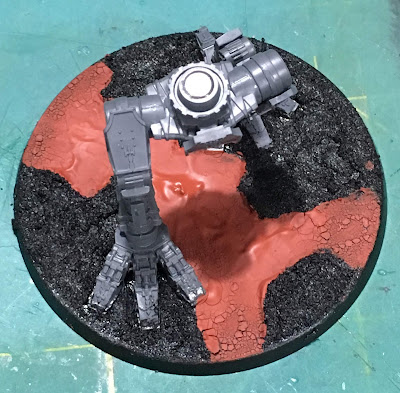
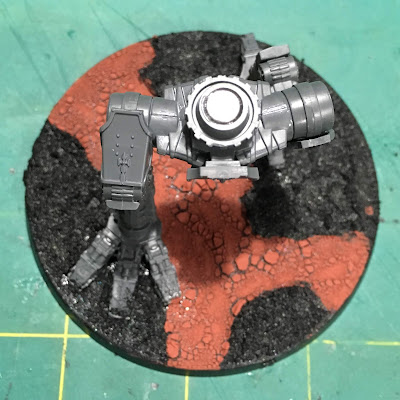
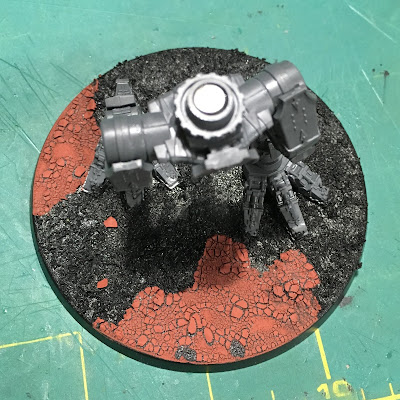
It is time to call it DONE on these two Legio Tempestus Reaver Titans.  During the final session, I added heat effects to the arm weapons and pigment powder to the base and feet.  Both models were also sealed, of course, using Model Masters Lusterless Flat Coat. I updated the paint recipe page with the heat effect colors.  I used a pretty standard approach based on colors that I had on hand.

I'm pretty jazzed with how they came out.  I'm not adding any decals or additional weathering at this stage while I wait to see if GW releases any Adeptus Titanicus decals/transfers for Legio Tempestus.  Not that they needs them really.  The colors scheme stands out well enough to identify the Legio.

Next up will be the two Warhound Titans that I have already assembled and primed.  I need to get to naming these engines as well.  I'm even considering more custom nameplates to identify the God Machines on the table or in the cabinet.

For now, however, I'm giving these two titans a big seal of DONE.


I hope folks have enjoyed following the progress on these titans.  Scroll down to see more shots form the light box.

Cheers and Happy Gaming!

Legio Tempestus Reaver for Adeptus Titanicus
Legio Tempestus Reaver 1

Legio Tempestus Reaver for Adeptus Titanicus
Legio Tempestus Reaver 1

Legio Tempestus Reaver for Adeptus Titanicus
Legio Tempestus Reaver 1

Legio Tempestus Reaver for Adeptus Titanicus
Legio Tempestus Reaver 1
Legio Tempestus Reaver for Adeptus Titanicus
Legio Tempestus Reaver 2

Legio Tempestus Reaver for Adeptus Titanicus
Legio Tempestus Reaver 2

Legio Tempestus Reaver for Adeptus Titanicus
Legio Tempestus Reaver 2

Legio Tempestus Reaver for Adeptus Titanicus
Legio Tempestus Reaver 2

Sunday, December 23, 2018

WIP: Legio Tempestus Reavers (Adeptus Titanicus) - Part 3

Adeptus Titanicus Reavers from Legio Tempestus WIP

As promised, one last post before Christmas. Armor panels have been highlighted, weapons have been detailed and touched up, including the missile launchers.  And the lead Reaver's crest has been painted.

Adeptus Titanicus Reaver from Legio Tempestus WIP

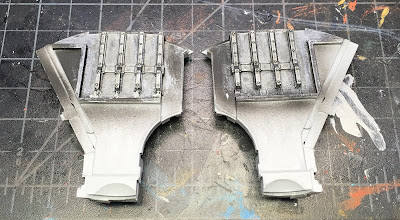
It all started with GW tin bitz added to the weapons and void shield generators. This included the cogs at the back of each weapon.

Adeptus Titanicus Reaver from Legio Tempestus WIP

The missiles got a careful coat of GW White Scar followed by a wash of GW Nuln Oil Gloss.

Adeptus Titanicus Reaver from Legio Tempestus WIP

Adeptus Titanicus Reaver from Legio Tempestus WIP

The Vallejo Brass was dry brushed selectively over the tin bitz. This step really livens up the bronze and adds a little pop to models.  Vallejo Brass was also painted over the bit of cog at the top of the crest on the main carapace.

Adeptus Titanicus Reaver from Legio Tempestus WIP

Adeptus Titanicus Reaver from Legio Tempestus WIP

The second Reaver with the same brass treatment.  The backs of the launchers also got Vallejo Oily Steel painted over them.  Once the brass highlights were done, a shade of 50:50 GW Reikland Fleshshade and Lahmian Medium was applied over all the bronze and brass details to blend and shade the new metals. 

Adeptus Titanicus Reaver from Legio Tempestus WIP

Adeptus Titanicus Reaver from Legio Tempestus WIP

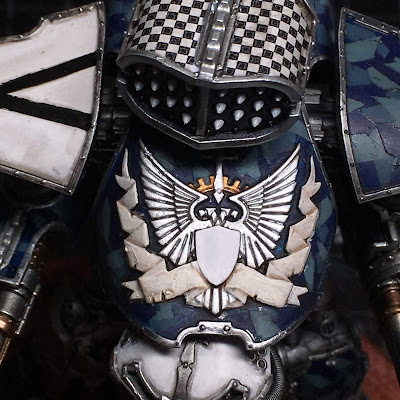
I spent some time on the crest.  P3 Menoth White Highlight was applied to the scroll work, shaded with Agrax Earthshade.  GW White Scar was painted in thin layers over the shield.  The silver was highlighted with more Vallejo Steel.

Adeptus Titanicus Reaver from Legio Tempestus WIP

Looking cool.  I'm leaving the shield white for now until a suitable decal/transfer presents itself.  I'd like something from Legio Tempestus, but may settle with a neutral Titanicus honor here if I get tire of waiting for a Tempestus decal sheet. :)

Adeptus Titanicus Reavers from Legio Tempestus WIP

The two titans are looking fierce now and ready for battle.  I'll be taking a break on hobby for the next couple days as my family celebrates Christmas.  But rest assured I'l be back at it soon.  It's just about time to apply the sealer to these two and move on to the two Warhound titans.  I'm also part way done with three House Taranis Knights so they'll be getting some love too before long.

So lots to do following me into next year for Adeptus Titanicus.  Also, there will be some painting on the Elucidian Starstriders from Rogue Trader as well as the models for Warhammer Quest: Blackstone Fortress.  Oh...and everything else on the to-do list!

Wow.  We've been handed some pretty cool stuff to hobby on in 2018.

Best Wishes for You and Yours over the Holidays.

Merry Christmas.

Cheers and Happy Gaming!

Thursday, December 20, 2018

WIP: Legio Tempestus Reavers (Adeptus Titanicus) - Part 2

Adeptus Titanicus Reavers from Legio Tempestus WIP

Today, I'm posting up progress on the my two Reavers for Adeptus Titanicus.  While I was on to other projects, these two were not truly neglected.  In fact, they have been getting a little paint here and there on a pretty regular basis.  I just hadn't completed enough to make it worth a post, until now.

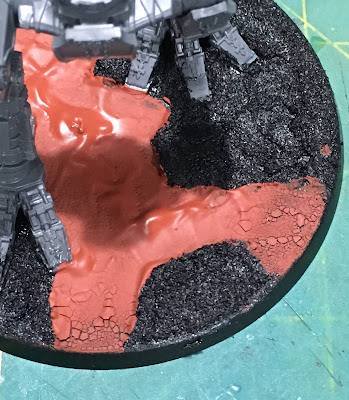
Most notably, the bases got some paint. However, along the way you will note that most of the base colors, including all the armor trim have been completed.  Legio Tempestus originated on Mars, and so it is that I am choosing a Mars themed paint scheme for the terrain.  I did not want to simply paint everything using GW Martian Ironearth, but I do like that color so I have worked to get a similar look here using other paints.

Adeptus Titanicus Reaver from Legio Tempestus WIP

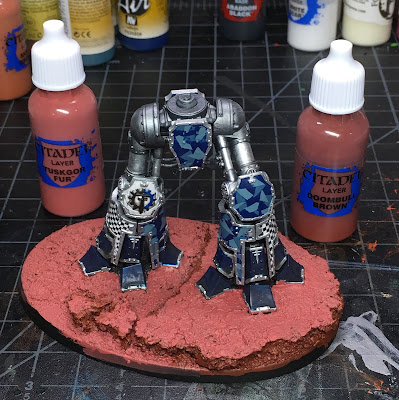
I started with GW Tuskgor Fur for all the flat areas, and GW Doombull Brown for any raised earth, to provide contrast and shadows. At this point, a painter must have faith in the chosen direction.  Tuskgor fur does NOT look good here at this point, in my opinion.  A bit too pink, for one thing.

Adeptus Titanicus Reaver from Legio Tempestus WIP

Next came the shading. Secret Weapon Miniatures Orange wash was used to change the Tuskgor Fur into something more akin to the color of the red planet. Secret Weapon Miniatures Dark Sepia was used on the raised earth and as an edging to help carry the effects of erosion.

Adeptus Titanicus Reaver from Legio Tempestus WIP

The edges were tidied up With GW Abaddon Black as well.

Adeptus Titanicus Reaver from Legio Tempestus WIP

As a final step, GW Gryphonne Sepia was used to shade around the feet and in all of the deep recesses on the base to provide subtle contrast to break up the expanse of orange/red earth. Not sure the effect is all that noticeable in the pics, but here we go.

Adeptus Titanicus Reaver from Legio Tempestus WIP


Adeptus Titanicus Reaver from Legio Tempestus WIP

Also in these pictures, GW Nuln Oil Gloss thinned with GW Lahmian Medium has been used as a wash over all of the armor panels and trim. The same was applied over the weapons and all of the torso armor.  Here's how things look at this point.  Mostly table ready, though I have yet to complete the rocket launchers.

Adeptus Titanicus Reavers from Legio Tempestus WIP

So that the launchers must be done next, then I will begin highlighting things.  I also plan to glue the torsos on permanently as I complete the models.  I don't see a need to pivot the torsos or store them in two pieces. I picked up custom for trays from Battle Foam that fits the models fully assembled, on their backs. With the weapons magnetized, I look forward to any new weapon sprues that may become available in 2019! I don't plan to buy more Reavers at this point.

Hopefully, I'll manage one more post before Christmas. If not, I wish everyone the best for the holidays.

Cheers and Happy Gaming!

Friday, December 14, 2018

On the Workbench [December] - Cerastus Knight-Castigator Part 2

Cerastus Knight-Castigator WIP - fully assembled

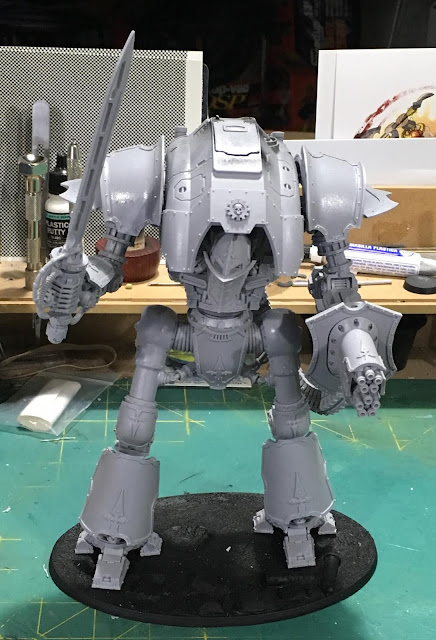
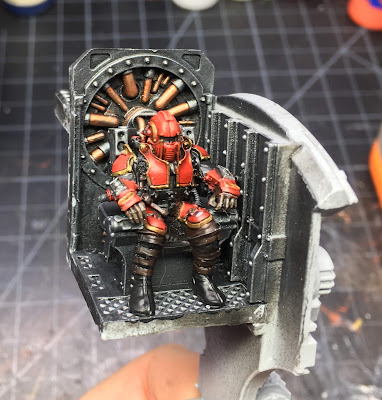
I was able to put more work into the Castigator this week and now the build is complete. Before reaching this point, I needed to complete the pilot so the body could be assembled since there is no way to get him settled in his seat through the top hatch.

House Taranis Knight Scion WIP - fully painted

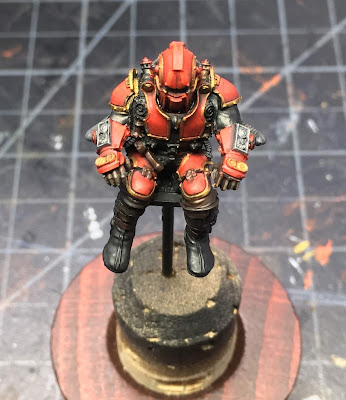
Nothing fancy here, but enough detail and care to look great when viewed through the hatch.  If I had really wanted to go over the top, I could have sorted out the installation of a green LED out of sight with the light defused enough to enhance the model and provide a convincing glow for the cockpit when the hatch is opened.  As it is, this pilot will sit in darkness and can only be decently viewed with a strong light shining in through the open hatch. Still, I know he's there, and I know the work that went into him.

House Taranis Knight Scion WIP - painted top view

The armor was painted using GW Mephiston Red and highlighted with GW Wild Rider Red.  The gold is Vallejo Brass.  I did not highlight it with silver since there aren't and sharp bright lights hitting the model from inside the cockpit.  I used GW Doombull Brown on the leather, same as the throne seat cushions.  The whole model was shaded with GW Agrax Earthshade, then the silver was painted using Vallejo Steel shaded with GW Nuln Oil.  The hoses were painted with Vallejo Dark Rubber and also shaded using GW Nuln Oil.  GW Abbadon Black was painted across the eye slit to darken it as I wasn't looking to paint OSL for a glowing visor.

After sealing the model with a coat of Model Masters Lusterless Flat coat, I returned to the assembly line.  I glued the throne to one side of the knight's body while completing the pilot.  Once the flat coat dried, the pilot was glued in place as well.

House Taranis Knight Scion WIP - on the throne

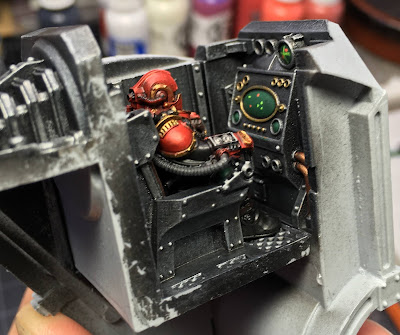
Next the front panel of the body was glued in place.  Now the Scion pilot can be seen facing the knight's command console. For short work, the interior is really coming together!

Cerastus Knight-Castigator WIP - attaching the front console

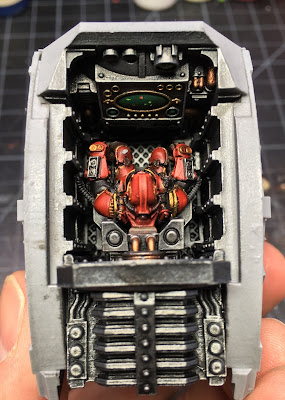
The other side was then glued in place as well.  Here's the last best view of the pilot and interior before the carapace armor is eventually glued down.

Cerastus Knight-Castigator WIP - completing the interior

I am quite pleased with the results.  Perhaps a bit dark, and I didn't go the distance with LEDs or any OSL form the screens lighting the front of the Scion's armor, but heck, it's the Grim "Dark" after all.

Cerastus Knight-Castigator WIP - attaching the body to the legs

With the body assembled I could finally complete the build.  The top carapace armor rests in place and is not glued down yet to help with final painting of the model.  Honestly, it sits tight enough that I could leave it unglued so I could see the full interior in the future.  I'll have to see about that once painting is complete.  It's also easy to forget and lift the model by the carapace and have it come loose, allowing the model to drop back onto the table, and no doubt breaking something...so that has to be considered.

The body is pinned to the legs with a length of brass rod, tightly fitted.  This approach should allow me to take it apart for painting and future storage.  Magnets could work if done well, but I didn't feel it was worth the extra effort in this case.  The resin here is MUCH heaver than the plastic knights.  The body with arms attached would require the best from my magnets.  A long, tightly fitted rod is secure with no risk of knocking the top off inadvertently. 

Cerastus Knight-Castigator WIP

And the knight is now standing tall and looking fierce; ready to cleave an enemy war machine in half with its mighty sword.  This was a great model to build.  It went together much easier than anticipated with all parts fitting accurately together with little to no warping.  I used a heat gun only to adjust the shape of the ammo belt so it wouldn't interfere with the position of the arm, and this step is even called out in the instructions.  Reshaping the belt is unavoidable with the pose-ability of the arm. The elbow joints were pinned like the knees to make it easier to pose the arms while the glue dried.  Everything is glued in place now and the arms and legs are rigid.  The pins remain to reinforce the glue joins.

All armor is temporarily attached, or not attached at all (chest plates).  These parts will only get permanently attached once the body is fully painted.  I'm looking forward to breaking out the air brush and laying down a cool House Taranis paint scheme on this beast.  I'll follow up with some comparison shots along side the Questoris and Armiger knights.  This dude is tall! Not Titan tall, but head and shoulders above the Questoris Knights.  It'll make a good ride for my House Taranis baron, and a strong centerpiece for the Imperial Knight force in general.

Thanks for reading.

Cheers and Happy Gaming!

Wednesday, December 12, 2018

On the Workbench [December] - Cerastus Knight-Castigator

Cerastus Knight-Castigator WIP - Throne painted

Greetings!  Well December and the holidays are a busy, busy time for my family and this year we've thrown in a good dose of illness to go with.  So it is, that I put up my first post for December 12 days in.  Yikes.  Anyway, although busy and sick, I haven't been idle.

While busily plugging away at my Adeptus Titanicus Maniple, I got inspired to take on a Forge Wold kit languishing on my hobby shelves.  The Knight-Castigator will serve as the lead knight for my House Taranis collection, a suitable ride for a Baron, I thought.

It all started like this...

Cerastus Knight-Castigator WIP - parts washed

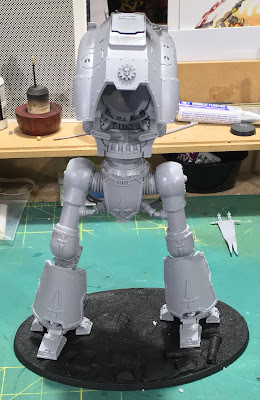
I decided to build this knight literally from the ground up.  He'll be mounted on a Secret Weapon Miniatures base that I got a while back in a "Bag O Crap" and recently primed for the occasion. The legs have been pinned in key places to provide additional support for the super glue.  I also now make a habit of scratching up the surfaces to be joined to give the glue more to adhere to.  This cross-hatching can be seen below on the ball of the waist joint.

Cerastus Knight-Castigator WIP Legs assembled

The brass rods seen above not only serve as pins, they are also quite helpful for assisting with the final pose. These legs are very pose-able, but can also be VERY fiddly to keep in place while the glue sets up. The pic below shows the completed legs with the armor temporarily attached, not glued down.  The large rectangular mounting sockets are great for this, since the armor is just about press-fit tight.

Cerastus Knight-Castigator WIP - legs assembled

So I was ripping along with the assembly, and having a great time, when I suddenly realized that this knight has a fully detailed cockpit and knight scion within.  This can of course be ignored since it is invisible unless you leave the top hatch unglued.  But for the cost of this kit, and respect for all the detail work that goes into it, I simply couldn't take the short cut!

So assembly came to a grinding halt while I primed the interior pieces and driver for painting.  Then that had to dry so I could get to work on the paint.  I did compromise somewhat with a very simple paint job.  After all, it will be only barely visible through the raised top hatch on the model.  I want the first glance into the knight suit to be intriguing and deliver some pop.  But I don't need to spend an additional week painting for a Crystal Brush here (yeah, I know...as if...).

Cerastus Knight-Castigator WIP - painting the interior sides

So a straight forward metal dry brush with various Vallejo metals followed by a GW Nuln Oil shade for the side panels.  Then some additional detail for the controls.

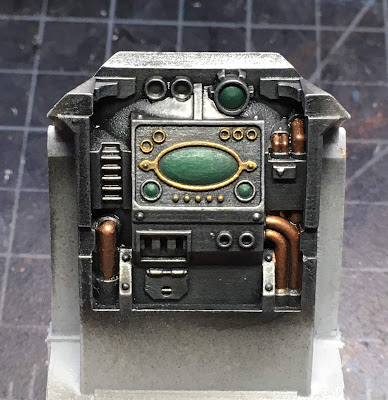
Cerastus Knight-Castigator WIP - painting the interior console

Army Painter Copper and Vallejo Brass were used for the details completed with Vallejo Green Taillight for the screens.  The whole thing was then shaded with GW Nuln Oil.  There's a lot more that could be done here, but remember that with the scion seated before it and the whole thing only visible at an angle looking down into the top hatch, most good detail would be lost to a viewer.  But it's a BIG screen you say...

Cerastus Knight-Castigator WIP - painting the interior console screens

Yeah, I thought so too.  So I put some details in.  Green dots for good guys, red for bad guys....simple, right?  Then the upper screen got the targeter treatment with the two bad guys lit up and ready to get got.  My hope is that these simple bright details will look cool and convincing on first glance down into the cockpit.

Cerastus Knight-Castigator WIP - painting the throne

Then, of course, the throne got paint too.  Another simple job to pick out details and convince the eye towards its mechanical nature.  The seated scion will cover up most of the detail, with both arms completely covering the armrests and controls.  So no extra effort there.  Other projects await! Not sure if I'm convincing myself or you that I didn't totally cheap out here...

In a follow up post, I hope to show the completed Knight Scion who today sits primed black and pinned to a cork for painting, along with his standing self.  Writing this, I realize that I bought the scions and throne as additional components for this kit.  The base kit does have the detailed interior panels and roof/hatch, but the throne and scions come extra.  I didn't plan on additional knights (and still don't) from Forge World, so I wanted this one to have all the bells and whistles!

Thanks for reading this far and indulging me in a bit of the Hobby Butterfly syndrome lately.  Rest assured that I will plow on with my Titanicus projects and should even get back to my Mechanicum Kill Team before long.  Then of course the Rogue Traitor minis await...and those form Blackstone Fortress...and...well...all the rest!

I hope your projects are going well, too.

Cheers and Happy Gaming!

Wednesday, November 28, 2018

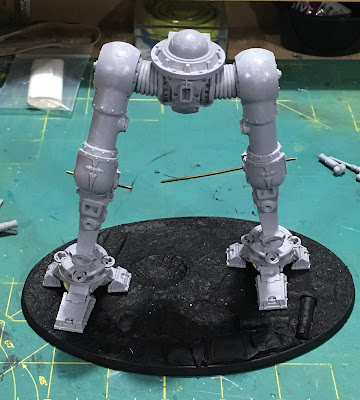
Adeptus Titanicus Warhounds WIP - The Bases

Adeptus Titanicus Titans for Legio Tempestus WIP

Legio Tempestus fought on many worlds, but with the loyalists originating on Mars, I will be painting the bases to match the Red Planet's blasted wastes.  For the two Warhound titans, I thought it might be fun to mix the usual Vallejo Black Lava texture I use with some GW Martian Ironearth technical paint. My vision is to use the Ironearth's cracked texture to represent dry river beds and other desert textures separate from the rocky ground created by the Black Lava.  So I set about laying down the Vallejo Black Lava so there would be places for the Ironearth to go and do its crackling thing.

Adeptus Titanicus Warhound Titan Base WIP

The first Warhound strides across an ancient river bed.

Adeptus Titanicus Warhound Titan Base WIP

The second Warhound strides among the parched remains of ancient ponds or lakes. I haven't worked much with this stuff, but I've read that it works best if layered on pretty thickly.  So I used a GW "M Texture" tool to trowel on the stuff in thick glops, spreading it around a bit, but not letting it get too thin in any on place, save perhaps near the edges.

After maybe an hour I was rewarded with some crackling around the edges...

Adeptus Titanicus Warhound Titan Base WIP

Adeptus Titanicus Warhound Titan Base WIP

After a couple hours, more crackling appeared...so far so good!  It works! :)
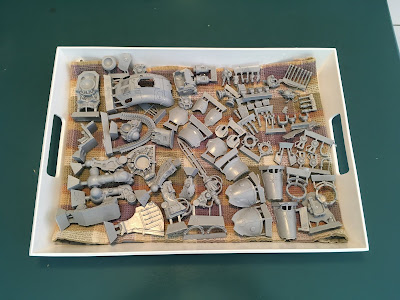
Adeptus Titanicus Warhound Titan Base WIP

Adeptus Titanicus Warhound Titan Base WIP

When I closed up for the night (maybe three or four hours later) the crackling continued to spread and the thick gloppy paint continued to dry.  When I woke up in the morning, this is what I saw...

Adeptus Titanicus Warhound Titan Base WIP

Adeptus Titanicus Warhound Titan Base WIP

Now with more crackle!  In fact, it crackled so much, a couple bits flaked off.  But I still have them so they'll get glued back down and the whole base will get primed to seal everything down.  The I'll come back in carefully with the airbrush and some washes to color everything carefully so as to not lose the textures.

I'm thrilled with how everything turned out so far.  I was hoping the texture on the plastic bases would hold the paint, and in fact was a bit worried it might effect the crackling.  But not to worry there, as you can see.  I'll be more careful in the future to avoid the flaking.

Up next will be a look at my Imperial Knights for Adeptus Titanicus.  The colors of House Taranis are being laid down and the first banner is coming along quite well so far. And I haven't forgotten the Reavers either.  They will be making an appearance again soon.

Cheers and Happy Gaming!