Thursday, May 27, 2021

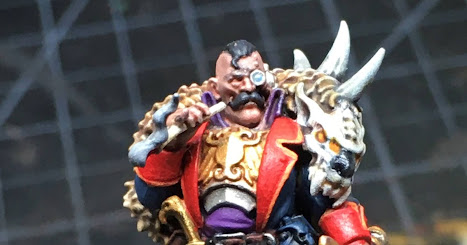
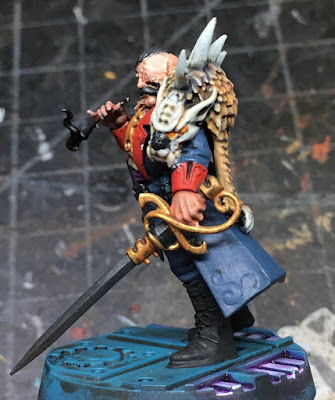
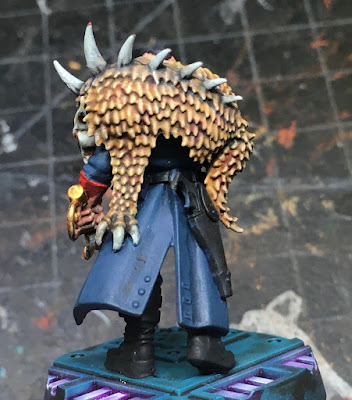
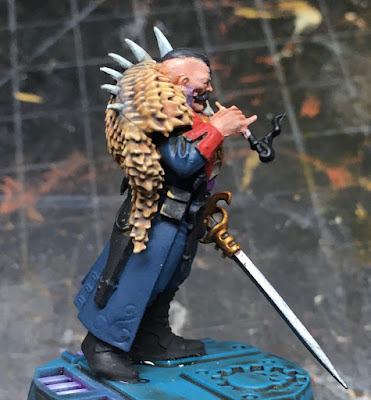
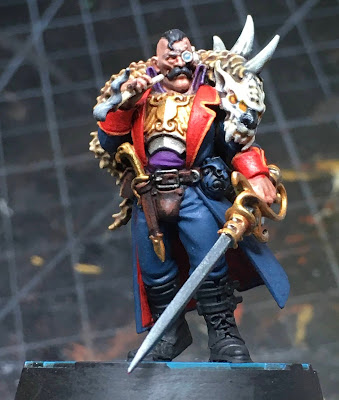
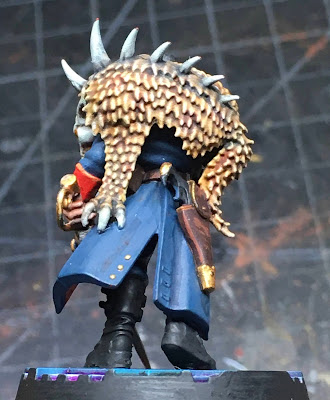
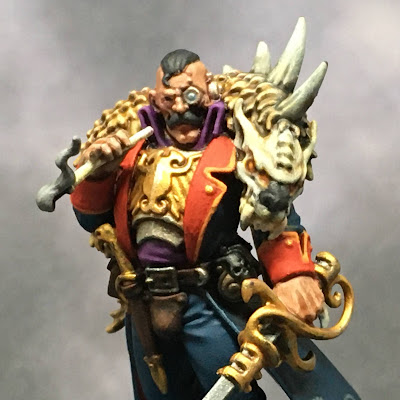
Janus Draik - Blackstone Fortress Explorer - TO DONE


Greetings and salutations. It's time to put Janus Draik in the done pile.  There is just so much going on with this model.  Janus here is the first of my explorers to be completed.  One step closer to a painted game of miniatures.  Of course, I'm just talking about the original boxed set now, not the many more figures that came after in supplements.  But I can dream.

So here's a big ol' stamp of DONE for this small project.  Now it's on to the next. I'm not sure who I'll pick up next from the explorers.  I have UR-025, Dahyak Grekh, and Pious Vorne on the table. Together with Janus Draik, these four were last in the Blackstone Fortress before Covid-19 locked down Precipice.  Feels only right to get them painted up for their next adventure, especially now that the hostiles are done and prospects for gaming in person are looking better and better.

I'll leave with a few photos of Janus Draik from the light box.

Stay safe out there.

Cheers and Happy Gaming!


Monday, May 24, 2021

How To - Magnetizing a Warbringer Nemesis Titan


With Forge World's recent release of a Volcano Canon Carapace weapon for the Warbringer Nemesis Titan, I decided it was time to add this titan to my Legio Tempestus battle group.  This will even up the odds somewhat with my Legio Ignatum force which already possesses a Warbringer Titan.

If you haven't been warned yet, understand that the new Volcano Canon kit for the Warbringer includes just the gun barrel assembly, and not the mount it goes in.  So if you glued in the Quake Canon, as I did, you're going to be out of luck for the new weapon unless you fancy a delicate operation to cut the glued weapon free so you can magnetize everything.

With this new Warbringer, I set out to magnetize everything properly from the start. Let's see how things turned out.

The Warbringer is pretty easy to magnetize, with only a couple scratch build bits, depending on how you want things to turn out.  For example, I like to magnetize the carapace weapon mount.  I did this originally so it could be swapped out with a new weapon mount.  Based on how the new volcano canon option has gone, this step is not really necessary. I went ahead and matched what had already been done for my first Warbringer titan, but feel free to skip this.

I started by gluing a magnet over the hole where the weapon mount attaches, from below and inside the titan's body.  You can see this in the picture above.  I use 5-minute 2-part epoxy and I'm sure to cover the whole magnet in epoxy to limit the possibility that the magnet may one day come lose and rattle around in the body of the titan. magnets are put in the supplied sockets on the upper arms as well.

From the top, you can see the large magnet covering the hole where the carapace weapon mount goes.  Additional small magnets (1mm x 5mm) have been glued into the sockets where the AA guns sit as well. I have lined up all of the magnet polarities top to bottom so they pull on each other rather then repel...otherwise its hard to get the glue to set right if the magnets are being pushed out of their holes by their neighbors above or below.  I guess if you glued things one-at-a-time, letting the glue dry in between, this wouldn't be an issue.  Still, to me this approach just made sense.

2mm x 10mm magnet in place

Now the scratch build - which is really customizing here.  I have used a razor saw to carefully cut off a portion of the weapon mount that would have extended into the hole in the carapace, now covered over by the magnet in the body.  Measure twice, cut once, as the saying goes.  The goal was to take off enough plastic to allow a new magnet to be glued on.  The end result is the mount sitting flush where it belongs in the carapace with full contact between the magnets. Now...I am using large magnets here, based on what I had on hand.  There is a lot of magnetic pull and it is a bit of a pain in the end because the attraction is very strong.  But I don't have to pull the mount off much, so I don't mind.  One could go further with some plasticard and smaller magnets, I imagine, to get the same result with less attractive force (using smaller magnets). Even using a 1mm x 10mm (3/8") magnet might help some.

 
The arm weapons and AA gun mounts get magnets too (1mm x 5mm). When gluing the magnets into the weapons, use care to keep the rectangular sockets free of glue (I had to dig some out as it was drying).  These are where corresponding pegs on the arm slot in based on which side you put the weapon on and align the weapon correctly with the cable coming down from the body.

At this point I had a collection of bits as shown above, magnetized and ready for paint. Now it was time to stare at the Quake Canon a bit to see how bet to magnetize it so the new Volcano Canon option could be swapped in.

The one challenge to over come was removing the rings form the mount halves that would insert into the sides of the barrel.  Magnets will go there, and we can't have anything inserting into the barrel if it has to come out once everything is glued up...I want flush magnet-to-magnet contact only. Also, there isn't enough room for a magnet to sit in in the mount halves, once the rings are removed, so I had to dremmel new holes with a router bit. Not fun, and MUCH care should be used to avoid routing a hole in anything else - like fingers holding the halves during the process.

The barrel was the easy part, just drop in a magnet on each side. A word of advice, I matched the polarity here so everything is in line.  This has the effect of drawing all the parts together (mount and barrel) rather than have things being forced apart.

The dremmel router bit (small) did a a fine job of removing the rims and making a new sockets for the magnets.  I exercised great care here to insure I did not cut through the sides of the mounts.  There is not much plastic to work with here at all.  But I managed a mm deep socket for the 1mm x 5mm magnet. It's not pretty, but once the gun is in place you cant see the magnets or their rough cut holes anyway.

 From the top, you can see that nothing of the magnets is seen to obstruct the gun barrel from dropping smoothly into the mount. The magnets provide enough force and friction to hold the barrel in place at any elevation.

And here we have the mounts and weapon all magnetized in place.  It's a bit of a journey, but as you read, most of it is straight forward with a bunch of 1mm x 5mm magnets.  It's really nice to see Games Workshop put the magnet sockets in the design.  These models are NOT inexpensive and it helps folks make the most of their investment when weapons options can be changed so easily.

That said, there was no such provision  made for the carapace - possibly to future proof sales so that folks would need new titans to use the new gun. I certainly expected the new Volcano would come come with a resin version of the mount so that hobbyists would not have to go to such lengths to use the two weapons on a single titan. With the peg the mount sits on, it seemed like this was an obvious choice (if you don't glue the mount in).

I hope this article helps some out there, and that you found some enjoyment in following along with my process here.  At some point, I'll have more to share with this titan, and the Warlord that is now also waiting for some paint.  These will be two great upgrades to my existing Legio Tempestus battle group.

Stay safe out there.

Cheers and Happy Gaming!


Friday, May 21, 2021

Janus Draik - Blackstone Fortress Explorer - WIP - Part 2


Janus Draik Blackstone Fortress WIP

Well, Janus is starting to take shape.  I'm having a lot of fun with this model.  There is a good amount of detail and a variety of surfaces and texture.

Janus Draik Blackstone Fortress WIP

I put a lot of work into the creature cape/stole that Janus has draped over his shoulders.  It's sort of like two models in one here...a fantasy monster and a human character.  I love the variety and what the designer did with the model.

Janus Draik Blackstone Fortress WIP

Several layers of shading were applied using GW Nuln Oil, GW Agrax Earthshade and GW Reikland Fleshshade.  I dotted some Reikland in like large spots/splotches in the pelt.  It's there, but subtle.  I felt some variation in the fur/scales was called for to give life to the (dead) beast.

Janus Draik Blackstone Fortress WIP

Janus Draik Blackstone Fortress WIP

Next, I targeted many of the remaining details.  The leather work, pipe, monocle, coat buttons etc.  I still have to hit up the decorations on his coat, among other tings.  But he's coming along quite well, I think.

Janus Draik Blackstone Fortress WIP

There is work to do on the face/head and I'd like to do more with the boots...possibly just highlights, but there is a decent amount of detail there that maybe shouldn't be all black. Also, there is a funky skull/pouch thing on his belt that I haven't decided what to do with. Oh, and that pistol grip to complete. so many cool details!

Janus Draik Blackstone Fortress WIP

There are a bunch of highlights needed as well, once I get the remaining details painted.  I'm treating these Blackstone Fortress heroes like the characters they are.  So no rushing to completion, and no cutting corners here. Also, no batch painting which is why I'm only showing off Janus for now.  I originally was going to batch paint for heroes at a time, but I quickly cancelled that idea. Too distracting, to easy to lose track of what I'm doing on each model.

So that's Janus for now.  One more post on him, possibly to before he's done.  As a one off model, I wasn't planning to record my paint recipe.  However, write in the comments if you'd like to see it and I can put something up at the end of the project.

Stay safe out there.

Cheers and Happy Gaming!


Wednesday, May 19, 2021

Oh, So Many Knights - WIP


House Taranis Knights for Adeptus Titanicus WIP

In my over abundance of enthusiasm for Adeptus Titanicus, I decided to complete assembly of some recent kits sitting on the shelf. The goal was to pull together a full family shot of what I have so far.  These knights represent my House Taranis force in support of my two Triumverate legios, Ignatum and Tempestus.  As Horus's betrayal unfolded, legios and knight houses found themselves divided on both sides, often based on which crusade fleets they were attached to at the time fo the heresy.

In my collection, Legio Tempestus may serve Horus in actions against Legio Ignatum.  Rather than collect and paint two separate knight households to support the two legios, I'm going to collect just one household, House Taranis.  House Taranis served on both sides of the Horus Heresy, such that those most loyal to the Mechanicum and the Emperor began to replace the traditional blue with Mechanicum red - the color use currently in the 41st millenium.  I will represent this by painting my collection in a mix of the traditional blue/white for those loyal to Horus and the newer red/white for those remaining loyal to the Imperium. 

Then during games where my Legios are in conflict, I'll use the red/white models with Legio Ignatum and the blue/white models with Legio Tempestus.  In a large game, why not use all of my collection as Loyalists?  I am purposefully NOT using any Horus iconography on my Legio Tempestus titans so I can use them to represent a battle group still loyal to the Imperium. My Legio Tempestus battlegroup has only recently turned to horus, or perhaps fights on not yet aware that Horus has turned traitor.

Questoris Knights Magaera for Adeptus Titanicus WIP

On deck to be built were a few recent Forgeworld resin kits.  These Questoris Knights Magaera were the first to get assembled. So cute at this scale! They are reasonably easy to assemble, but watch out for some delicate, fiddly bits.  Resin can be so brittle.

Questoris Knights Styrix for Adeptus Titanicus WIP

The next to build were the Questoris Knights Styrix, basically the same model as the Magaera with different arms.

Cerastus Knights Atrapos for Adeptus Titanicus WIP

These Cerastus Knights Atrapos were the last to be completed.  Now we're getting bigger, but still so cute next to the larger titans.  These were very easy to assemble, quite straight forward. And with these three kits built, I had nothing left in the to-do pile for Adeptus Titanicus knights. The final family shot is at the top of the post. 28 knights ready to serve either legio of the Triumverate in my collection, bound by ancient Martian oaths.

I won't get to painting these for a while yet.  I have one Warmaster, one Warlord, and two Warhounds ahead of them in the AT painting queue so far. But at least these knights are assembled and playable for my games - which I hope to have a few more of as the immediate risks of Covid wane.

So that's it for my adventure with tiny knights.  Next up, we'll return to Blackstone Fortress with an update on Janus Draik.

Stay safe out there.

Cheers and Happy Gaming!

Monday, May 17, 2021

Janus Draik - Blackstone Fortress Explorer - WIP

Janus Draik Blackstone Fortress WIP Janus Draik Blackstone Fortress WIP

Greetings, and welcome back to 262Krieg.  Not sure what happened, but I apparently just got so carried away that I skipped updates last week.  This is the current project I'm working on.  Not a lot to discuss so far, but this version of Janus Drake, Rogue Trader and explorer from Blackstone Fortress, is starting to take shape.
 
I'm using Pro Acryl paints from Monument Hobbies for this project.  I've enjoyed good results from these paints on past projects and have been moving towards using them more as a result. 
 
I hope to have more to show for this project soon.  With spring in full swing, vacations and other family activities will no doubt begin to effect the pace of posting.  Regardless, work goes on and there should be plenty for me to share.
 
Stay safe out there.
 
Cheers and Happy Gaming! 

Wednesday, May 5, 2021

On the Workbench [MAY]


Adeptus Titanicus Warhound Titan WIP

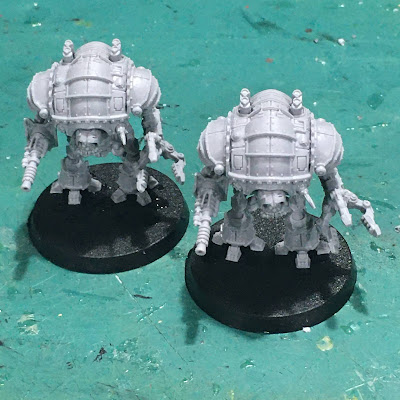
Greetings, and welcome to another post from the Workbench.  This month, I've been working on a couple new Warhound titans for my Legio Ignatum collection.  This time around, I wanted to try out the new close combat weapons offered by Forge World.  It is not clear to me that these will be weapons I use often in my games. So I decided it was a good time to bring in magnets to allow me to swap around weapons on these new Warhounds.  Normally, I have found Warhounds inexpensive enough that it didn't seem worth magnetizing the weapons.

Adeptus Titanicus Warhound Titan WIP

To increase pull in such a small area, I decided to try out 2mm x 5mm rare-earth rod magnets.  As shown above, I used a pin vise to drill holes in the Warhound arms deep enough to receive the rods. Here there is some care to be taken to make sure the weapons hang in a pleasing manner once completed.  An early attempt had a terrible angle and I had to use green stuff to fill the original hole, before drilling again at a slightly different angle. A little super glue insures they won't come out, but honestly they fit tight enough on their own.

Adeptus Titanicus Warhound Titan WIP

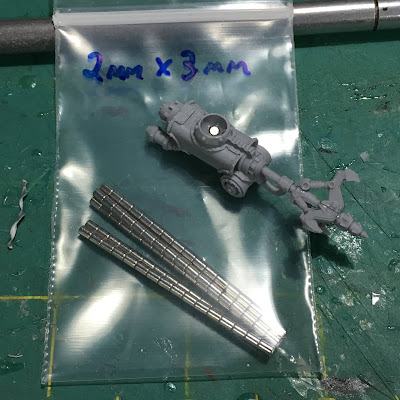
With less depth to play with in the weapons themselves, I chose 2mm x 3mmm rod magnets to go into the weapons themselves.  A pin vise was again used to drill the holes to a depth that would receive the magnets and allow everything to sit flush when attached to the arms of the model. Here again, you have some flexibility with where you seat the magnets, depending on how you expect the weapons to hang once attached.

Adeptus Titanicus Warhound Titan WIP

Above, the two Forge World weapon options are shown assembled, magnetized and ready for painting.  The Ursa Claw looks especially wicked, doesn't it?  I'll take this method forward now and magnetize the other standard Warhound weapon options to match.  This approach will provide a full suite of weapons to use in games of Adeptus Titanicus. 

It was a simple project and a fun way to try out these new weapons without locking me into keeping them if they work out for gaming.

Moon Elf Sorcerer Moon Elf Sorcerer

Soon, I'll move on to  Blackstone Fortress Heroes.  I took a break to paint this AD&D figure for a 5th edition virtual campaign.  I've been playing in the campaign virtually using a combination of Zoom and Roll20 since the Covid times. This is Meryn Yes'gell'a, a Moon Elf Sorcerer. He's still a work in progress, but I hope to complete the model this week so I can get back to my usual projects. I've been sitting on the model for too long, and needed to complete him before the campaign wraps up and the project becomes moot.

Best wishes for your own projects.  Stay safe out there.

Cheers and Happy Gaming!