Saturday, March 25, 2017

Munitorum Armoured Containers WIP

Two sets primed and based

Writing up the March workbench post prompted me to continue with the containers now that I had six primed models and few excuses.  So it was that I fired up the compressor and took the air brush out to set some base colors down.  First off, I decided to try modifying the primer with a top-down zenith highlight of grey. This approach is was hopefully going to add some interest to the base coat in terms of darker shading on the underside and lowest parts of the containers and the brightest shades on the top.

Container Primed with Zenith Highlight - Top

The zenith highlight here is laid down using Army Painter Uniform Gray. The top is covered entirely in the gray, while the sides are spray roughly halfway down.  I had not art or science here, just went on instinct based on some articles I've read from others in the past. I have absolutely no art/color theory background what-so-ever so these sorts of projects are always a chance to learn something new, hands-on.

Container Primed with Zenith Highlight - Side

Confident nothing was ruined so far, I set about applying the zenith priming to all of the containers.  Below is a set up shot of three of the contains after additional primer has been applied.  I used an Iwata Eclipse airbrush and a portable spray booth for the painting. In my basement hobby space, I was able to cut a hole in the hose for a typical "dryer vent" which I attached the spray booth to, so everything vents outside.  Not something every hobbiest is going the be able to do, esp. if you don't own the house you are hobbying in.


Three Containers Primed with Zenith Highlights

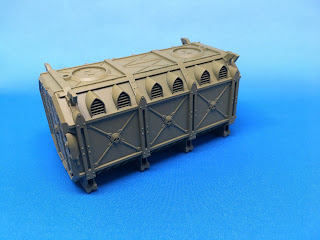
Now the colors...after much deliberation, I decided I wanted a mixed set of colors when I was done so the set wouldn't appear too uniform what stacked all together.  I was likely influenced by GW's own art here, I confess.  For me set, I chose red, yellow, and blue, with red being chosen for the majority.  The final result is spoiled in the opening pic above.  Here are close ups of each scheme.

Red Container

Three containers are based with Vallejo Model Color 70.947 Red.
Dark Yellow Container

Two containers were based with Vallejo Model Air 71.025 Dark Yellow.

Royal Blue Container

One container was based with Vallejo Model Color 70.809 Royal Blue.

Not sure how the primed zenith highlights will play in the long run.  But I can't see that any looks wrong or went wrong during painting either, so that's all for the good. The extreme lighting of the photo booth artificially lighten the container tops int he pics so I can't say you are seeing the true effect in these shots. One of the red crates also opens and has been fully painted in its interior.  So that leaves me four closed and two opened containers.

Lots of variety and color for the set.  I look forward to how things turn out. At some point, I'll tackle the drums and crates as well.  For now they sit primed but unloved...

Cheers and Happy Gaming!

Friday, March 24, 2017

HowTo: Scatter terrain and Objective Markers

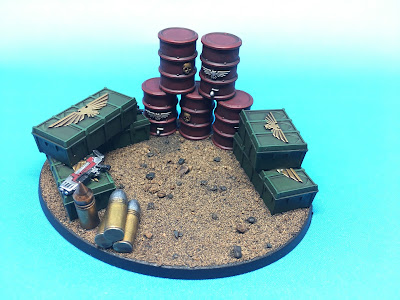
Earlier this year I painted up some terrain pieces assembled on normal bases using barrels and crates from the Munitorum Armoured Container set with a few other bitz tossed on.  I had forgotten to share those so here they are!  I got the idea to use a couple large bases to organize items as a weapons cache, fuel stores, or just simply improvised cover.

Improvised Cover - Front

This is the largest piece and is set on a large oval base. Here I added elements form the bitz box to flesh out the scene of random Imperial Guard stores. This could serve as an objective, or simple cover. While I will add similar elements to my new Imperial buildings, I thought this was a great way to introduce additional cover that could be placed differently for each game rather than remain static with the builds.

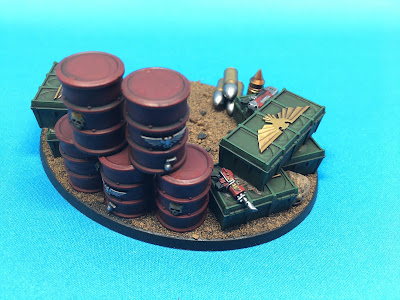
Improvised Cover - Back

Another shot from the other side.  I forget the exact colors used here, but it was done primarily with Vallejo colors and GW Nuln Oil and Agrax Earthshade washes, then suitably high lighted. My style generally favors muted, dirty colors so my highlighting is not so extreme.  I am always reluctant to use bright highlights for fear of things looking garish or cartoon-y.

Munitions Stores

The pieces above complete the set with random piles of war gear.  I had fun with the skull in guard knife adding interest to the promethium barrels in the foreground. For the ground cover, I used a mix of fine and coarse gravel from some model railroad mix I bought years ago.  To that I add a few larger stones also from a model railroad scenic source. 

Everything is glued down using a quality wood glue (I find it sets with more staying power than a plain white/PVA glue).  Once dry, I usually paint over then wash and dry brush.  Here, I skipped the paint step and simply washed the mix heavily.  I pooled wash here and there for interest, esp. under the spigot of the promethium barrels.  For the larger rocks, I colored them in similar but different colors so that everything didn't seem unnaturally uniform, even picking out a few of the larger "coarse gravel" bits in different grays or browns.  A final wash over all set things up right.

A simple but very satisfying terrain project that I threw in just before Squaduary 2017 got started. In my next post, I'll show more progress son the the armored containers.

Cheers and Happy Gaming!


Thursday, March 23, 2017

On the Workbench [March] - Void Shield Generator and Munitorum Containers

Following Squaduary 2017, I chose a couple build projects as a short break from painting.  First up is the plastic Void Shield Generator.  I picked this up primarily as themed battlefield terrain to compliment the rest of the GW plastic terrain kits I own.  The Void Shield generator is certainly a useful piece to field as part of an army as well, but I don't expect to use it this way much except in themed games where an active void shield over a portion of a war-torn city fits.  The piece should also look grand simply as a burnt out, but not yet destroyed, reminder of the glorious mysteries of the Empire of Man.

Warhammer 40K Terrain - Void Shield Generator WIP
 Should be a fun and challenging piece to paint in detail. I plan to start with a table-top ready mix of base colors and dry brushing then with more time I'll move on to filling in cool details and adding any necessary weathering. Up next are Munitorum containers and associated ammo boxes and fuel drums.

I picked up a second set of containers for six in total along with the extra bits that come with. The first batch of drums and crates I made into based terrain pieces to act as battle field debris or objectives.  As I write this, it occurs to me that I never posted that small, satisfying, project. Look for something soon on that.

I'm not sure what I'll do with this second batch.  Perhaps I will add a couple more based pieces, or perhaps I'll make a themed stand-alone terrain piece with a container or two.  I haven't decided fully whether to leave the containers and "free pieces", or combine them with existing building pieces. As free pieces they could be arranging in infinite ways for various battles.  Built into fixed terrain pieces they would add character and theme in a more static arrangement.

This is all largely a theoretical exercise, as I'm unlikely to play many games with them regardless of how I paint them up for use!  I think I like the process of modelling and painting terrain pieces over leaving them as free models on their own.   I'll probably experiment a bit to see what works with the buildings I've already assembled.

Munitorum Armored Containers WIP

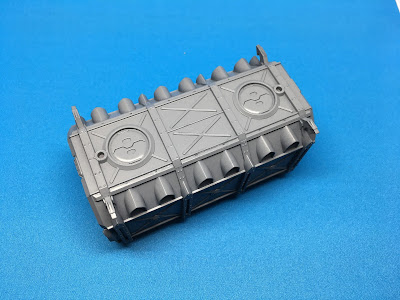
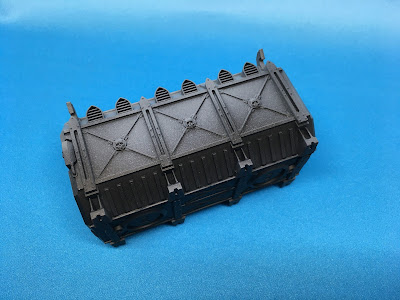
The new set primed (except for the storm bolters).  As I did with the first set, I plan to paint one container so it can be open showing the interior detail. Below is a shot with the first set of containers, also primed.  The doors on one are closed bit fun-tak putty so the exterior can be sprayed without effecting the painted interior.

Munitorum Armored Containers WIP

Expect follow on articles as I finally put paint to the containers.  I'm been delaying for some time now due to indecision on the best paint scheme.  I originally wanted to paint these with a Dark Angels theme.  But I think in the end I'll settle for something with contrast to the rest of my terrain project (heavily gray, dirty, and dusty) and generic enough to fit in with any battle field conflict. I want to avoid the base munitorum army green I have used for much of the rest of my bunker-based terrain. I'm guessing a mars Mechanicm red will be the final choice, but there is still time left to change my mind on this!

In addition to terrain, I primed the Deathwatch Corvus Blackstar while I had the airbrush filled with Vallejo Surface Primer Black (73.602). Great primer for the airbrush, I must say!

So that's what's on the work bench for March.  I hope to present an "on the Workbench" article each month, projects permitting.  Stay tuned for more.

Cheers and Happy Gaming!

Monday, March 20, 2017

Deathwatch Paint Recipe


As promised, here is the recipe I worked out over the process of Squaduary 2017.  I employed a mix of vendors' paints for this project.  I really like the Vallejo line, but have have a few Army Painter colors that have been staples.  I can't articulate why it is I have hung on certain colors other than to say it's what has worked for me in my style of amateur brushwork.

It should be noted that I did not capture the recipe for the chapter colors found on the right shoulder pads. I guess I thought that would be obvious when it came to repeating them on other similar brothers as the Deathwatch project progresses.

So without further adieu...

My Deathwatch Paint Recipe

Black Power Armor
  • Base - GW Abaddon Black
  • 1st Highlight - Vallejo Grey Blue (70.943)
  • 2nd Highlight - Vallejo Game Color Wolf Grey (72.047)

Steel Arm
  • Base - Vallejo Steel (71.065)
  • Wash - GW Nuln Oil
  • 1st Highlight - Vallejo Steel (71.065)
  • 2nd Highlight - Vallejo Silver (71.063)
  • Glaze - 1 part Vallejo Dark Blue (70.930) to 5 parts GW Lahmian Medium

Skulls and other Gold details
  • Base - Vallejo Old Gold (70.878)
  • Wash - GW Agrax Earthshade
  • 1st Highlight - Vallejo Old Gold (70.878)
  • 2nd Highlight - Vallejo Silver (71.063)

Weapons & Equipment (Iron parts)
  • Base - Army Painter Gun Metal
  • Wash - GW Nuln Oil
  • Highlight - Army Painter Shining Silver

Weapons (gun casings)
  • Base - Vallejo Game Color Bloody Red (72.010)
  • Wash - GW Nuln Oil
  • Highlight - Vallejo Game Color Hot Orange (72.009)

Weapons (ammo shells)
  • Base - Army Painter Weapons Bronze
  • Wash - GW Agrax Earthshade
  • Highlight - Vallejo Old Gold (70.878)
  • 2nd Highlight - Vallejo Silver (71.063)

Capes/Cloaks
  • Base (linings) - P3 Menoth White Base
  • Highlight (linings) - P3 Menoth White Highlight
  • Base (Outer) - Vallejo Game Color Bloody Red (72.010)
  • Wash (Outer) - GW Reikland Flesh Shade
  • Highlight (Outer) - Vallejo Game Color Hot Orange (72.009)

Ammo Pouches
  • Base - Master Series Paint Harvest Brown (09200)
  • Wash - GW Agrax Earthshade
  • Highlight - Master Series Paint Orange Brown (09201)
  • Buttons - Vallejo Old Gold (70.878)

Scrolls
  • Base (wax seals) – Army Painter Dragon Red
  • Base - P3 Menoth White Base
  • Wash – Agrax Earthshade
  • Highlight (wax seals)  – Vallejo model air Red (71.003)
  • Highlight – P3 Menoth White Highlight
  • Text – Vallejo Burnt Umber (71.040)

Bases
  • Base – Vallejo Dark Earth (71.029)
  • 1st Highlight – Vallejo Khaki Brown (71.024)
  • 2nd Highlight – Vallejo Light Brown (71.027)
  • Wash – GW Agrax Earthshade
  • Wash – spots of GW Athonian Camoshade


As Always, Cheers and Happy Gaming!