Thursday, May 31, 2018

WIP: Armiger Warglaives from House Taranis - Part 6

WIP House Taranis Armiger Warglaive

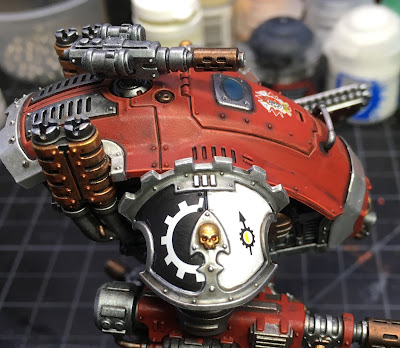
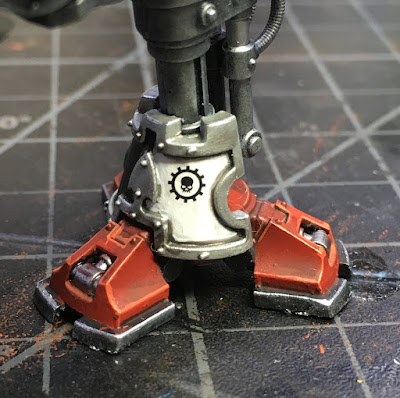
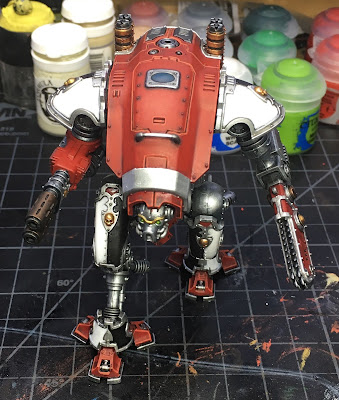
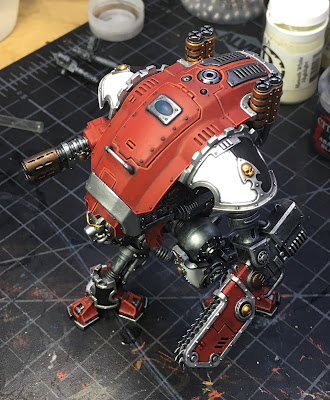
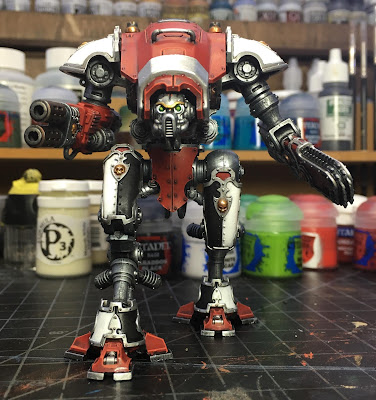
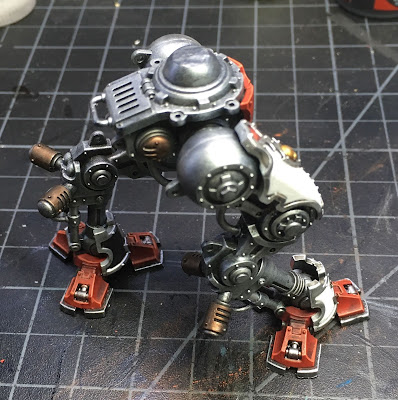
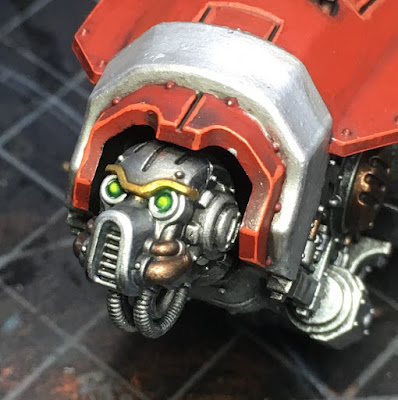
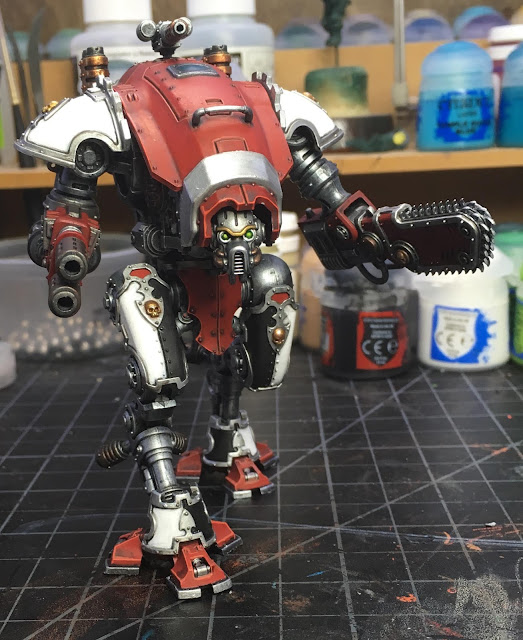
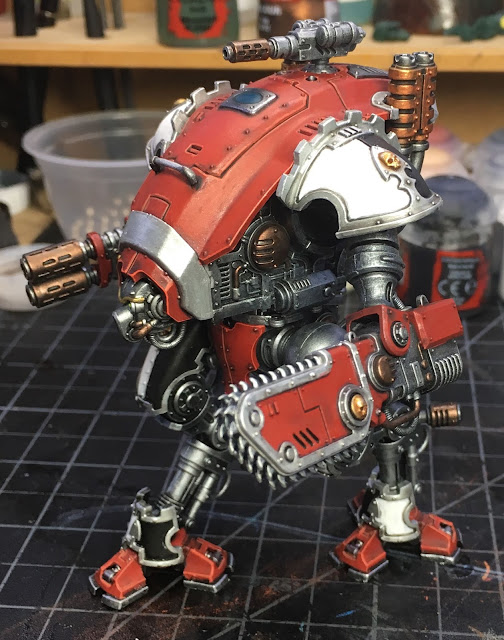
It walks!  Welcome to the latest installment of my series on building and painting Armiger Warglaives.  The new Imperial Knights codex is right around the corning and I'm excited to get this guy done.  I got highlights of GW Wild Rider Red on the the weapon arms and cleaned things up a bit there.  Then I took a break to work on the bases a bit.

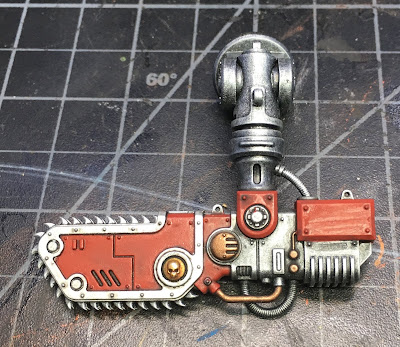
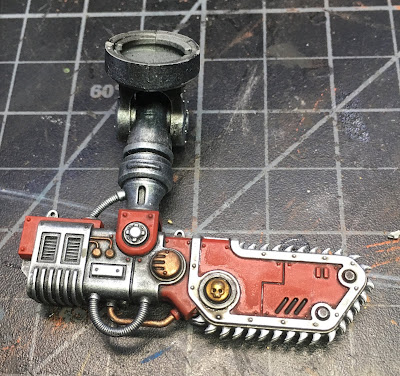
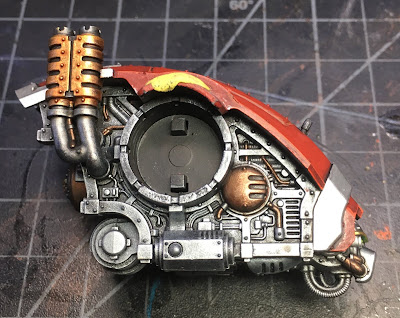
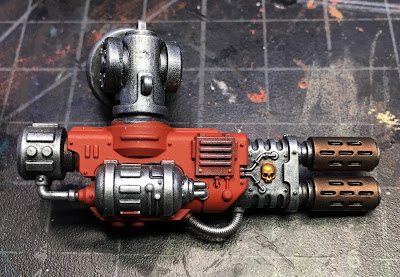
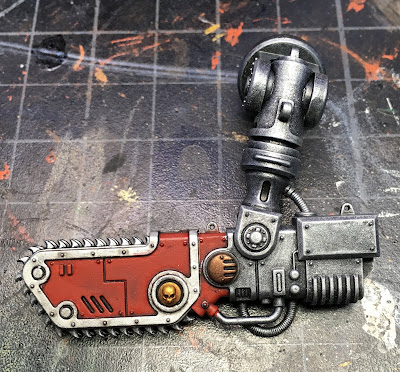
The weapon arms are now matching the body in detail and highlights, I think. Thought they are almost completely washed out in the pics...

WIP House Taranis Armiger Warglaive right arm

WIP House Taranis Armiger Warglaive right arm

WIP House Taranis Armiger Warglaive left arm

WIP House Taranis Armiger Warglaive left arm

When I take paint to the model again, it will be to touch up all the rivet heads and highlight the brass and bronze bits. Feeling a bit of burn out, I took a break to look at the bases for the two Armigers. Drybrushing and washing is something it is easy to batch paint, so I set to both bases even though the second Armiger isn't even close to ready for it.


WIP House Taranis Armiger Warglaive custom base

WIP House Taranis Armiger Warglaive custom base

I started with a coat of Vallejo Dark Earth (71.029) sprayed through the airbrush.  When that dried, I highlighted it with Vallejo Khaki Brown (71.024) using a heavy dry brush focused on the edges mostly, then the high points of the textures on the earth.

WIP House Taranis Armiger Warglaive custom base

Next I added spot shades of GW Athonian Camoshade to the bits of black lava I spread around the base to give the impression of moss and other greenery clinging to the parched land. Over this, and while it was still wet, I added spots of GW Biel-tan Green to represent denser patches of vegetation. Then I dabbed some GW Carroburg Crimson around the base of the chaos terminator body and some Secret Weapon Miniatures Fallout Wash around the broken hose.

Here's where I left things for the night, washes still drying.

WIP House Taranis Armiger Warglaive custom base

WIP House Taranis Armiger Warglaive custom base

I am happy with the results so far.  I may experiment with a few tufts of grass...or I may leave it be and just carry on with some more color...or maybe both!  You'll have to check back to find out. I love building and painting these custom bases and it can be hard to know when to call it quits.

One more post to finish off the first Armiger now.  Then I will either complete the second, or perhaps take a break to put some Deathwatch back on the painting table. It's going to be hard to stop painting knights with the codex due out so soon...

Cheers and Happy Gaming!

Wednesday, May 30, 2018

WIP: Armiger Warglaives from House Taranis - Part 5

WIP House Taranis Armiger Warglaive Decals

For part five of the Armiger Warglaive, it was time to get the initial decals on.  I'm holding off on unit and honor markings until I see the codex and its accompanying art for House Taranis. I don't want to have to redo anything.

The decals were applied using Micro Set from Microscale Industries, Inc.  I'm still using the same bottle I bought back in the late 90's.  Lasts forever (unless you are laying down decals like mad, I guess ) and still does the job well.  I do not generally lay down a gloss coat before applying decals as others do.  I have never had any adhesion issues with Micros set and a normal coat of paint.

Once the decal is in place, I carefully press down with a paper towel to draw up any extra Micro Set and make sure the decal is well seated on the model.  One wants to be careful not to move the decal doing this, or inadvertently pick it up on the towel.  Next I apply a coat of Micro Sol from the same company over the top of the decal.  This helps dissolve the remaining film of the decal and really makes it look painted on.  The Micro Sol also softens the decal so it will lay down tighter over rough surfaces where necessary, not an issue here due to the smooth armor plates, and relatively smooth paint layers.

Here are a few close ups of the work.

WIP House Taranis Armiger Warglaive House Seal
House Taranis crest

WIP House Taranis Armiger Warglaive Right Shoulder Livery
House livery, including cog symbolizing Mechanicum allegiance

WIP House Taranis Armiger Warglaive Left Shoulder Livery
Warning glyph on chainblade

WIP House Taranis Armiger Warglaive Left Leg Honor Badge
Honor marking
I'm quite pleased with how the decals came out.  Once the Micro Sol had dried, I painted on some Army Painter Anti-shine Matte Varnish to seal the decals and prevent them from rubbing off while I finish the painting.  I use the Model Masters Lusterless Flat spray for all my sealing generally, but I like the Anti-shine for small jobs like this.  I didn't see a need to spray the whole model just to seal the decals.

Next up, I will finish the highlighting and any weathering for the model.  Then I have to paint the base so I can finally attach the model and seal the whole thing. I hope to accomplish that in one more session, but that may be too optimistic.

There is some pretty exciting stuff spilling across the Internet regarding the Imperial Knight codex. I'm really looking forward to it.  The second Armiger is standing by and I have four unbuilt knights, including one from Forgeworld to build out House Taranis once I see the new rules. I'm not going to be able to pass on at least one new Dominus class knight as well! 

If you too are looking forward to the new Knight codex, let me know in the comments.

Cheers and Happy Gaming!

Thursday, May 24, 2018

WIP: Armiger Warglaives from House Taranis - Part 4


I was able to make more progress on the first of my two Armiger Warglaives this week. This is a picture heavy post as I tried to capture more angles of all the work.  For a small guy, there is still a lot of painting to be done here.

I attacked the armor highlights first.  GW Wild Rider Red was added as an edge highlight to all the red panels, while Vallejo Silver was added as an edge highlight to the metal trim and other bits of the armor like handles and rivet heads. I didn't hit up all the rivet heads at this point, but eventually I'll get to all of 'em. Here's where things stood after the first pass of highlighting...

WIP House Taranis Armiger Warglaive Highlights

WIP House Taranis Armiger Warglaive Highlights

WIP House Taranis Armiger Warglaive Highlights

WIP House Taranis Armiger Warglaive Highlights

Next I tackled the rest of the base colors on the arm weapons. Prior to this, I was mostly focused on the body and legs.

WIP House Taranis Armiger Warglaive Gun Arm

WIP House Taranis Armiger Warglaive Gun Arm

Lots of GW Tin Bitz added for details. More GW Mephiston Red was added to further break up all the silver metal and in other cases some of the red was replaced with Vallejo Oily Steel to improve the realism of the weapons. I didn't get to the highlights for the weapon arms yet, though I did put some time into the chainsword teeth.

WIP House Taranis Armiger Warglaive Sword Arm

WIP House Taranis Armiger Warglaive Sword Arm

Next I added details to the body where all the cool wire and hose details are.

WIP House Taranis Armiger Warglaive Body details

WIP House Taranis Armiger Warglaive Body details

Nothing extreme, just some GW Tin Bitz added to a few key lines, including a couple on the face. Then some GW Tin Bitz found its way onth the legs as well, again, to break up all the silver metal and add some interest.  I liked how the stock GW paint jobs did this. Still no metals highlights at this point.

WIP House Taranis Armiger Warglaive Legs

 Here are some closeups of the head with the tin bitz added.  Each time I put these close ups on the blog, I see more cleanup that I missed! :)

WIP House Taranis Armiger Warglaive Head and Face

WIP House Taranis Armiger Warglaive Head and Face

Here are some parting shots of the assembled model. Some additional pin washes with GW Nuln Oil have been added to the armor plates, though I'm not sure it's too noticeable here vs. the first couple shots above at the start of the article. All of thenew paintwork for these sessions has been shaded as well with GW Nuln Oil to blend it all in.

WIP House Taranis Armiger Warglaive

WIP House Taranis Armiger Warglaive

WIP House Taranis Armiger Warglaive

Everything is coming together great! It's time to put on the transfers and see to the final highlights and cleanup. Then I have to paint the base, of course, and get everything assembled and pinned down to the base. Hopefully that work will all fit in a final WIP post next week some time.  I probably won't get in two posts next week, or much extra painting time either, due to the US Memorial Day holiday.

Best of luck for your projects this week!

Cheers and Happy Gaming!

Monday, May 21, 2018

WIP: Armiger Warglaives from House Taranis - Part 3


More paint on the first of my two Armiger Warglaives for House Taranis.  I started by cleaning up the panels where I got trim paint on the other colors.  Then I laid down some GW Nuln Oil for shading.  In hindsight, I think I should have gone ahead with a gloss coat varnish prior to this step...or perhaps used more care to do a pin wash instead of an all over shading.  I wanted a darker dirtier feel, which I got in spades, but there is a lot more cleanup and panel rework than would have been necessary otherwise.

WIP House Taranis Armiger Warglaive

A dry fit assembly of the parts so far.  The shoulders are not glued on yet, since the arms don't have enough clearance to come off once the shoulders are glued down. Making progress! I took a break from the armor to paint the head up enough to mount.  It's simple, but effective.  I'll add some highlights to improve it as a focal point on the model. The title picture shows some improvements I made after the shot above was taken.

WIP House Taranis Armiger Warglaive

Not much work on the main arm weapon...just brightened the red some.  This pic instead shows the shoulder armor in more detail. I'm looking forward to getting some decals on, but need to wait a bit longer.

WIP House Taranis Armiger Warglaive

I got some trim painted on the chain blade and brightened the red a bit before shading it all with more GW Nuln Oil. The other shoulder is in full view here as well.  I'm pleased with how the armor is coming out, even though I will be modifying my technique with the second Warglaive.  This is all practice for the larger House Taranis knights to come. It is a simple scheme, but the white needs to stand out and not be too muddy.

Next I began picking out gold and bronze details; this was a good use for my last pot of GW Tin Bitz that I've been hanging on to.  I also painted in more metal detail on the feet. I shaded the gold and bronze carefully with GW Agrax Earthshade, making sure didn't run amok.

WIP House Taranis Armiger Warglaive

Here are some close ups of where things stand at this point.

WIP House Taranis Armiger Warglaive

WIP House Taranis Armiger Warglaive

WIP House Taranis Armiger Warglaive

WIP House Taranis Armiger Warglaive

WIP House Taranis Armiger Warglaive

WIP House Taranis Armiger Warglaive

WIP House Taranis Armiger Warglaive

Many more details to go, then all the highlighting.  I'm probably going to hold off on final assembly until I see what gets released for a new Warglaive kit.  Internet rumors indicate some new weapon options and new rules, so I want to be sure I don't make any final decisions at this point that I'll come to regret later.  I don't plan to have a bunch of these models so I'm not looking to build more to get new weapons. It may be that I cut the arms for magnets if we get cool additional weapon options, much like a standard Knight. This would be pretty easy with the arms made the way they are.

Here's a parting shot of the the Warglaive fully assembled.

WIP House Taranis Armiger Warglaive

At least one more session of painting, maybe two to finish the remaining details and highlights.  Then its decals and any final shading/weathering.

I'm looking forward to the new Imperial Knight codex, and the rumors that there may be new weapons for the Warglaives as well.  Time will tell...

Cheers and Happy Gaming!

Thursday, May 17, 2018

WIP: Deathwatch Primaris Aggressors


To complete the two new Deathwatch Primaris Intercessor kill teams, I built three aggressors.  Like the Inceptors, they had originally been on the shelf waiting to join the Dark Angels. But then they got the call to fall out and join the ranks of the Deathwatch instead.

First up, I built one stock with the auto boltstorm gauntlets.  He'll join with the stalker bolt rifle intercessors and give them (and more importantly their Heavy Plasma Incinerator brothers) the ability to move and shoot heavy weapons without the -1 to-hit penalty. never mind increasing the squad's volume of over watch fire and smashing anyone's face who makes it into assault.   He's one tough hombre to have in a fire support squad.

Deathwatch Primaris Aggressor WIP with boltstorm gauntlets

Very cool model.  Next up, I built the remaining two Aggressors with the flamestorm gauntlets.  These guys will join the assault oriented kill team and get up in the grill of the enemy. I like how these guys go together. The hoses and cabling line up very well.  This of course cuts into their pose options.  Fortunately, I'm not planning to run more than three so the poses will stay unique.  I expect it wouldn't be too much of a hassle to cut the hoses and re-position the arms, using green stuff perhaps to replace the hoses and keep the natural fall of the lines.

Deathwatch Primaris Aggressors WIP with flamestorm gauntlets front

Deathwatch Primaris Aggressors WIP with flamestorm gauntlets back

Here's the second one. Not much to see here, just a stock build with the Deathwatch Terminator pad replacing the left shoulder pad that comes with the kit. Fortunately, there is enough clearance with the backpack to accommodate the flared Deathwatch shoulder pad.

Deathwatch Primaris Aggressors WIP with flamestorm gauntlets front

Deathwatch Primaris Aggressors WIP with flamestorm gauntlets back

Once built, it was time for some wood glue and a dunk in the gravel tub.  Here is a parting shot of the trio after the basing work was complete.

Deathwatch Primaris Aggressors WIP basing complete


These guys will now sit with Hellblasters and Inceptors waiting for their turn with the primer. This will be an easy job with the airbrush.  Then they wait in the painting queue. It was great fun to take a painting break and do some modelling again. I'm ready to get back to the Armiger Warglaives now.

Cheers and Happy Gaming!