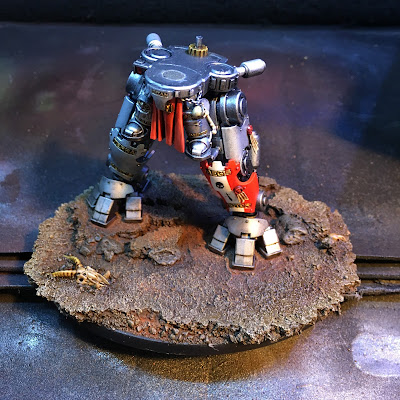
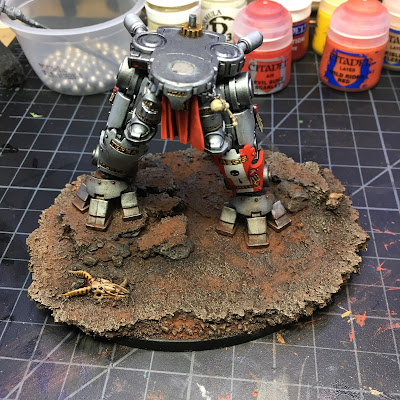
Photos are having less value in week three as much of the easy to spot painting work has been done and covered already. During week three, the legs were pinned and glued to the base, the sword was glued into its final place, and magnets were installed in the waist to enable the model to separate at some point for storage. Not a lot of painting we done otherwise, other that to hit up a spot or two where I discovered a mistake, or where my other work caused some issue that needed repair.
Here is a shot of the bottom of the base illustrating where I let the four pins (two for each foot) come through the base. I use superglue to both stick the fit and pins to the base, and to glue the pins from behind to make it even less likely they will loosen and pull back through.
Below is a shot of the legs in spray booth. After pinning the legs to the base, I decided to apply some Secret Weapon Miniatures pigments to the base and feet assemblies to tie the model in with its base. The powders applied, I laid down a dull coat lacquer to set everything.
Some reddish dusty appearance is visible in the picture. I laid down a second coat with pigment fixer to improve the effect now that the legs have an overall lacquer laid down for protection. With the second coat, now I'm seeing some dust and dirt built up...
Also visible in the picture is the magnet set in the front circle at the Grand Master's waist. I set out to replace the round pin in the upper torso with a magnet that could then sit down into the original hole in the leg assembly. but this just didn't pan out and the magnet kept coming lose. In fact, the magnet is not lodged permanently in the leg assembly, and that's what we're looking at above. So I drilled a hole in the upper assembly and sank a magnet there and not the whole thing clips together nicely.
It is fortunate that the model is designed with the gear assembly which will prevent the upper and lower parts from sliding apart. If it gets too fussy, i can add another magnet to the rear which would help keep the torso and legs aligned. For now, things seem to work just fine so I'm leaving it be.
Week four will bring this to done. The highlights are being finished or tweaked...some remaining details brought in to the scrolls, seals, etc.. I need to decide whether or not to carry the white stripe of the heraldry to the left shoulder which is currently red. I originally planned to put a black skull on a white strip down the center. But I'm liking the plain red just fine too, and I'm hesitant to risk wrecking things when I try to add the stripe with the shoulder/arm pistons hanging right over the area to be painted. Might just drop in a skull transfer on the red and call it.
Still very happy with the model otherwise. Stay tuned for the week four post where I discuss how the model was brought to completion. I may follow that with some final photo shoot, or paint recipe, or both, time permitting.
Best wishes to the other participants working to complete their projects and kudos to those who have already posted complete work.
Cheers and Happy Gaming!


Awesome work. Loving the work on the basing, it's an area where I feel my armies lack. Any tips on upping my basing game?
ReplyDeleteThank you! Ah, basing...I really enjoy basing. In my opinion, basing should cast the model in context with a setting but not overwhelm the model itself. Go easy and keep the tones of the base muted and as natural to its context as possible. But then have fun! I keep two tubs of ground cover - one a mix of fine and medium coarse gravel from model railroad ballast and the other a mix of larger rocks also from model railroad scenics. For fine work, I use Vallejo Black Lava mostly which, like some of the GW technical paints, lays down a coarse sandy texture great for blending in bits and covering other textures (like the obvious look of cork!). I try to think about how the ground looks - how dirt, dust, and sand fills in areas around larger bits. An I vary my colors, especially washes, to prevent a uniform look to the terrain. I mix in brows, greens, and even reds in spots....making patchy bits of green among larger pools of brows to emulate the look for lichens, molds and other greenery taking root. It's very much a open study for me each time, with no pat process. I will say that one can get great results without buying resin bases - but the resin bases work great too. I'll put up a basing tutorial with my Grey Knight work since I'm putting that whole force on these home-made cork bases of my own design.
DeleteGreat efforts so far, look forward to seeing the finished article
ReplyDeleteThank you!
DeleteGorgeous work! Can't wait to see it all together!
ReplyDeleteThanks very much! I'm putting the final details to it this evening so I should have a final look up soon.
Delete