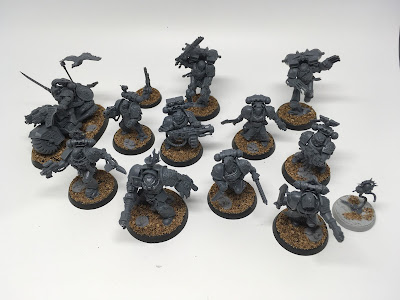
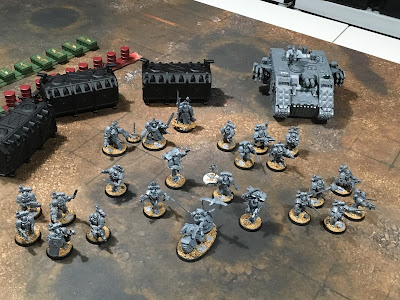
Above the various assembled models have been divided into 5-man veteran squads with characters and individuals towards the center. Using the Deathwatch upgrade bits among other things I was able to make use of a partially assembled land raider I have received as part of a bits lot from the Spiky Bitz/The Long War Kickstarter. I like the Redeemer variant, but I already have an Inquisitorial Land Raider Redeemer which can be seconded to the Deathwatch at any time, so I went with the cavernous and very shooty Crusader variant to aid in the delivery of the Emperor's wrath to the very heart of the Xenos.
 |
| Kill Team Cassius Assembled |
I will close this post with some WIP shots of the drop pod which is currently on my painting table. I left the pod in sub assemblies - the base with doors, the center console and harnesses, the five fins, and the engine/weapon mount. They friction fit very well after being based black and the whole pod can be assembled or disassembled at will currently.
This is what it looked like last night when I sat down to make progress. The bare metal has been done, largely through dry brushing with increasingly light Vallejo silver colors (gun metal, oily steel, aluminum). I am using brass for the explosive door bolts and a few other details. The engine mount is largely painted, though doesn't show well here. The Stormbolter's gun cowling is based red. Last night I came to the mad conclusion that I needed the ubiquitous hazard stripes on the doors...
I chose a sparse pattern and used a pencil to draw the stripes in freehand. I made use of the various bolt holes to help mark out the symetry of the stripes so they look more consistent across each separate door. This probably should have been done with the air brush and masking, but as I said this was a MAD inspiration, so of course I brushed it all in. Above is the result after close to four hours of my noob brush work.
I started with harvest brown (I think that;s right) from the master series paint line and painted over the black along all the edges where the stripes would go. I then drew in the stripes and use Vallejo medium yellow to fill in the yellow portions. I say fill in...really I layered yellow over the brown in seemingly endless coats...maybe fourteen or fifteen...seriously...many coats...until I got the yellow to a point where I was satisfied. I favor a darker, dirty style, for my 40K work so I didn't bring the yellow up to bright Imperial Fists standards. :) This done, and my eyes bleeding, I filled in the black which went predictably quicker.
I tidied up the inside of the door edges between stripes and flood panels using a Vallejo black metal which comes out like a very dark gun metal. I then painted Vallejo brass into each and every bolt hole in the hazard stripes...there are many. This done, the stripes were washed using Agrax Earthshade and the black-metal inside edges were washed with Nuln Oil. Lastly, I poked a bead of Nuln Oil into each and every bolt hole along the stripes so the brass holes appear just a bit sooty from being blown open. :)
 |
| The drop pod reassembled after the Long Night of Hazards |
The guts complete, I'll glue the thing together for a final assembly and then close up the doors to get started on the outside...
Thats the Deathwatch so far.
Happy Gaming!


No comments:
Post a Comment