Friday, October 27, 2017

DreadTober 2017: Week 4 - TO DONE.

DreadTober 2017

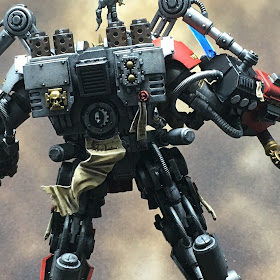
Grand Master in DreadKnight Armor close-up


Well, that went fast!  We're in the final days to finish up the DreadTober projects.  After a last session, I think I'm willing to call this one done.  I don't promise I won't fuss over a small detail here or there (I still haven't addressed the badly straight crackling electricity on the blade!), but overall this one is in the books.

In the last session I addressed some details and clean-up on the Grand Master's terminator armor. I added an odd highlight here and there where I'd either neglected something or hadn't brightened up a line enough. This included some fine edge highlights around the feet and ankles of the Dreadknight armor. Books and scrolls got some highlight love as well, something that is clear in the lead photo above.

Here's a final look at the fully assembled and painted Grand Master in Nemesis Dreadknight armor.

Grand Master in DreadKnight Armor final front

Grand Master in DreadKnight Armor final right side

Grand Master in DreadKnight Armor final back

Grand Master in DreadKnight Armor final left side

And a closer look at the Grand Master himself.

Grand Master in DreadKnight Armor the Grand Master

And a closer look at the rear of the model which has hardly been seen to this point.  The Mechanicum cog peeks out.  I would like to do something more with the honor roll handing from the cog, but for now it is simply highlighted and left to the imagination.  I took on the challenge with the same scroll bit on my Ordo Malleus Inquisitor, but here I was at odds with where I wanted it to go.

Grand Master in DreadKnight Armor rear close-up

A final look at the heraldry on the left knee/shin armor. While simple, I was very pleased with how this part came out.

Grand Master in DreadKnight Armor left knee close-up

The tilting shield stands out nicely on the shoulder without capturing the eye too much. 

Grand Master in DreadKnight Armor tilting shield close-up

And finally, the power sword.  For my very first attempt, I am very happy with this.  It didn't end up meeting the expectations I had in mind, but it serves well and gives the model more interest than my typical "steel blade with blue wash" approach would have. This is something I'll continue to work on since most of the Grey Knights will have some power weapon or another. I'm sure I can get better at the blending.  Oh, and I made my final decision to go with a simple white skull on the right shoulder instead of a white stripe with a black skull, like on the left knee/shin.

Grand Master in DreadKnight Armor sword close-up

So there he is.  A step ahead of my first entry last year (a Deathwatch dreadnought) and done on time as well. Given that the Grand Master is a Grey Knight character, I also get to call this an item done on my TO-DO list. So here's the stamp of approval (thanks again to 40kaddict!)


Cheers and Happy Gaming!

Wednesday, October 25, 2017

DreadTober 2017: Week 3


DreadTober 2017

A bit late for week three progress (being half way through week four) but here goes.  Just a brief post today.  I'll catch up in the week four post which should follow close on the heels of this one.

Photos are having less value in week three as much of the easy to spot painting work has been done and covered already.  During week three, the legs were pinned and glued to the base, the sword was glued into its final place, and magnets were installed in the waist to enable the model to separate at some point for storage. Not a lot of painting we done otherwise, other that to hit up a spot or two where I discovered a mistake, or where my other work caused some issue that needed repair.

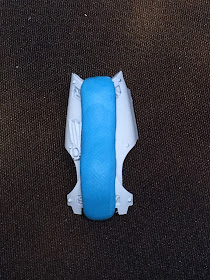
Here is a shot of the bottom of the base illustrating where I let the four pins (two for each foot) come through the base.  I use superglue to both stick the fit and pins to the base, and to glue the pins from behind to make it even less likely they will loosen and pull back through.

Grand Master in Dreadknight Armor WIP pinned base


Below is a shot of the legs in spray booth.  After pinning the legs to the base, I decided to apply some Secret Weapon Miniatures pigments to the base and feet assemblies to tie the model in with its base.  The powders applied, I laid down a dull coat lacquer to set everything.

Grey Knight Grand Master in DreadKnight 1st pass w/weathering powders

Some reddish dusty appearance is visible in the picture. I laid down a second coat with pigment fixer to improve the effect now that the legs have an overall lacquer laid down for protection. With the second coat, now I'm seeing some dust and dirt built up...

Grand Master in Dreadknight Armor WIP second pass w/weathering powders

Also visible in the picture is the magnet set in the front circle at the Grand Master's waist.  I set out to replace the round pin in the upper torso with a magnet that could then sit down into the original hole in the leg assembly.  but this just didn't pan out and the magnet kept coming lose.  In fact, the magnet is not lodged permanently in the leg assembly, and that's what we're looking at above.  So I drilled a hole in the upper assembly and sank a magnet there and not the whole thing clips together nicely.

It is fortunate that the model is designed with the gear assembly which will prevent the upper and lower parts from sliding apart.  If it gets too fussy, i can add another magnet to the rear which would help keep the torso and legs aligned.  For now, things seem to work just fine so I'm leaving it be.

Week four will bring this to done.  The highlights are being finished or tweaked...some remaining details brought in to the scrolls, seals, etc..  I need to decide whether or not to carry the white stripe of the heraldry to the left shoulder which is currently red. I originally planned to put a black skull on a white strip down the center.  But I'm liking the plain red just fine too, and I'm hesitant to risk wrecking things when I try to add the stripe with the shoulder/arm pistons hanging right over the area to be painted.  Might just drop in a skull transfer on the red and call it.

Still very happy with the model otherwise.  Stay tuned for the week four post where I discuss how the model was brought to completion.  I may follow that with some final photo shoot, or paint recipe, or both, time permitting.

Best wishes to the other participants working to complete their projects and kudos to those who have already posted complete work.

Cheers and Happy Gaming!

Monday, October 16, 2017

DreadTober 2017: Week 2

DreadTober 2017

Greetings and welcome to my end of week two DreadTober 2017 post! By the end of the week, all surfaces had some paint on them and the project overall is coming together nicely.  I should be able to coast through the final weeks addressing highlights, correcting what ever isn't really working, finalizing the base and fixing the model in its final position.  I'm also considering magnetizing the top half to the legs to make it easier to pack up and transport in the future. 

Grand Master in Nemesis Dreadknight week 2

Lots to go over for this week, so I hope you have a cup of coffee or tea to hand. The week started with some attention paid to the arm mounted weapons.  GW Evil Sunz Scarlet was layered over a base coat of the old GW Mechrite Red foundation paint. The lettering was hit up with Vallejo Brass and a coat of GW Agrax Earthshade was washed over all with a focus on the recesses.  Special care was take with a damp brush to draw off any puddles that tried to form on the broad flat surfaces.
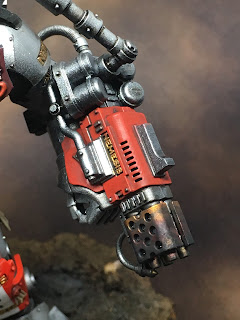
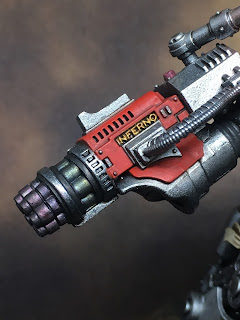
WIP Grand Master in Nemesis Dreadknight Left ArmWIP Grand Master in Nemesis Dreadknight Right Arm

Heat effects and general weathering were applied to the business end of the weapons to carry the impression of heavily use, midst battle. The flammer got some purple and yellow washes followed by a heave dry brush of GW Abaddon Black. The psi-lencer got many progressive washes of purple, blue, green, and yellow as I moved up the barrels from the front to the back. A heavy Nuln Oil wash was laid down last to aid in blending the washes and normalizing the shadows. I'm no hot-metal scientist, but I like the effect.

Next up was the Grand Master's head. A basic Vallejo flesh color was used as a base followed by several rounds of washing and highlighting until I had things where I wanted them.  GW Reikland Fleshshade was used as a general wash with Carroburg Crimson and Druchii Violet used around the eyes, cheeks and mouth.  Reaper Masters Series Harvest Brown was used on the hood with a GW Agrax Earthshade wash. The metal bits were painted using GW steel with a Nuln Oil wash. More Vallejo Brass with a GW Agrax Earthshade wash was used for the gold bits. A Vallejo light blue was used on the optical lense with a GW Nuln Oil Gloss wash.  I went with a grey eye again, with washes to further define the space and blend things in.  I like how this turned out on My Deathwatch Watch Master and it doesn't disappoint here.

WIP Grand Master in Nemesis Dreadknight Head Front

WIP Grand Master in Nemesis Dreadknight Head Right Profile

WIP Grand Master in Nemesis Dreadknight Head Left Profile

Then, the head was clipped from the cork and dropped into the knight suit to see how things would look when assembled. I left enough wire to pin the head in place when all is said and done. I thought of leaving it to turn, but I don't think I'll do that in the end.

WIP Grand Master in Nemesis Dreadknight Grand Master Close-up

The final session of the week saw me take on the sword for some power weapon effects.  After considering my options (and reviewing some great videos on youtube.com), I decided to give Duncan's approach a whirl from the GW Warhammer TV channel. I secured the necessary paints, and as week 2 drew to a close, I cracked on with the paint job.

WIP Grand Master in Nemesis Dreadknight Sword w/hilt complete

Earlier in the week, I had completed the hilt to a decent standard.  I can leave things here, or come back in with additional highlights and some detail later in the month if time permits. Below are the final pics of the blade work.

WIP Grand Master in Nemesis Dreadknight Blade Complete Right Profile

WIP Grand Master in Nemesis Dreadknight Blade Complete Left Profile

I won't go into the paint recipe except to state that I was was forced to use GW Temple Guard Blue in place of GW Baharroth Blue as I wasn't able to secure a pot in time for the session. Overall, I guess I got what I was after.  In critique, I don't feel I carried the effect well.  In hindsight, it might not have been the best idea to try this type of effect on such a large blade for the very first time.  I would have been better served had I practiced a couple times on some of the MANY spare Grey Knight force weapons in my bitz box. Clicking to get the zoomed image should make it clear where I did not carry off the fades well; and the edge highlighting is blobby in spots as well along the blade edge.

Still, an honest critique aside, the blade still looks cool when viewed at tabletop distance and I don't feel I ruined it by far.  I will state for the record, however, that I did assemble a spare sword from the bits box in preparation for a replacement while waiting for one of the many coats of paint to dry.   I departed form Duncan's recipe at the end by applying a careful coat of GW Drakenhof Nightshade to help blend the various layers and highlights together.  This softened some of the harsh contrasts where colors met and were not blended as well as I might have liked. Looking at these final pics, I am considering coming back in with some scratches/nicks to the blade to perhaps address some of the highlight issues along the blade edge...but maybe I'm over thinking that.

I'll close with a couple more shots of the assembled model at the end of week two. It was great to see  everything basically painted! 

WIP Grand Master in Nemesis Dreadknight Left Profile

WIP Grand Master in Nemesis Dreadknight Right Profile

Moving into week three, I'll look at painting in the remaining details and completing the highlights. If successful, I'll have all of week four to mount the dreadknight to the base and complete any scenic work. This is where I'll take on the magnets too.  It should be a simple matter to do this and I'm not sure why it didn't occur to me earlier during the initial assembly.

I'm really enjoying following the progress of the rest of the DreadTober 2017 crew.  My best wishes to all for their week three.

Cheers and Happy Gaming!

Thursday, October 12, 2017

DreadTober 2017: Week 2 Progress

DreadTober 2017

Greetings and welcome to week 2 progress on the Grey Knight Grand Master in Nemesis Dreadknight.  For this week, I cracked on with the details on the knight.  I began with all the scrolls and purity seals, then addressed the laurel at the base of the halo behind the Grand Master's head. Next the servo skull and the daemon skulls on the base got attention. For the skulls on the base, I chose different washes to add some interest and prevent the three very different skulls from looking uniform. 

Here is where I was at after the first session of week two.

Grey Knight Grand Master in Nemesis Dreadknight front

Grey Knight Grand Master in Nemesis Dreadknight Back

And some close-ups of the details...

Grey Knight Grand Master in Nemesis Dreadknight Halo

Grey Knight Grand Master in Nemesis Dreadknight chest restraint

Grey Knight Grand Master in Nemesis Dreadknight Scroll

Grey Knight Grand Master in Nemesis Dreadknight Base Skull

During the second session, I focused on the tilting shield and exhaust stacks while refining other details as well. The shield, while not very challenging with its raised detail, was a lot of fun to paint. Multiple point washes really helped bring out the details in such a small scene. GW Agrax Earthshade was used for everything but the knight's armor, where GW Nuln Oil Gloss was used instead.

Grey Knight Grand Master in Nemesis Dreadknight Tilting Shield

I'll likely put some more attention into the exhaust stacks before I'm done but there are complete to a good standard for now. A Vallejo Rust (again, I neglected to capture the exact color) was used as a base coat.  This was followed by two passes with a Agrax Earthshade wash and one pass with a Vallejo orange rust wash.  Vallejo gunmetal was lightly dry brushed on followed by another pass with Agrax Earthshade.  Once that was dry, Vallejo Steel was used as a final highlight. While waiting for various bits to dry, some Vallejo steel has been used to add fine highlights to the dreadknight armor here and there. A thorough pass of highlighting will roll up anything that got missed by this early tinkering to pass time.

Grey Knight Grand Master in Nemesis Dreadknight Exhausts

The loin cloth was highlighted and shaded a bit more to increase its character. A few other details got attention as well, such as highlighting of the servo skull and halo, completion of the cable attaching the scroll to the front of the right shoulder, and some highlighting of the skulls on the base. Also, all the ribbed armor joints got a coat of Vallejo Dark Rubber with a GW Nuln Oil shade.  Not seen in the pictures, I made progress on the sword hand by painting the grip and pommel. The hand is ready for my grand adventure with airbrushing power weapon effects for the first time!

After session two this week the knight has edges a bit closer to done...

Grey Knight Grand Master in Nemesis Dreadknight Front

Grey Knight Grand Master in Nemesis Dreadknight Back

If I can fit in one more session this week, then I'll start work on the head and hit up the arm weapons.  Red casing will be added along with black trim where necessary and some different metals to help them stand out from the metals in the rest of the armor. The heavy psilencer shows a bit of this from session two this week where Vallejo gunmetal was painted on the barrels and black trim added to define them a bit better. 

Almost halfway through month and this project is coming along much better than I had imagined from the outset. 

Cheers and Happy Gaming!

Friday, October 6, 2017

DreadTober 2017: Week 1 (more progress!)

DreadTober 2017

I managed to stick in an additional session this week so it turns out my week 1 post was just a bit premature.This session saw the shin armor done up and attached, progress on the harness and some gold details about the armor applied.  After having planned something more advanced for the Grand Master's personal heraldry, I backed off and took a more straight forward approach. I very much like the result.  I started by masking a straight line down the center of the left shin guard with mounting putty.  I started with masking tape, but something in the shape of the curves and overlapping nature of the armor kept me from getting as clean a line as I wished and I was certain to get some spray under the tape. Putty has its own issues, but was easier to get tight and insure good clean lines. a poke here and a prod there with a modelling tool convinced my I'd get a decent straight bar of white in the end, though the lump of putty doesn't look like much here.

Grey Knight Grand Master in Nemesis Dreadknight WIP masking the shin guard

I had laid down a thin coat of Testors Model Master Lusterless Flat Lacquer over the shin guard to protect the paint during future masking. That should now pay off.  With the putty in place, I turned to the air brush to apply some Vallejo Game Air red (again I forget the exact color). If all turns out, I should have a neat white stripe down the center of a red shin guard.  This was left to dry while I took to painting up the harness. I decided it would be painted in the same heraldry as the shin guard.

Grey Knight Grand Master in Nemesis Dreadknight WIP painting the harness

The restraint piece is not yet complete, but coming along nicely. I look forward to the challenge of doing something interesting with the book's cover and the open pages. I also haven't touched the bars of the restraint nor added any highlights yet. While this piece dried, I went back to the left shin guard and removed the putty.  There was some clean up of the lines left between the red and white, but in all I was very happy with how the masking turned out.  I neglected to get a picture of the unveiling though. Instead I cracked on with painting the gold details, attending to the purity seal and adding some shading and highlighting. at the last, I applied a couple decals to complete the heraldry.

Grey Knight Grand Master in Nemesis Dreadknight WIP painting the heraldry

Another coat of Lusterless Flat Lacquer sealed the new work and will insure that I don't inadvertently injure the decals as work progresses. There are still final highlights to be done but I ended the night satisfied with the work.  The protective putty was removed from the legs and shins and everything was glued together.  The restraint continues to be left off while I work on the Grand Master himself, however, who got a base coat on his loin cloth and gold details on his armor.

Through out this session, I tinkered away at the dreadknight suit. First, while spraying the red on the shin guard, I decided to go ahead and use the air brush to spray the right shoulder armor where I will duplicate the heraldry by some manner.  I think I'll just use the skull since there won't be room for the sword and the skull there. The air brush served, and only a small amount of retouching of the over spray was required for the surrounding metal parts.

The left shin guard was detailed with gold and some shading along with the right.  And I put gold on all the inlaid scripture and on a few other details.  Short of a concerted effort, this was more to pass the time while other bits dried on the restraint and shin guards since I had the gold already out on the wet palette and did not mean to waste a drop. GW Agrax Earthshade was applied over all the gold, heavily pooled into the gold lettering to be sure it popped once dry. Closing the night's session, I posed the pieces back on the base for a front and rear shot of the progress.

Grey Knight Grand Master in Nemesis Dreadknight WIP front

Grey Knight Grand Master in Nemesis Dreadknight WIP back

So that is now the true state of progress as I close out week one. The extra effort has paid off and I don't feel any concern about finishing this piece on time for the challenge now. My best wishes for my fellow challengers with their projects. And as always...

Cheers and Happy Gaming!


Thursday, October 5, 2017

DreadTober 2017: Week 1

DreadTober 2017

A week into DreadTober 2017, and it is time to show some progress.  The week started with finalizing the pose and gluing down the last bits where I was using mounting putty to hold things together. New mounting putty went over any remaining areas where I plan to glue parts following priming and painting.  The only exception was the head.  Since it will be pinned and sits well down in the armor collar where it can't reasonably get knocked about, I see no reason not to apply a simple drop of super glue to the pin when dropping the head in at the end. I'm even considering some fancy pinning to allow the head to be mounted firmly and still turn left and right for fun...we'll see. The head and sword are mounted on old bourbon bottle corks since I expect to handle them a bunch during painting.  By contrast, I expected to mount the other parts fairly quick, or at least to handle them very little before they are mounted and the final paint applied. So they are not put on cork handles. I may come to regret that later.

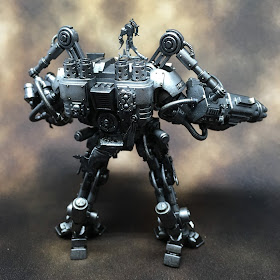
Grand Master in Nemesis Dreadknight WIP ready for priming

With the pose set, all the bling added, and the parts set for painting it was time to throw on a good coat of primer.  For this model, I am choosing to go with a coat of Vallejo Primer Black shot through the air brush.  This method is my new favorite for priming.  I do have a small spray booth with a fan vented to the outside, but even with this, the use of standard rattle-can primer smells up the beats lab, and then eventually the first floor of the house which does not please the family...Happy family; happy hobby!

Spraying outside is the go to, obviously, and I do this for all my large projects like terrain...but as we all know, this is very weather dependent.  In the US northeast, I can't count on many dry, temperate days for this.  It is mostly humid and when it isn't humid or raining it's either too hot or too cold. The air brush and a spray booth with outside venting comes to the rescue and allows me to prime anythign anytime.  The Vallejo primers cover well, pass through my Iwata Eclipse with no issues and stay stuck on in my experience.  They leave a good paintable finish and offers little to know smell when shot through the air brush.

Grand Master in Nemesis Dreadknight WIP black primer laid down

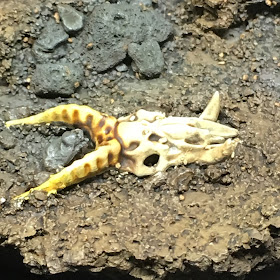
Before setting about painting the primed model, I put in a little work on the base. All the cork pieces were glued down with wood glue (I find this adheres and lasts well over standard white glue, but it is probably not really necessary).  Then some plastic daemon skulls were added from the new GW skulls boxed set.  These are Daemonhunters after all! Some random fine ballast was glued around here and there to fill in bits and make the cork ledges a come off a bit more realistic with crumbly sections, etc. Then I spread Vallejo Black Lava over all the flat cork surfaces to give everything a dirty, dusty look and conceal the very obvious cork surface patterns.  Lastly I glued on some random large and medium rocks .  These hopefully add some variety and a more natural rugged feel to the terrain. Here are some pics of the result.

Grand Master in Nemesis Dreadknight WIP Base glued up.

In the top left and middle right you might just make out the dreadknight's foot prints.  While the black lava was still wet, I pressed the legs down firmly, but carefully to get a bit of an impression.  This will help remind me where I want to pin the legs down later and also adds a bit of weight to the model when all is finally assembled.  It will be subtle but the feet, especially on the left leg, should appear to be sinking in and kicking up a bit of the hard-packed earth as the Grand Master strides forward. Perhaps a bit of this shows below with the legs temporarily in place for scale.

Grand Master in Nemesis Dreadknight WIP Base with dreadknight legs for scale.

With the base complete and put aside to dry, it was time to get some painting in. I started by laying down the metallic base colors on the dreadknight with the air brush.  A solid coat of Vallejo Air Gunmetal was sprayed all over, with particular attention the getting it in and around all of the leg framework.  Then a coat of Vallejo Oily Steel was applied top-down at a roughly 45 degree angle to add highlights.  Last, some Vallejo Steel was added primarily to armor panels and key highlights at the top of the model and a few spots I thought would catch more light.  I then put some white down on the left shin armor where the Grand Master's personal heraldry will go. I'm thinking that I'll brush paint the right shoulder armor with the same heraldry as well. Too fussy to try to air brush that now with the pistons and what not in the way...at least for my airbrush skills! :)

Grand Master in Nemesis Dreadknight WIP base metallics laid down.

With the base colors in place, it was time for the GW Nuln Oil Gloss wash. This was basted liberally over the whole model with a large brush focusing on areas with deep detail.  On the armor panels, I used a second brush, wet with water only, to pull off any wash pooling badly and even on a few other spots that looked shabby. Not a perfect effort, but I'll have much less tidying up to do once the wash is fully dry. Here's some shots in the light box of the results.  Coming along nicely, I think.

Grand Master in Nemesis Dreadknight WIP Based and Washed front

Grand Master in Nemesis Dreadknight WIP based and washed back

While the wash dried, I put some more work in on the base. Vallejo German Camo Black Brown (70822) was laid down with the air brush under and around the rough edges of the cork and in the valleys between the raised pieces. This will provide deeper shadows around these areas.  Next another lighter Vallejo brown (there are so many, I forget what I used) was air brushed all around the top edges of the cork, a bit among the highest flat surfaces and a bit on the largest open flat areas to the front of the base, and dusted over the skulls for effect. This base work is an organic process for me and not a precise, planned effort. Last for the browns, a Vallejo Green Brown was applied just to the edges of the cork pieces and skulls as a final pre-shade highlight. Lastly, Vallejo German Grey was applied to the large rocks and similar gravel to off set these from the cork and other gravel bits.

Then the whole base was given an all over coat of GW Agrax Earthshade, followed by spot washes of GW Athonian Camoshade (all the grey rocks and gravel areas) and Carroburg Crimson here and there for interest while everything was still wet.  I'll see how this comes out once dry.  I'll be doing some dry brushing for certain.  I'm also thinking of adding a clump of grass or two.  The daemon skulls will of course get picked out in a light color for contrast.  The rim of the underlying plastic base will get a fresh coat of GW Abaddon Black once this all dries to tidy it up. A simple but effective piece of ground I hope.

Grand Master in Nemesis Dreadknight WIP Custom Base with Washes
The base with washes applied, still wet.

Well that's what I have for now. I'm enjoying the progress shown by other challengers.  Some great pieces coming along for this years event. Stay tuned for week 2 progress and possibly a post on the WIP Deathwatch Captain with Jump pack that is still waiting to get finished.

Cheers and Happy Gaming!