So it is finally time to close out work on this squad of five Custodian Guard with swords. They've been hanging about the blog and my shelves for some time and it feels great to get them completed. In the not-to-distant future, I'll complete their dreadnought companion who also waits in the wings - then it will be time to build and add in the next squad of five halberd wielding Custodes.
This is a bit of a long post for me and quite picture heavy...
This is a bit of a long post for me and quite picture heavy...
DISCLAIMER: I'm embarrassed to note while putting this post together that I forgot the helmet eye lenses. They probably aren't the only detail to go missing in such lively models so I'll have to make a last pass at some point to address this. That said, they are still beyond table top quality and deserve their done status for this post.
Before moving on to gallery shots, a couple parting WIP shots illustrate the bases getting some hobby love. The bases were constructed using cork pieces broken by hand from a thin sheet. I choose the thicknessa according to how much height I want. Typically, I give characters more height than troopers. In the cas eof Custodian Guard, they are all great heroes in their own right, so tall bases all around!
The cork was glued down using Elmer's wood glue...a tougher sort of water soluble white glue (aka PVA glue). The wood glue is more viscous and so less runny and easier to work with and also a bit stickier than white glue in my opinion. I find it has proven more durable than white glue for basing.
After the cork was glued down, a thin layer of wood glue was spread over to tops of the cork (to hide the inherent cork texture), anywhere that black plastic form a base still showed, or really any where that I wanted to add some more texture. While the glue was still wet, I dunked the bases in a tub of basing mixture I keep around. The tub is filled with various sizes of railroad ballast, but mostly fine stuff that suits the 28mm scale. The excess is then shaken off. A few select larger rocks (also railroad scenic stuff) were then glued down separately to add more variety and some general interest.
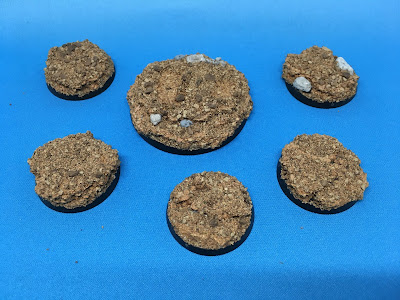
Here was the result prior to priming.
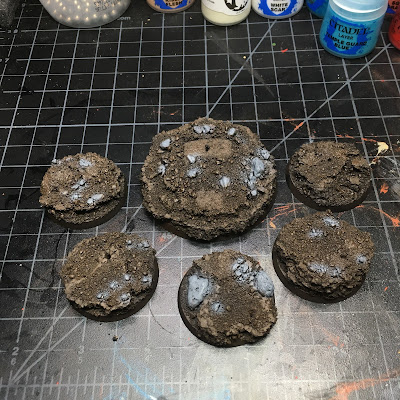
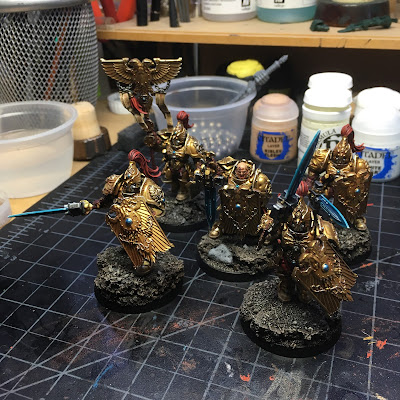
The large base in the center is for the dreadnought, with the squad bases all around. The larger rocks are clearly visible as lighter grey and a few skulls were added to the dreadnought base for fun. Below, is a shot of the newly painted Custodes in line with their now primed bases. Holes have been drilled all the way through the bases with as pin vise and some rock material was removed to make room for booted feet. I tidied up with a spot of Vallejo Black Lava here and there to maintain texture where I exposed the plain cork prying off the glued down rocks.
Normally I attach my models to their bases before gluing the gravel down so it appears around their feet naturally as if they have crunched down a bit into the terrain. As I step up my game and paint miniatures off the base on holders (Bourbon corks as seen in prior WIP posts), I don't have a consistent system for dealing with attaching models to a scenic base. The dread feet were pressed into the basing material while the glue was still wet to leave impressions where he will later be glued down. I think I should have done that with the Custodes too prior to mounting them on the wire.
Moving on...the bases got painted first with the air brush. I put down a dark brown around the raised edges of cork and anywhere else I wanted a deeper shadow. Then a neutral brown was put down over the flat surfaces. I do this by eye, just following an artistic impression I have in mind...nothing really formal or prescribed. The last step was to spray a small amount of neutral grey on the larger rocks to maintain some contrast so that not everything is the same brown. I wait to tidy the base edges because there will be a lot of dry brushing to follow and I'd just have to go back and touch things up again.
With the air brushing complete, a heavy wash of GW Nuln Oil was spread over all with particular attention to the recesses to enhance the shadows. While this was drying, some spot washes of GW Athonian Camoshade was daubed on here and there to provide a little "life" to the parched earth. Even in the blasted wastes, nature finds a foot hold! Once this was all dry, the models were attached using a small amount super glue - you don't want this running all over the painted surfaces as it tends to dry frosty (at least my brand does) and adds more painting headaches.
The pins in the feet are long enough to pierce through the cork and the plastic base which provides a firm attachment and even has the effect of pinning the cork to the plastic base. I will often turn the model over after pinning and drop some super glue on to the pin poking through the base which I then blast with a quick cure spray to quickly cure the glue. I fantasize that this may help prevent the pin from pulling free one day. It certainly doesn't hurt. I trim any wires that are too long at this point so the model rests flat and no one gets easily poked while handling the base.
Once the models were mounted to their bases, I dry brushed the bases heavily with Steel Legion Drab, then lightly with Ushabti Bone to create the highlights. A light grey was carefully dry brushed on the larger grey rocks as a highlight as well. Then a wash of GW Agrax Earthshade was put down over all and left to dry. A second pin wash of Nuln Oil was carefully added just to the darkest recesses and lowest edges to add some delineation between some areas. I even added a splash or two of GW Biel-Tan Green shade in small patches to enhance the notion of moss, fungus, or other slim vegetation clinging to the parched ground. The final touch was to run GW Abaddon Black around the edges to neaten things up and to set off the base from the table.
And that was that! After I run a quick pass to complete the missed eye lenses and anything else that pops up, the squad will get a good coat of Model Masters Lusterless Overcoat to seal and protect the hard work. I'm quite pleased with how the squad came out. They are so busy looking with all the light glare off the gold armor and silver details, but they do stand out on the table in a good way. I'll give these boys a hearty seal of DONE and move on to other projects.
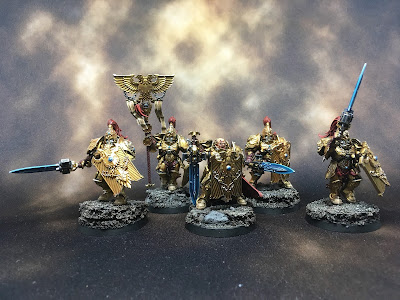
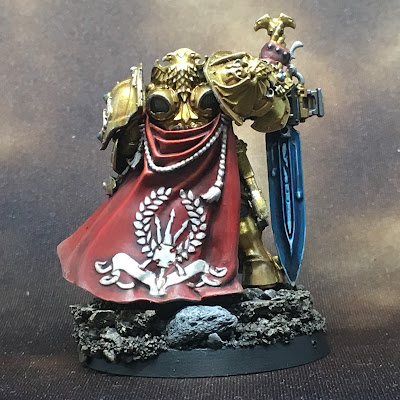
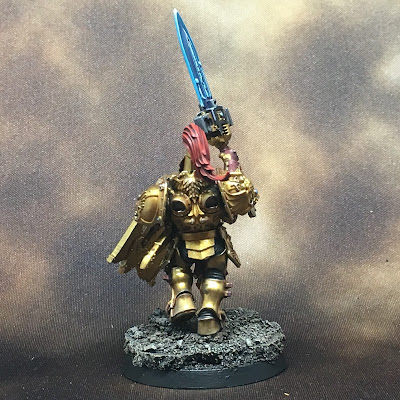
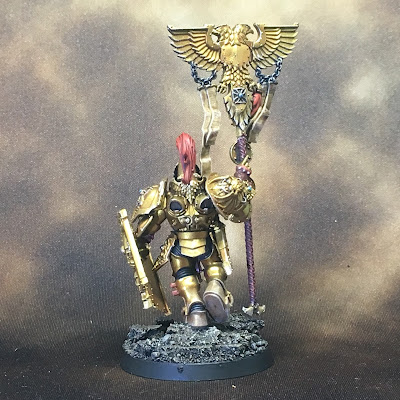
Here are some parting gallery shots of the squad in the light box...
As these close ups show, I like to lightly dry brush a model's feet in the process of dry brushing the base to carry the illusion that dirt and dust are kicked up and collected on the boots. I feel this roots the model in its environment and convinces the eye a bit to the authenticity of the scene a model is presented in. However, I always to this with a light touch to avoid overdoing the effect unless I want a particularly dirty or muddy scene. Dust and dirt also feature at the hem of the squad leader's cloak, done with the same dry brush pass, and feather upwards so the effect is most prominent at the hem and fades upwards.
Comments are always welcome.
Cheers and Happy Gaming!









No comments:
Post a Comment